
A dripping spout, a stiff handle or a tired finish can make a kitchen feel older than it is. The good news is that replacing a kitchen tap (called a faucet in the US) is a job most confident DIYers can handle. Both HomeServe and This Old House describe it as a manageable project when you have the right tools and a replacement that fits your sink.
Can you change a kitchen tap yourself?
Yes, in most homes you can. If you are replacing a deck-mounted tap with a similar one and your pipes are in good condition, the job involves unscrewing and reconnecting rather than rebuilding any sink plumbing. This Old House notes that if the shut-off valves do not stop the water, you will need to close a valve further along the line or the main supply.
Call a qualified plumber if you need to change pipe work, your isolation valves are seized, or you are fitting a wall-mounted tap.
How do you choose a compatible kitchen tap?
Before you buy, look at your sink and the pipes beneath it. Choosing a tap with the same mounting type and the same number of holes as your current one keeps the job simple.
| Check | What to look for | Why it matters |
|---|---|---|
| Number of holes | One (monobloc mixer) or two or three (pillar or separate hot and cold) | The new tap must match, or you will need a blanking plate or a new sink |
| Hole size | Check the tap’s installation guide; mixer taps often fit a standard hole of around 35 mm | A tap that is too big will not seat properly |
| Water pressure type | High-pressure (mains-fed) or low-pressure (tank-fed) rated | Some taps only work well on certain systems, so read the manufacturer’s guidance |
| Hose and connector type | Flexible tails with compression or push-fit ends | Mismatched connectors are the top cause of “extra trip to the shop” |
| WRAS approval (UK) | Look for the WRAS-approved mark on the box or product page | Shows the product has been tested against UK water regulations |
Water safety matters too. WRAS checks the testing of water fittings to ensure they comply with the Water Supply (Water Fittings) Regulations and the Scottish Byelaws, which exist to protect drinking water in homes and businesses. Buying a WRAS-approved tap is the easiest way to stay on the right side of those rules.
What tools and materials do you need?
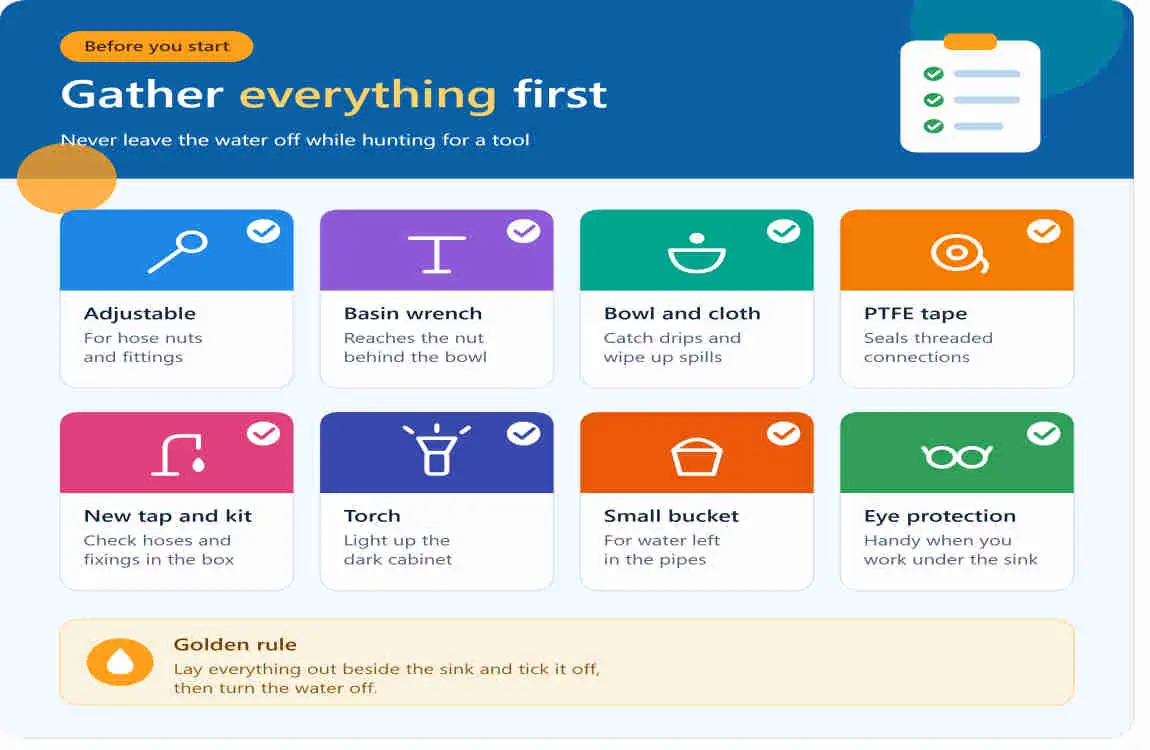
- Basin wrench or tap spanner
- Adjustable spanner
- Screwdriver
- Small bucket and old towels
- Torch or head lamp
- PTFE tape (where the tap instructions call for it)
- Silicone sealant or plumber’s putty (only if your tap’s instructions require it)
- Your new tap, with its flexible hoses and fixing kit
Retailers such as Wayfair also suggest having a second person nearby to help hold the tap steady while you tighten it from below.
How to change kitchen sink taps: 8 steps
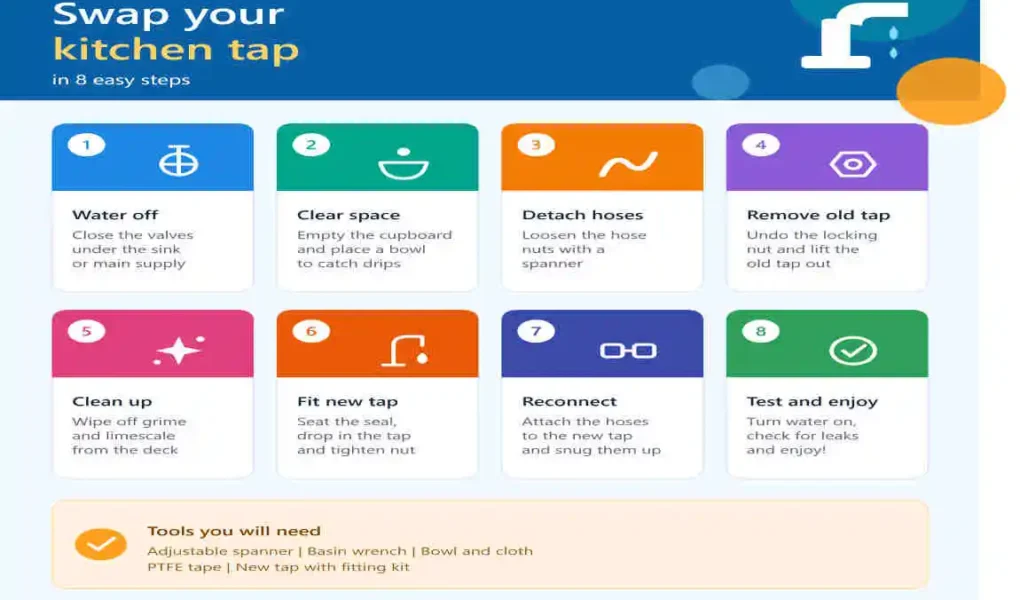
Clear the cupboard and check your set-up
Empty the cupboard under the sink, lay down towels and use a torch to look at how the old tap is fixed. Identify the hoses, the isolation valves and the nut or clamp that holds the tap to the kitchen sink. If you have a waste disposal unit, unplug it or switch off its circuit before you start, as Family Handyman advises.
Turn off the water supply
Find the isolation valves on the hot and cold pipes under the sink and turn each a quarter turn so the slot sits across the pipe. If your kitchen has no individual valves, you will need to shut off the water to the whole house, which HomeServe US points out. Then open the old tap to drain the lines and confirm the water is off.
Disconnect the supply hoses
Put the bucket under the connections and use your adjustable spanner to undo the nuts that join the tap’s hoses to the valves. Expect a little trapped water to come out. Keep a towel handy.
Undo the back nut and remove the old tap
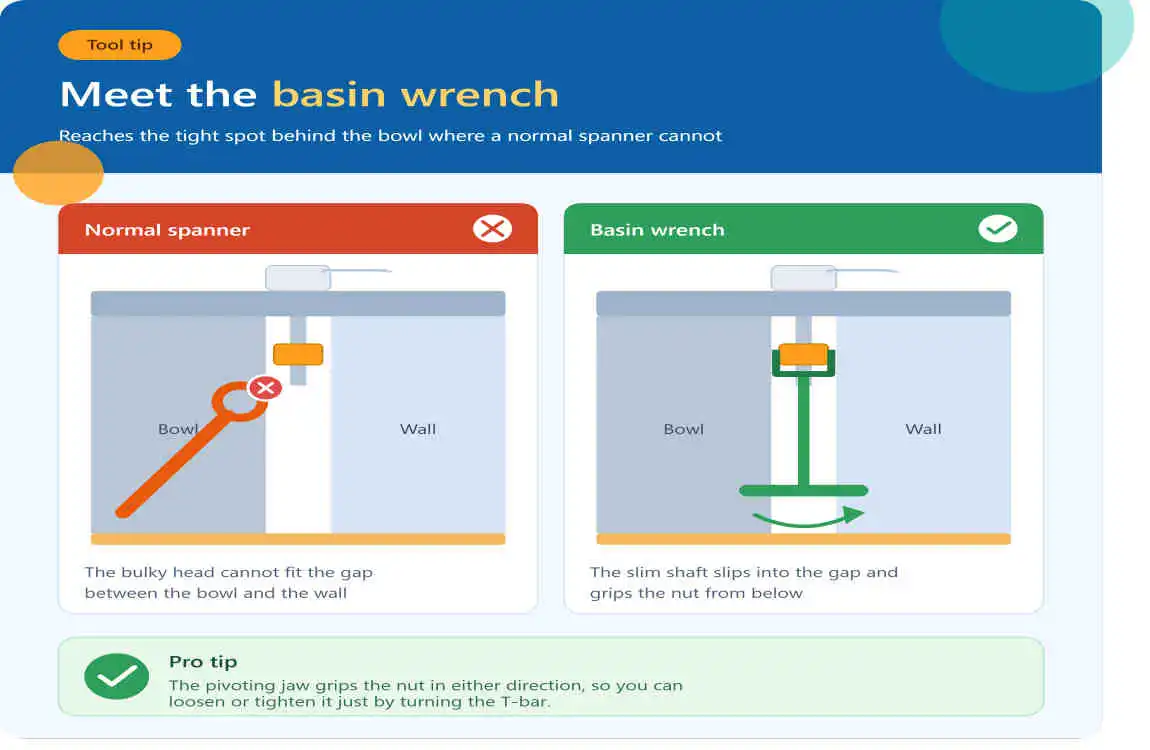
Reach up behind the sink with the basin wrench and loosen the back nut or fixing clamp that holds the tap in place. Newer taps sometimes use plastic wing nuts that can be loosened by hand. Once the nut is off, lift the old tap out from above. Scrape away any old sealant or putty, taking care not to scratch the sink, then wipe the surface clean and dry.
Fit the new tap
Follow the manufacturer’s instructions. In most cases you will place the supplied rubber seal or gasket on the underside of the tap, pass the hoses and threaded tail down through the hole, then secure the tap from below with the washer and back nut. Keep the tap straight while you tighten it, and snug it up firmly without cranking down. A helper makes this much easier.
Connect the hot and cold hoses
Match the hoses to the correct valves (hot to hot, cold to cold). Hand-tighten each connection first, then give it a gentle quarter turn with the spanner. As a general rule, one of the quickest ways to damage a seal is to tighten far beyond what is needed. This Old House recommends threading nuts by hand first so you do not cross-thread them.
Turn the water back on slowly
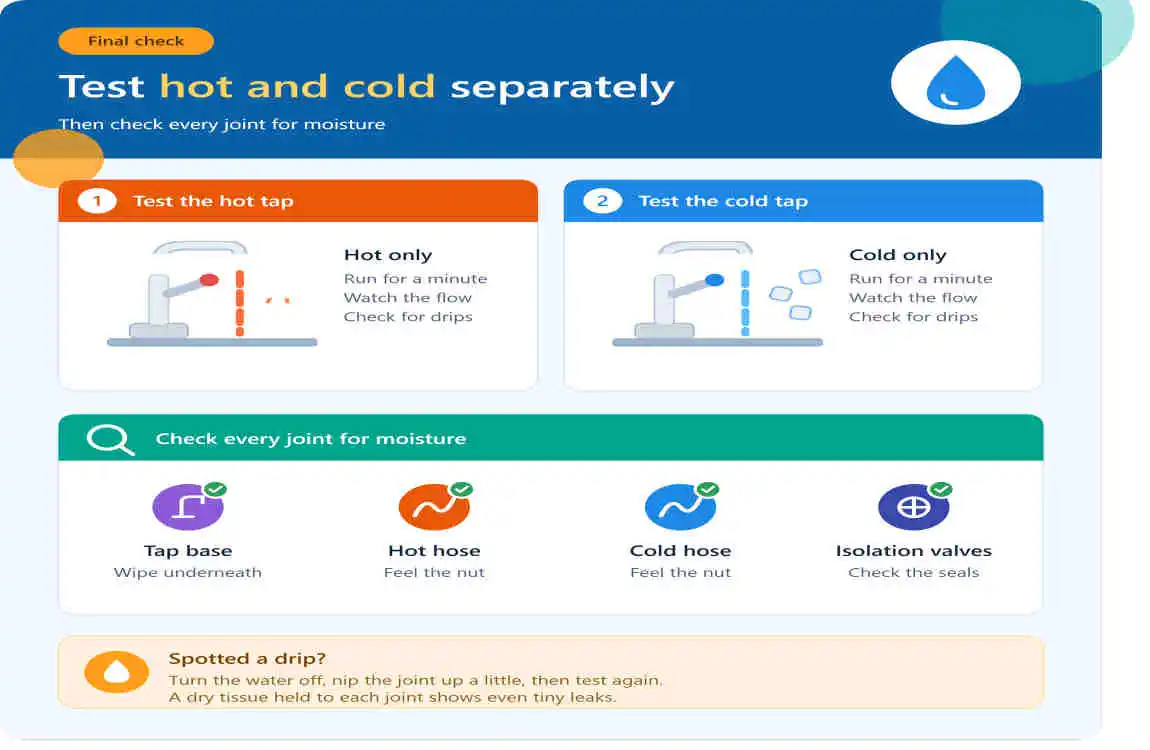
Open the isolation valves gradually. Leave the tap open while the pipes refill so air can escape, then close it once water flows steadily. Running the tap for a minute or so also clears any debris from the lines.
Check for leaks
Dry each joint with a tissue, then run hot and cold water and watch every connection under the sink. Check again after 10 to 15 minutes and again the next day. If a joint weeps, switch the water off, undo it, check the washer is seated properly and reconnect.
What are the most common mistakes when changing a kitchen tap?
| Mistake | What happens | How to avoid it |
|---|---|---|
| Not shutting off the water properly | Flooding when you undo a hose | Test by opening the old tap after closing the valves |
| Buying a tap with the wrong number of holes | It will not fit your sink | Count the holes and check hole size before you buy |
| Over-tightening connections | Damaged washers and slow leaks | Hand-tighten, then a gentle turn with the spanner |
| Forgetting the seal or washer | Water seeping under the tap base | Follow the fitting diagram that comes in the box |
| Crossing hot and cold hoses | Hot water from the cold side | Check the labels on the hoses and handles before connecting |
| Ignoring the disposal unit or other fittings | Damage or electrical risk | Unplug or isolate the power first |
How much does it cost to change a kitchen tap?
A DIY swap costs the price of the tap plus any small extras such as new hoses or sealant. Hiring a plumber adds labour on top, and rates vary widely by region and by how accessible the pipework is, so it is worth getting at least two quotes. Fixing a drip with a new washer or cartridge can be cheaper than replacing the whole tap, so consider that first if your existing tap is otherwise in good shape.
When should you call a plumber?
- Your isolation valves will not close, or there are none and the stopcock is stuck.
- The pipes are corroded, kinked or need cutting or re-routing.
- You are installing a wall-mounted or boiling-water tap.
- The new tap still pipe leaks after you have re-seated the connections.
Frequently asked questions
Can I change a kitchen tap myself?
Yes. A like-for-like deck-mounted tap swap is a manageable DIY job that needs basic tools and around one to two hours. Call a plumber if you need to alter pipework or your valves will not shut.
How long does it take to replace a kitchen tap?
Most people take one to two hours, depending on access under the sink and how stubborn the old fixings are.
Do I need to turn off the water?
Yes. Close the isolation valves under the sink. If there are none, shut off the main stopcock and open the old tap to drain the pipes.
What tool removes the nut under a kitchen tap?
A basin wrench (also called a tap spanner) is designed for the cramped space behind the sink and loosens the back nut or clamp.
Should I buy a WRAS-approved tap?
In the UK, a WRAS-approved tap shows the product has been tested against the Water Supply (Water Fittings) Regulations, which makes it the simplest choice for peace of mind.
Why is my new tap leaking?
Usually it is a missing washer, a loose hose connection or an over-tightened nut that has crushed a seal. Turn the water off, re-seat the connection and test again.
Final thoughts
Changing a kitchen sink tap comes down to preparation: match the tap to your sink, switch off the water, use the right wrench, and tighten with care. Take your time, test thoroughly and your new tap should serve you well for years. If anything under the sink looks worse than you expected, a plumber is a sensible call.