Building a new home is an exciting adventure, and how to install plumbing in a new house is one of the most critical steps you’ll encounter. A well‑designed plumbing system keeps clean water flowing, sends waste safely away, and protects your family from leaks, dampness, and costly repairs. When plumbing is planned before walls go up, you avoid costly re‑work, reduce waste, and stay comfortably within code requirements.
Understanding Plumbing Systems in a New House
What Is a Residential Plumbing System?
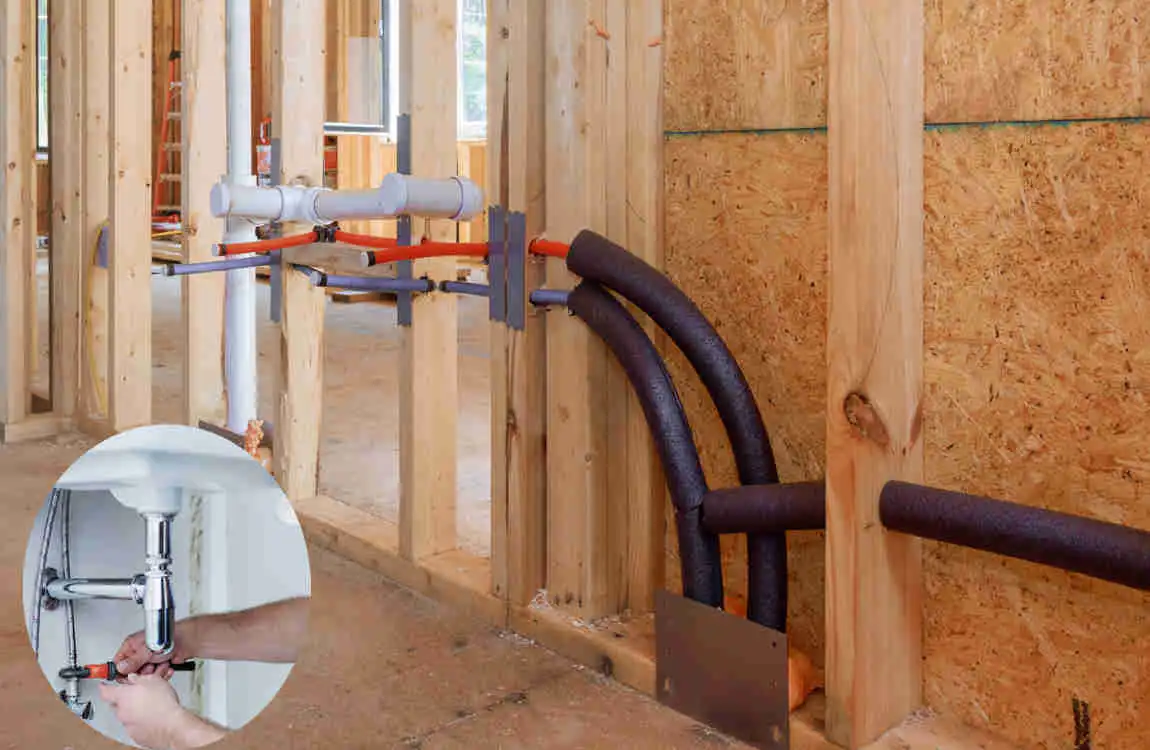
A residential plumbing system can be divided into three main parts:
- Water Supply Lines – Bring fresh, pressurized water from the municipal main (or a well) into the house.
- Drain‑Waste‑Vent (DWV) System – Carries used water, waste, and gases out of the home while allowing air to flow so drains don’t become suctioned shut.
- Fixtures and Appliances – Sinks, toilets, showers, washing machines, and water‑heating devices that use the water supply and connect to the drain system.
Understanding each piece helps you see how they all work together—just like a circulatory system in the human body.
Why Proper Plumbing Installation Matters
- Safety – A correctly installed system prevents water damage, mold growth, and the risk of sewage back‑up that could harm health.
- Water Efficiency – Proper pipe sizing and low‑flow fixtures save gallons and lower your utility bills.
- Long‑Term Cost Savings – Avoiding leaks and re‑work saves hundreds or thousands of dollars over the life of the house.
- Building Code Compliance – Inspections won’t pass unless the plumbing meets local codes, so doing it right the first time avoids delays and fines.
Planning Before Installing Plumbing
Create a Plumbing Layout
A solid layout is the blueprint that guides every pipe you’ll cut, bend, and join.
- Kitchen – Plan for a dishwasher, sink, and possibly a water filter. Locate the fridge’s water line and any future built‑in coffee maker.
- Bathrooms – Each bathroom typically needs a sink, shower/tub, and toilet. Stack the fixtures vertically where possible; this reduces pipe runs and material costs.
- Laundry Room – Include a washing‑machine hookup, a utility sink, and a vented dryer if required.
- Outdoor Plumbing – Think about garden hoses, irrigation, a possible outdoor faucet for washing cars, and fire‑suppression lines if needed.
Sketch the floor plan, mark the positions of all fixtures, and draw the path each supply and drain line will take. Use graph paper or a simple digital drawing tool—just keep it clear and measurable.
Check Local Building Codes
Every city or county has its own plumbing code, often based on the International Plumbing Code (IPC).
- Permits – Most jurisdictions require a plumbing permit before any installation begins.
- Inspections – Expect rough‑in inspections after the water supply and DWV systems are in place, followed by a final inspection after fixtures are installed.
- Regulations – Look for rules on pipe size, material restrictions (e.g., some areas still require copper for hot water), venting distances, and backflow protection.
Getting familiar with these rules early prevents surprises later.
Estimate Your Plumbing Budget
A realistic budget keeps the project on track. Break it down into three buckets:
Category What to Include Typical Range
Materials Pipes, fittings, valves, insulation, fixtures $2,000–$8,000
Labor Professional plumber fees (if hired), subcontractor costs $3,000–$12,000
Unexpected Costs Change orders, extra fittings, site conditions $500–$2,000
Add a 10‑15 % contingency to cover anything the plan didn’t foresee.
Tools and Materials Needed
Essential Plumbing Tools
Tool Why It’s Important
Pipe cutter Cleanly cuts copper, PEX, or PVC without burrs.
Pipe wrench Provides grip for tightening fittings and nuts.
Measuring tape Guarantees accurate pipe lengths and layout spacing.
Drill Needed for making holes for pipe passes and vent stacks.
PVC cement Bonds PVC pipe and fittings for permanent connections.
Soldering tools (torch, solder, flux) Required when working with copper pipes.
Having these tools on hand reduces downtime and helps you keep the installation moving smoothly.
Common Plumbing Materials
- PEX pipes – Flexible, easy‑to‑install, and resistant to corrosion.
- PVC pipes – Ideal for drain, waste, and vent (DWV) lines.
- Copper pipes – Traditional choice for water supply, especially in hot‑water lines.
- CPVC – Similar to PVC but rated for hot water up to 200 °F.
- Valves – Ball valves, shut‑off valves, and pressure‑reducing valves control flow.
- Connectors – Elbows, tees, couplings, and adapters join pipe sections.
- Pipe insulation – Prevents heat loss on hot lines and protects against freezing on cold lines.
Select the material that best fits your climate, budget, and local code requirements.
Step‑by‑Step Guide on How to Install Plumbing in a New House
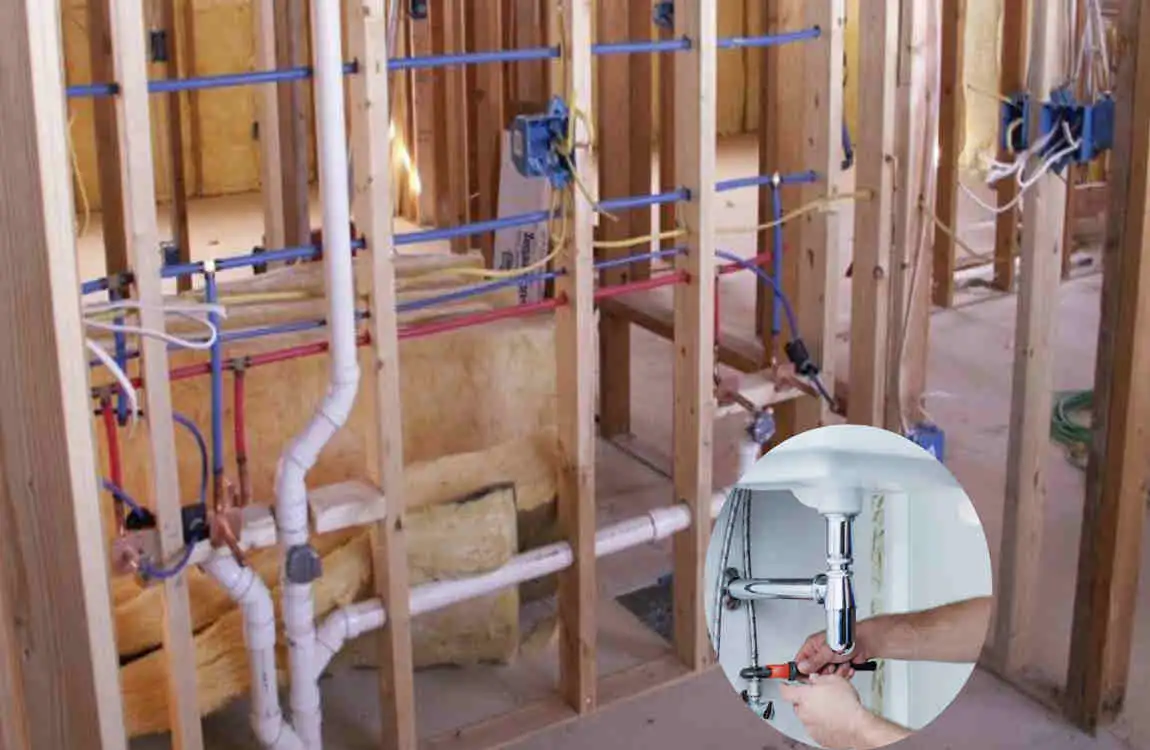
Below is a practical, chronological walk‑through. Feel free to adjust the order slightly based on your specific floor plan, but keep the overall flow consistent.
Mark Fixture Locations
- Locate studs and joists on the framing wall using a stud finder.
- Measure and mark the exact spot for each sink, toilet, shower, and appliance.
- Snap chalk lines on the floor to indicate where water supply and drain lines will run.
Doing this before any cutting saves you from endless re‑measuring later.
Install the Main Water Supply Line
- Connect to the municipal service or well pump at the point of entry (POE).
- Run a ¾‑inch supply line from the POE to the interior water meter.
- Place a shut‑off valve just downstream of the meter; this is your main control.
- Branch the line toward the kitchen, bathrooms, and laundry according to your layout.
Use PEX for flexibility in tight spaces, or copper if required by code.
Install Drain and Vent Pipes
- Lay out the main stack – a vertical 4‑inch DWV pipe that runs from the lowest fixture to the roof vent.
- Add branch lines (3‑inch for bathrooms, 2‑inch for kitchen/laundry) that slope at 1/4 inch per foot toward the stack.
- Install vent elbows at each fixture, then run vent pipes upward to the roof or a secondary vent.
Correct slope ensures that waste flows freely and prevents clogs.
Run Hot and Cold Water Lines
- Start from the main shut‑off and run ½‑inch PEX or copper to each fixture.
- Label “hot” and “cold” on the pipe insulation or using colored tape—blue for cold, red for hot.
- Install loops for fixtures that need both hot and cold (e.g., kitchen sink).
Secure the pipes with pipe clamps every 3– 4 feet to keep them stable.
Install Shut‑Off Valves
Every fixture should have an individual shut‑off valve:
- Ball valves are easy to turn and provide a tight seal.
- Place them below the fixture where they’re accessible for future maintenance.
These valves let you isolate a single faucet without turning off the entire house.
Connect Plumbing Fixtures
- Mount the fixture (sink, toilet, shower) according to the manufacturer’s instructions.
- Attach supply lines using compression fittings or PEX crimp rings.
- Secure drain connections with solvent‑welded (PVC) or soldered (copper) fittings.
Double‑check that every connection is tight and that there’s no cross‑threading.
Pressure Test the System
- Close all fixtures and attach a pressure test gauge to the main shut‑off valve.
- Pressurize the system to 80– 100 psi using a hand pump or an air compressor.
- Watch for drops in pressure over 15 minutes; any loss indicates a leak that must be repaired.
A successful test gives you confidence before the walls are closed up.
Schedule Final Inspection
Contact your local building department to arrange a final plumbing inspection.
- Provide them with a copy of your as‑built drawings.
- Ensure that all permits are posted on-site.
- After passing, you’ll receive a Certificate of Occupancy or similar clearance.
Choosing the Right Plumbing Pipes
PEX vs Copper
FeaturePEXCopper
Flexibility Highly flexible; requires fewer fittings Rigid; needs many elbows.
Cost Lower material cost, cheaper labor Higher material cost, longer labor
Durability Resistant to corrosion, good for most climates Excellent longevity, works in high heat
Installation Simple crimp or clamp connections Requires soldering or press‑fit tools
Best Use Residential supply lines, renovations High‑temperature applications, areas demanding code‑mandated copper
PVC vs CPVC
FeaturePVCCPVC
Temperature Rating Up to 140 °F (suitable for drains) Up to 200 °F (good for hot water)
Cost Cheapest DWV material Slightly higher than PVC
Strength Rigid, easy to install Slightly more flexible, still strong
Best Use Drain, waste, and vent lines Hot‑water supply lines where PVC isn’t allowed
Which Pipe Is Best for Your Home?
Pipe TypeBest ForProsCons
PEX Water supply Flexible, affordable, easy to join UV sensitive, not approved in all jurisdictions
Copper Water supply Durable, resistant to bacteria Expensive, requires soldering.
PVC Drain lines Low cost, easy to glue Not suitable for hot water
CPVC Hot water Heat resistant, easier than copper Less flexible, can be brittle over time
Choosing the right pipe hinges on budget, local code, and the climate where you live.
Common Plumbing Mistakes to Avoid
Poor Pipe Sizing
Using a pipe that’s too small restricts flow and creates pressure drops, while an oversized pipe can cause water to stagnate and increase heat loss. Consult local code tables for the correct diameter based on fixture units.
Incorrect Pipe Slope
DWV pipes must maintain a 1/4‑inch per foot slope (or 2 % grade). Too flat a slope leads to clogs; too steep a slope can cause water to rush, leaving solids behind.
Skipping Vent Pipes
Vents equalize pressure, preventing siphoning of water from traps. Missing a vent can cause gurgling noises, slow drains, and foul odors.
Ignoring Local Plumbing Codes
Even if you think you know the “right” way, the inspector will enforce the code. Non‑compliance can lead to fines, rework, or even unsafe conditions.
Forgetting Shut‑Off Valves
Without individual shut‑offs, a single leak may require shutting down water to the entire house—a major inconvenience.
DIY vs Hiring a Professional Plumber
When DIY Makes Sense
- Small projects – Replacing a faucet, fixing a leaky pipe, or installing a single new fixture.
- Experienced hobbyists – Those who have completed a few plumbing jobs and feel comfortable with tools and codes.
- Budget constraints – If labor costs would exceed material savings, DIY may be economical.
When You Should Hire a Professional
- Full‑house rough‑in – Installing the main supply and DWV system for a new build.
- Complex code requirements – When local regulations mandate inspections, permits, or specialized materials.
- Safety concerns – Working near gas lines, high‑pressure mains, or in confined crawl spaces.
Tips for Long‑Lasting Plumbing
Use Quality Materials
Invest in reputable brands for pipes, fittings, and valves. Cheap, low‑grade components often fail early, leading to costly repairs.
Prevent Pipe Freezing
- Insulate all cold‑water lines in unheated areas.
- Seal gaps that let cold air into crawl spaces or basements.
- Leave a trickle of water flowing during extreme cold snaps.
Perform Regular Maintenance
- Check for water‑hammer noises; add air chambers if needed.
- Flush water heaters annually to prevent sediment buildup.
- Inspect valve operation to ensure they turn fully on and off.
Check for Leaks Early
Look for damp spots, musty smells, or unexplained spikes in water bills. Early detection stops small drips from becoming major floods.
Estimated Cost of Installing Plumbing in a New House
Installation Item Estimated Cost
Water Supply Lines $1,500–$4,000
Drain & Vent System $2,000–$5,000
Fixtures Installation $1,000–$3,000
Complete Plumbing System $7,000–$20,000+
These numbers vary by region, house size, and material choices. Adding a 10‑15 % contingency helps cover unexpected expenses.
Frequently Asked Questions (FAQ)
How do you install plumbing in a new house?
The process starts with a detailed plumbing layout, followed by installing the main water supply line, running drain‑and‑vent pipes, connecting hot and cold water lines, installing shut‑off valves, attaching fixtures, pressure‑testing the system, and finally scheduling a final inspection.
What type of pipe is best for a new home’s plumbing?
PEX is popular for its flexibility, affordability, and ease of installation, especially for water‑supply lines. Copper provides unmatched durability and is often required for hot‑water lines in some jurisdictions. Choose based on cost, local code, and personal preference.
How much does it cost to install plumbing in a new house?
Most homeowners spend $7,000 – $20,000 for a complete system, depending on the size of the house, the materials selected, and labor rates in the area.
Can I install plumbing in a new house myself?
Simple tasks, like fixing a faucet or swapping a showerhead, are great DIY projects. However, a full‑house plumbing installation usually requires permits, inspections, and a solid understanding of codes—areas where a licensed plumber is advisable.
What is the first step in installing plumbing in a new house?
Begin by creating a detailed plumbing layout that maps out all fixture locations, pipe runs, and vent routes. This plan guides every subsequent step and helps avoid costly changes later.
How long does plumbing installation take in a new house?
For an average single‑family home, 3 to 7 days is typical for the rough‑in phase, assuming a crew of professional plumbers. Additional time is needed for fixture installation, testing, and inspections.
| Plumbing Aspect | Details |
|---|---|
| Purpose | Installs the complete water supply, drainage, and vent systems in a new home. |
| Installation Stage | Completed after framing and before insulation and drywall installation. |
| Main Components | Water supply lines, drain pipes, vent pipes, sewer line, fixtures, water heater, and shut-off valves. |
| Common Pipe Materials | PEX, copper, CPVC, and PVC (for drain and vent systems). |
| Water Supply System | Delivers clean hot and cold water to kitchens, bathrooms, laundry rooms, and outdoor faucets. |
| Drainage System | Removes wastewater safely through drainpipes connected to the main sewer or septic system. |
| Vent Pipes | Prevent sewer gases from entering the home and maintain proper drainage pressure. |