
If you use your detached garage for more than just parking, adding water can make a big difference. A garage sink, utility faucet, bathroom, workshop wash station, or outdoor cleaning spot all become much easier to use when you have a proper water supply.
That is why many homeowners want to learn how to run a water line to a detached garage. It can make the space far more practical and can even add value to your property. But this is not a job to rush. A water line needs careful planning, the right pipe choice, proper trench depth, and a safe connection to your home’s main supply.
Understanding the Basics of Running a Water Line to a Detached Garage
Why Add Water Supply to a Detached Garage?
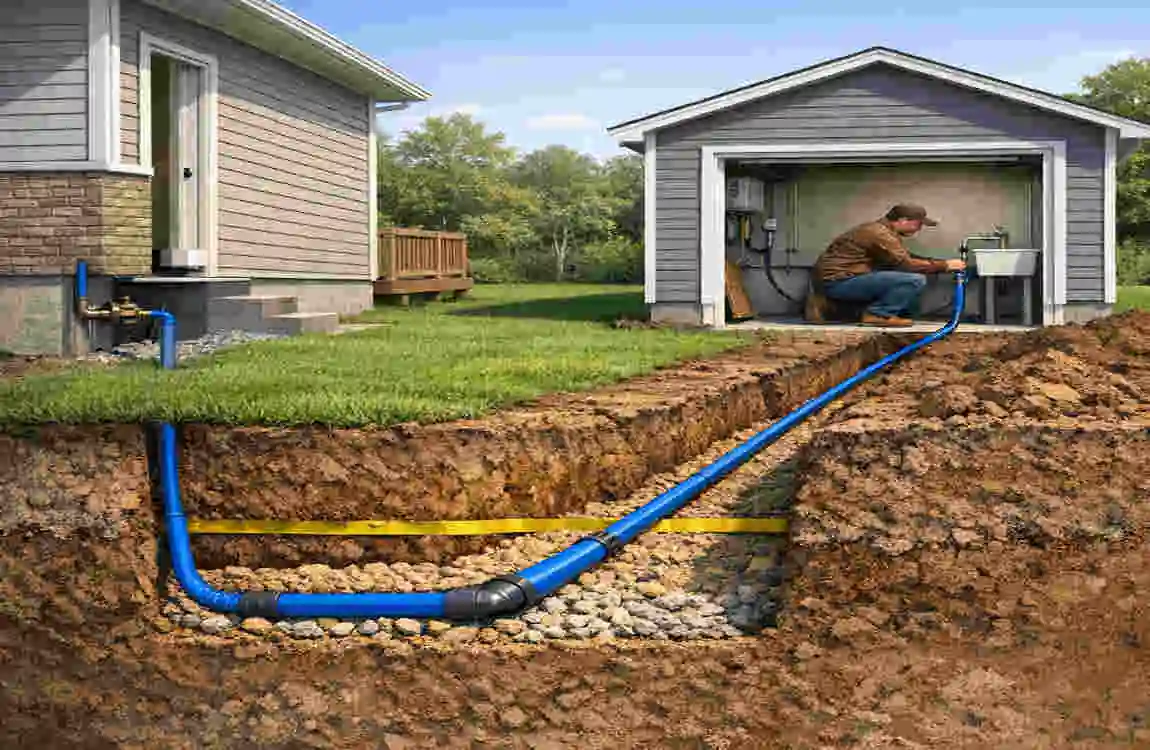
A detached garage becomes much more useful when it has running water. Instead of just being a storage space, it can serve as a real extension of your home.
You may want water for a garage sink, a small bathroom, a workbench wash area, or even for gardening and outdoor cleaning. If you like doing hands-on projects, having water nearby saves time and effort.
It also improves the overall usability of the garage. You do not need to carry buckets from the house or keep running back and forth for simple cleaning tasks.
How Detached Garage Plumbing Works
Detached garage plumbing usually starts from the main water line at the house. From there, a new pipe runs underground to the garage.
The pipe enters the garage through a protected opening in the wall or floor. Once inside, it connects to fixtures such as a sink, faucet, toilet, or water heater, if needed.
The setup is simple in concept, but it must be done correctly. If the pipe is not buried deep enough or sealed well, it can freeze, leak, or get damaged over time.
Factors to Consider Before Installation
Before you dig anything, take a step back and think through the whole project.
You should consider:
- Distance between the house and the garage
- Local plumbing codes
- Soil type and digging conditions
- Cold weather and freezing risk
- Water pressure needs
These details may seem small, but they can affect the final cost, the pipe type, and even the success of the project.
Planning the Water Line Installation
Check Local Plumbing Codes and Permits
This step matters more than many homeowners expect. In many places, you need a permit before adding a new water line.
Permits help make sure the work meets local rules. They may also require inspections after installation. If you skip this step, you could face problems later when selling the home or fixing the garage plumbing.
It is always better to check first rather than fix paperwork later.
Choose the Best Water Line Route
The shortest route is not always the best route. You want a path that avoids large tree roots, other utility lines, concrete obstacles, and hard-to-reach areas.
A smart route makes the job easier now and much easier if repairs are needed in the future. Try to keep the line as direct as possible while still leaving room for safe digging and service access.
Determine Pipe Size Needed
Pipe size affects water flow. If the pipe is too small, the pressure may drop when more than one fixture is being used.
Here is a simple way to think about it:
- ½-inch pipes are often used for small fixtures or limited use
- ¾-inch pipes are better for multiple fixtures or more regular use
- Larger pipes may be needed for higher water demand
Choosing the right size from the start helps avoid weak flow later.
Tools and Materials Needed to Run a Water Line to a Detached Garage
Essential Materials Checklist
Before you begin, gather all the needed supplies. Having everything ready makes the work smoother and helps avoid delays.
Common materials include:
- PEX, copper, or PVC water pipe
- Shut-off valves
- Pipe fittings
- Insulation materials
- Pipe clamps
- Waterproof seals
- Trenching materials
The exact list depends on your garage setup, climate, and local code requirements.
Required Tools
You will also need basic plumbing and digging tools.
Useful tools include:
- Shovel or trenching equipment
- Pipe cutters
- Wrenches
- Measuring tape
- Level
- Pressure testing tools
If the run is long or the soil is hard, a trenching machine may save a lot of effort.
Step-by-Step Guide: How to Run a Water Line to a Detached Garage
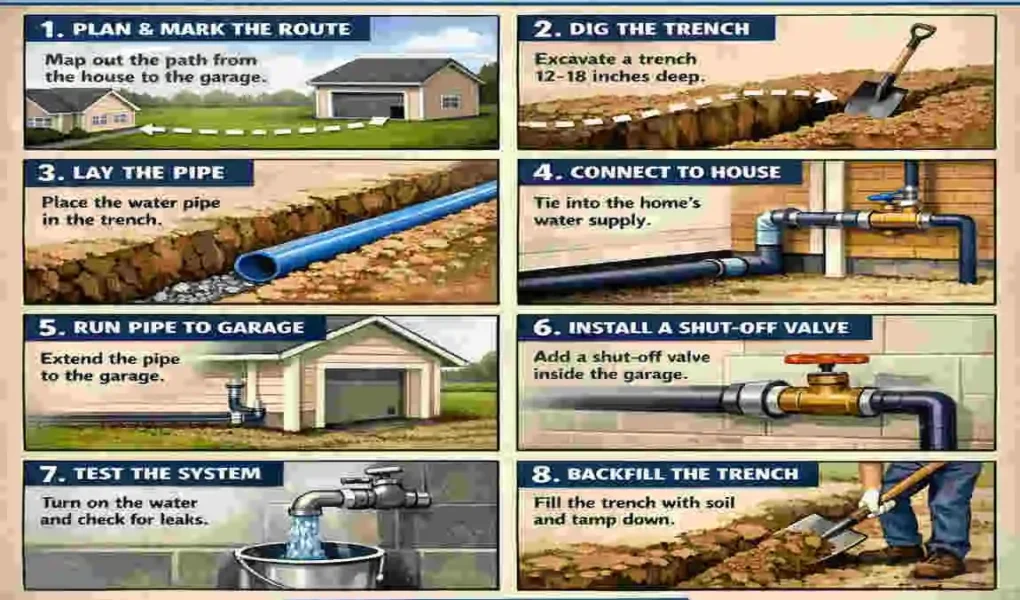
Plan and Mark the Water Line Path
Start by marking the path before you dig. This helps you stay organized and avoid mistakes.
You should also mark underground utilities so you do not damage power lines, gas lines, or other buried systems. Measure the full distance from the house to the garage and decide where the line will enter the garage.
This planning step gives you a clear layout before the real work begins.
Shut Off the Main Water Supply
Before connecting anything, turn off the main water supply to the home. This keeps the work area safe and prevents flooding.
If needed, drain water from nearby lines so there is no leftover pressure in the system. Then prepare the connection point where the new line will attach.
Take your time here. A small mistake at this stage can create a mess later.
Dig the Trench for the Water Line
The trench is where the underground pipe will sit. The depth matters because the pipe needs protection from freezing and physical damage.
In colder regions, the pipe should usually go below the frost line. In warmer areas, the depth may be less, but it still needs to be deep enough to stay protected.
Try to keep the trench level and smooth. A clean trench makes pipe placement easier and reduces stress on the line.
Install the Underground Water Pipe
Now place the pipe into the trench. Be careful not to bend it too sharply or force it into tight angles.
Use proper fittings where needed and make sure every joint is secure. If your climate is cold, add insulation around vulnerable sections to help protect against freezing.
This is one of the most important parts of the job, so do not rush it.
Connect the Water Line to the Main Supply
At the house connection point, install a tee fitting or another approved connection method. This allows the new line to branch off from the main supply.
It is also smart to add shut-off valves. These let you stop water flow to the garage line without shutting down the whole house.
Check each connection carefully. Tight, secure fittings help prevent leaks and pressure problems.
Bring the Water Line Into the Detached Garage
Once the pipe reaches the garage, you need to bring it inside safely. This usually means drilling a proper entry point through the wall or floor.
After that, seal the opening well so water, air, pests, and dirt cannot get inside. The pipe should also be protected from damage where it enters the structure.
A good entry point helps keep the system safe and neat.
Connect Plumbing Fixtures
Now you can connect the garage fixtures. This may include a sink, utility faucet, toilet, or water heater depending on your project.
Keep the layout simple if possible. The fewer unnecessary bends and fittings, the easier the system is to maintain.
If you are adding a bathroom or hot water, the project becomes more complex and may need professional help.
Test the System
Once everything is connected, turn the water supply back on slowly. Watch for leaks at each joint, valve, and fixture connection.
Then test the water pressure. Make sure it is steady and strong enough for the fixtures you installed.
This final step is very important. It helps you catch problems before they turn into expensive repairs.
Best Types of Pipes for a Detached Garage Water Line
PEX Pipes
PEX is one of the most popular choices for this kind of project. It is flexible, easier to install, and often handles freezing better than some rigid pipes.
It also works well for long underground runs because it can bend around obstacles more easily.
Copper Pipes
Copper is strong, durable, and long-lasting. It also handles heat well, which makes it a solid option in many situations.
The downside is that copper usually costs more and can be harder to install than PEX.
PVC and CPVC Pipes
PVC and CPVC are affordable and lightweight. They are easy to work with and often cost less than metal pipe.
However, they may not be the best choice for every climate or application, especially where freezing is a concern.
How Deep Should a Water Line Be Buried to a Detached Garage?
Burying the line at the right depth is one of the most important parts of the job. If the pipe sits too close to the surface, freezing can break it during cold weather.
The exact depth depends on local frost levels and building codes. In colder areas, the line usually needs to be buried deeper than in mild climates.
A few helpful tips:
- Use insulation where needed
- Avoid shallow installation
- Protect exposed sections carefully
- Check local frost depth rules before digging
If your area gets harsh winters, do not guess. A frozen pipe can cause a big mess and expensive damage.
Cost to Run a Water Line to a Detached Garage
The total cost depends on several parts of the project. Some homeowners save money with DIY labor, while others spend more by hiring a plumber for the full job.
Cost Factor Estimated Impact
Pipe materials Depends on pipe type and length
Excavation Higher for longer distances
Permits Varies by location
Labor Depends on project complexity
Fixtures Adds additional costs
What Affects the Final Price?
The biggest cost drivers are usually the length of the run, the type of pipe, and whether the trench is easy or hard to dig. If you need bathroom fixtures, the price also goes up.
DIY work may reduce labor cost, but professional plumbing can improve reliability and reduce the chance of mistakes.
Common Mistakes When Running Water Lines to a Detached Garage
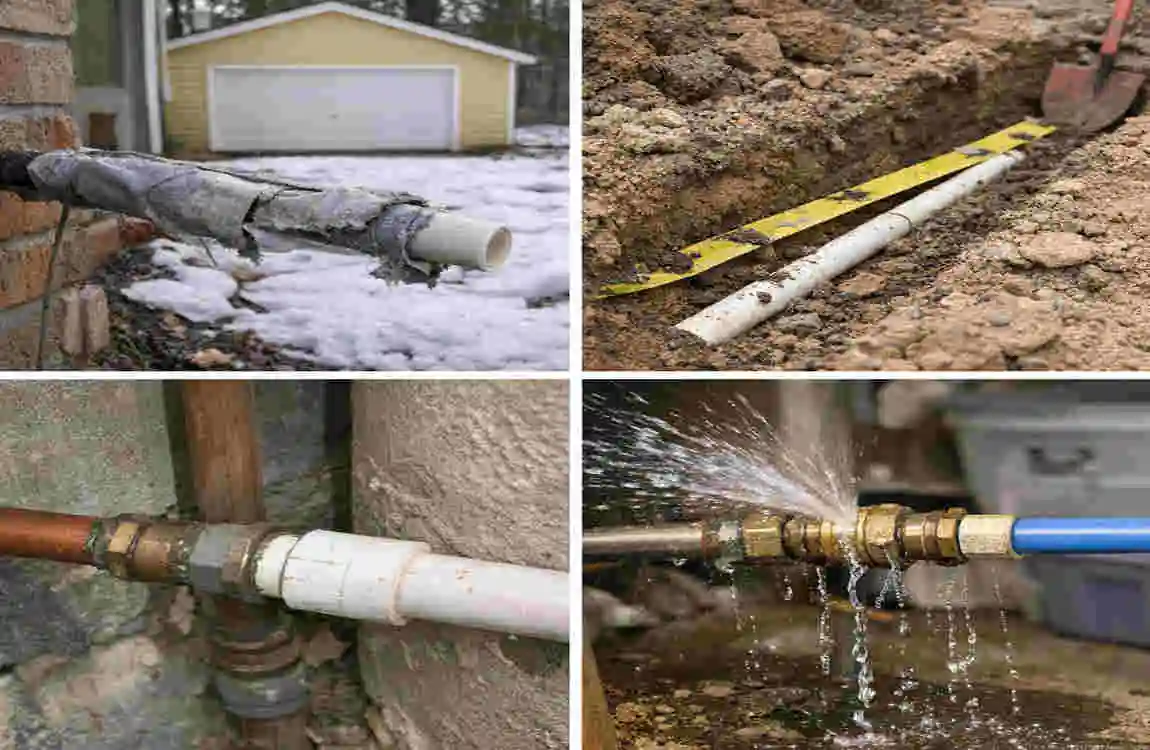
Installing Pipes Too Shallow
This is one of the most common mistakes. A shallow pipe is much more likely to freeze and break in winter.
Choosing the Wrong Pipe Size
If the pipe is too small, water pressure may be weak. That can make sinks, faucets, and other fixtures perform poorly.
Ignoring Local Plumbing Codes
If you skip code requirements, you may fail inspections or create future repair headaches. It is always better to follow the rules from the start.
Skipping Pressure Testing
Pressure testing helps confirm the line is sealed properly. Without it, small leaks may stay hidden until they cause damage.
Tips for Protecting a Detached Garage Water Line
Once the line is installed, protect it well so it lasts longer.
- Insulate exposed pipes
- Install shut-off valves
- Drain pipes before freezing weather
- Check for leaks regularly
- Use quality fittings
A little prevention goes a long way here. Good protection now can save you from major repair costs later.
DIY vs Hiring a Professional Plumber
When DIY Installation Makes Sense
DIY can work if the project is simple, the pipe run is short, and you already have plumbing experience. It is often best for small garage water lines with basic fixtures.
If you enjoy hands-on work and understand plumbing basics, this may be a manageable project.
When to Hire a Professional
A licensed plumber is often the better choice for larger or more complex jobs. This is especially true if the garage will have a bathroom, water heater, or long underground line.
You should also hire help if your project needs permits, inspections, or special code compliance. Professional work can cost more upfront, but it often gives better long-term peace of mind.
Maintenance Tips After Installing a Garage Water Line
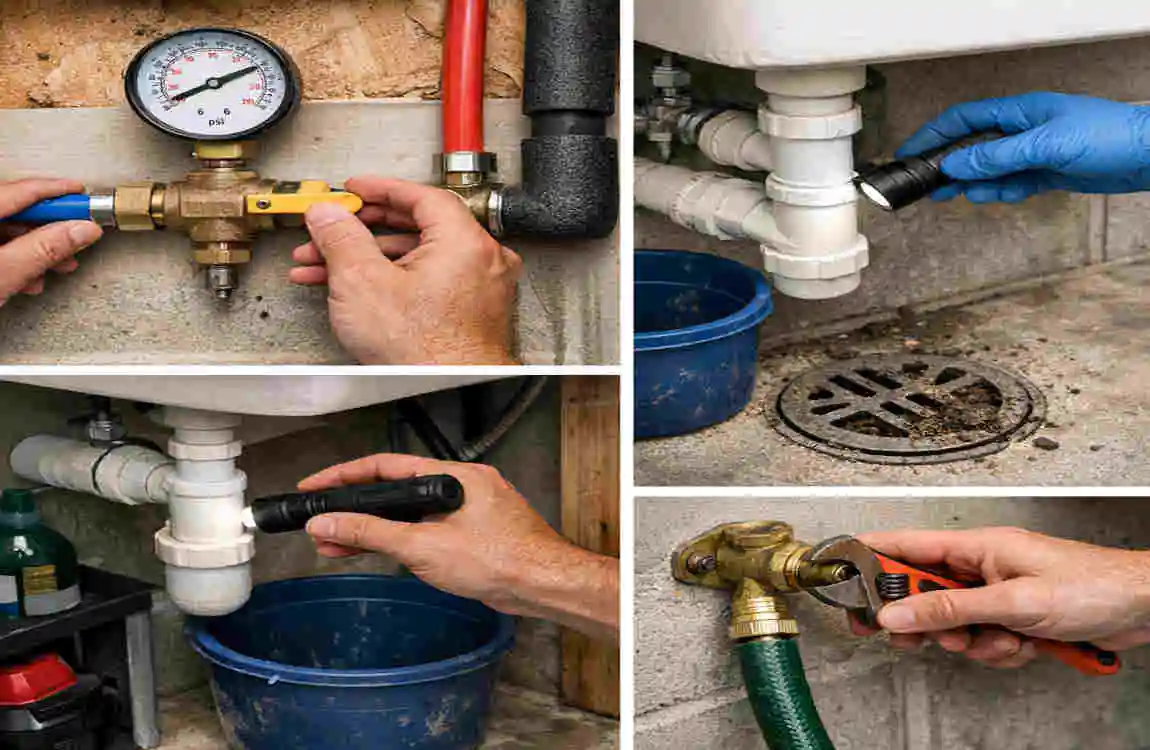
Once the line is in place, do not forget about upkeep. Regular care helps the system stay in good condition.
Check the line seasonally for leaks, damp spots, or damage. Make sure shut-off valves still work properly. If winter is coming, confirm that insulation and drain-down steps are ready.
You should also inspect exposed pipe sections and fittings from time to time. Small maintenance checks can prevent big surprises.
Frequently Asked Questions
How much does it cost to run a water line to a detached garage?
The cost depends on pipe length, digging needs, materials, permits, and labor. Short, simple projects cost less, while longer underground runs cost more.
What type of pipe is best for a detached garage water line?
PEX is often the easiest and most flexible choice. Copper is very durable, while PVC/CPVC may work for some low-cost projects.
How deep should a water line be buried to a detached garage?
The line should usually be buried below the frost line or in accordance with local code requirements. This helps prevent freezing.
Can I run a water line to my garage myself?
Yes, if you have plumbing experience and the project is simple. For larger or more complex work, a professional plumber is a better choice.
Do I need a permit to run water to a detached garage?
Many locations require permits for new plumbing work. Always check local rules before starting.
| Key Details | ||
|---|---|---|
| Check Local Codes | Verify plumbing permits, depth requirements, and safety rules before starting. | |
| Plan the Water Route | Choose the shortest path from the main water supply to the detached garage. | |
| Select the Right Pipe | Use durable materials like PEX or PVC based on local requirements and water pressure needs. | |
| Dig the Trench | Excavate a trench deep enough to protect the water line from freezing and damage. | |
| Install the Water Pipe | Lay the pipe carefully, avoiding sharp bends and protecting it with proper insulation. | |
| Connect to Water Supply | Attach the new line to the main water source using approved fittings and shut-off valves. | |
| Run Pipe Into Garage | Bring the line through the garage wall and connect it to faucets, sinks, or appliances. | |
| Test for Leaks | Turn on the water slowly and inspect all connections before covering the trench. | |
| Insulate & Protect | Add insulation where needed to prevent freezing and extend pipe life. | |
| Backfill the Trench | Cover the pipe carefully with soil after confirming the system works properly. |