Imagine this: You’re rushing out the door for work, and your garage door refuses to close because of a finicky sensor. Frustrating, right? Garage door sensors are those small devices near the bottom of your garage door tracks that act like invisible guardians. They shoot out infrared beams to detect any obstacles, ensuring the door doesn’t slam down on your car, pet, or worse, a family member.
But sometimes, life throws curveballs, and you might need to bypass garage door sensors temporarily. Maybe they’re misaligned from a recent bump, or Dirt has built up over time. In this guide, we’ll explore how to bypass garage door sensors safely, without turning your garage into a hazard zone.
Before we get into the nitty-gritty, let’s talk safety and legality. Bypassing these sensors isn’t something to take lightly—it’s a short-term fix, not a permanent hack. You, as a homeowner, bear the responsibility to avoid accidents. If you’re unsure, always consult a pro. And hey, if you’re into home improvement like the folks at sites such as homeimprovementcast.co.uk, remember that a well-functioning garage door boosts your home’s curb appeal and value.
Understanding Garage Door Sensors
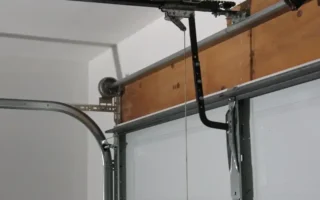
Garage door sensors might seem like magic, but they’re straightforward tech designed to keep you safe. Think of them as the eyes of your garage door system. Positioned about six inches off the ground on either side of the door, these little devices ensure nothing gets crushed when the door closes.
What Are Garage Door Sensors?
At their core, garage door sensors are photoelectric eyes. One sensor sends out an invisible infrared beam, and the other receives it. If anything breaks that beam—like a toy left in the path—the door stops or reverses. This setup became mandatory in the US after 1993 to prevent tragic accidents, especially with kids and pets.
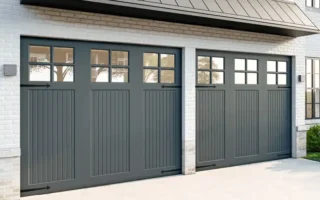
You’ve probably seen them: small black boxes with a glowing LED light. They’re wired to your garage door opener, which is usually mounted on the ceiling. Without these sensors, your door could become a severe liability. As a real estate agent, I’ve seen how outdated garage systems can scare off buyers—keeping yours in top shape is key for that welcoming home decor vibe.
How Do They Work?
Let’s simplify this. The sending sensor emits a steady infrared beam, like a laser pointer you can’t see. The receiving sensor catches it and sends a signal back to the opener saying, “All clear!” If the beam breaks, the opener halts the door’s movement.
This obstruction detection is powered by simple electronics—no fancy AI involved. Some modern systems even add features like auto-reverse if the door hits something solid. It’s all about preventing mishaps, and it works remarkably well when maintained.
Picture yourself decorating your garage for the holidays—string lights and wreaths everywhere. If a decoration blocks the sensor, the door won’t budge. That’s the system doing its job, reminding you to clear the path.
The Importance of Sensors for Safety
Why bother with these at all? Safety first! Sensors prevent countless injuries each year. According to safety stats, garage doors cause thousands of emergency room visits annually, often from doors closing on fingers or feet.
They also protect your property. Imagine your car getting dented because the door didn’t detect it—ouch for your wallet. For families, this is non-negotiable. If you’re sprucing up your home decor, a safe garage door lets you focus on aesthetics without worrying about accidents.
Common Reasons Sensors Might Fail or Need Bypassing
Sensors aren’t invincible. Dirt, spider webs, or even sunlight can interfere with the beam. Misalignment happens if someone bumps them while parking. Wiring issues from age or rodents can also cause failures.
Sometimes, you need a temporary bypass during repairs or power outages. But remember, this isn’t a fix-all. If problems persist, it’s time to think about upgrades, perhaps tying into broader home improvement projects like those discussed on homeimprovementcast.co.uk.
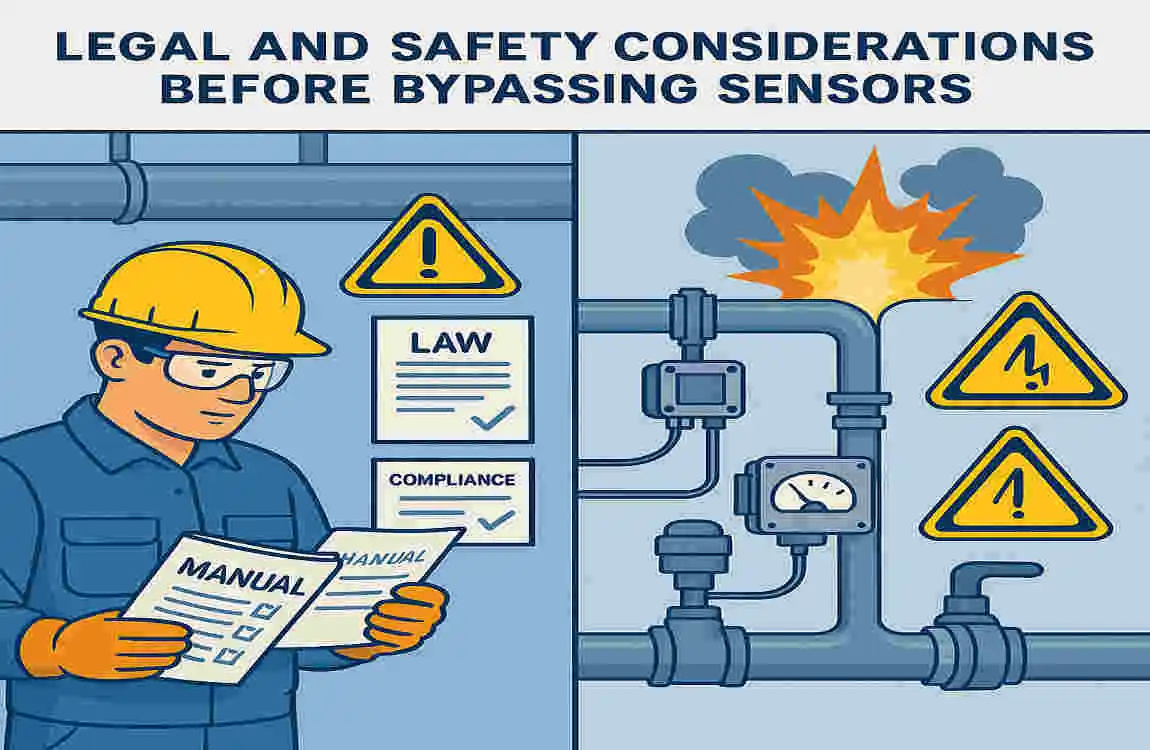
Legal and Safety Considerations Before Bypassing Sensors
Before you even think about tinkering, pause and consider the bigger picture. Bypassing sensors can save the day in a pinch, but it’s like driving without a seatbelt—risky if not done right.
Why Bypassing Should Only Be Temporary
Sensors exist for a reason: protection. Make bypassing a temporary solution, such as during a quick repair. Leaving them off permanently invites trouble. Restore them as soon as possible to keep your home safe.
Ask yourself: Is this fix worth the risk? Most experts say no for long-term use. As someone interested in home decor, you know a safe space enhances the overall appeal—don’t compromise that.
Possible Risks and Dangers of Improperly Bypassing Sensors
Mess up the bypass, and you could face accidents. The door might close on something (or someone) without warning. Electrical shocks are a risk if you’re not careful with wiring.
Property damage is another worry—think crushed bikes or scratched cars. And if an injury happens, you could be liable. Always prioritize safety; it’s better to be cautious than sorry.
Legal Implications and Homeowner Responsibility
In many places, tampering with safety features violates building codes. If an accident occurs, insurance might not cover it, leaving you on the hook. Homeowners have a duty to maintain safe systems—neglect that, and legal headaches follow.
Check local laws before proceeding. For real estate pros, this is crucial: A bypassed sensor could flag during a home inspection, affecting sales.
When to Call a Professional Instead
Not handy with tools? Call in the experts. Professionals handle this safely and ensure that everything complies with the relevant codes and regulations. If the issue seems complex—like faulty wiring—don’t DIY it.
Websites like homeimprovementcast.co.uk often recommend pros for such tasks, mainly if you’re focusing on decor rather than mechanics. Better safe than sorry, right?
Common Scenarios That May Require Sensor Bypass
Life happens, and sometimes sensors throw a wrench in your plans. Let’s look at when a bypass might be necessary. I’ll break it down clearly so you can relate.
Sensor Malfunction or Misalignment
Over time, sensors can drift out of alignment due to vibrations or accidental knocks. If the beam doesn’t connect, the door stays open. A quick bypass allows you to close it while realigning.
Damaged or Blocked Sensors
Are pets chewing wires? Dirt buildup? These block the beam, mimicking an obstruction. Bypassing temporarily clears the way for cleaning or replacement.
Emergency Situations
Power outages or opener failures can leave you stuck. In a storm, you might need to operate the door manually, bypassing sensors for access.
Testing or Troubleshooting Sensor Issues
During diagnostics, bypassing helps isolate problems. It’s like testing a car’s brakes—essential but temporary.
To make this more straightforward, here’s a quick table summarizing these scenarios:
Scenario Description: When to Bypass?
Malfunction/Misalignment Sensors shift, breaking the beam. Yes, for quick realignment.
Damaged/Blocked Dirt, pets, or debris interrupt the signal. Yes, during cleaning.
Emergency Situations: Power failure or stuck opener. Yes, for immediate access.
Testing/Troubleshooting: Checking for wiring or component issues. Yes, as part of diagnostics.
See how these tie into everyday home life? If you’re decorating your garage as part of a home improvement project, avoiding these issues keeps things smooth.
Step-by-Step Guide: How to Bypass Garage Door Sensors Safely
Alright, reader—let’s get hands-on. This is where we tackle how to bypass garage door sensors step by step. Remember, safety first: Only do this if you’re comfortable, and make it temporary.
Tools and Materials Needed
Gather these basics: a screwdriver set, wire connectors, a voltage tester, electrical tape, and jumper wires. Don’t forget gloves and safety glasses. Have your garage door manual handy—it’s your best friend here.
Preparation and Safety Precautions
Start by disconnecting power to the opener. Unplug it or flip the breaker. Inform everyone in the house—no surprises. Clear the garage floor to avoid trips.
Test the door manually first. Pull the release cord to disengage the opener. This ensures you can operate it by hand if needed.
Methods to Bypass Sensors
Here’s a numbered list of safe methods—follow them carefully:
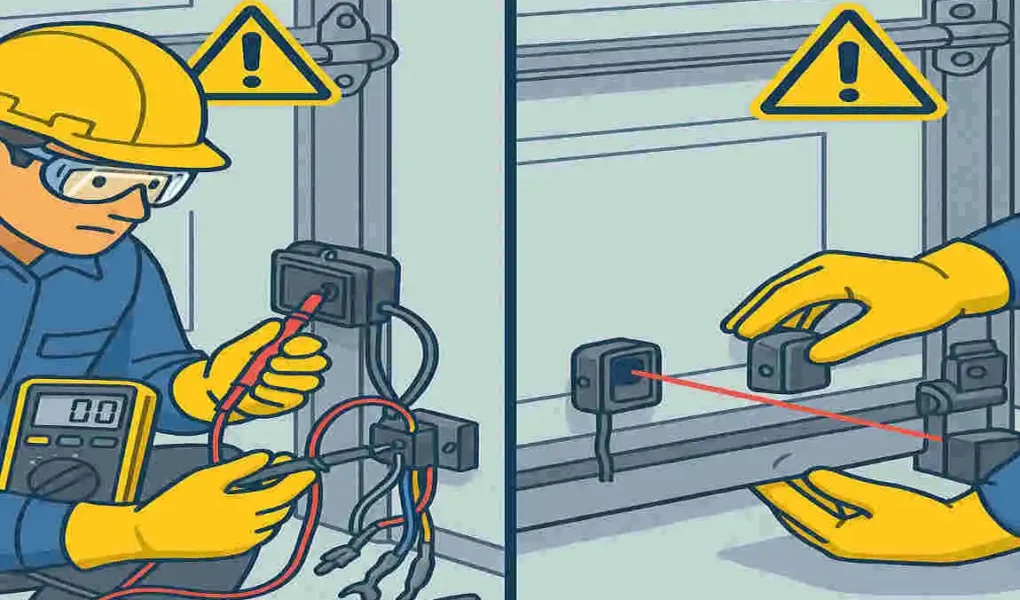
- Temporarily Disconnecting Sensor Wiring: Locate the sensors’ wires at the opener unit. Carefully disconnect them. This breaks the circuit, allowing the door to function without sensor input. Tape the ends to prevent shorts.
- Using Jumper Wires to Simulate Sensor Signals: Connect jumper wires between the sensor terminals on the opener. This tricks the system into thinking the beam is intact. Use your voltage tester to ensure no live current.
- Manual Override via Garage Door Opener Controls: Some openers have a bypass switch or button. Consult your manual to activate it. This is the easiest for quick fixes.
Choose the method that fits your setup. For older doors, jumper wires work best; newer ones might have built-in overrides.
How to Test the System After Bypassing
Once bypassed, test the door slowly. Open and close it manually a few times. Watch for any unusual resistance. If it operates smoothly, you’re good—for now.
Re-enabling Sensors Once the Issue Is Resolved
Fix the root problem, then reconnect everything. Realign sensors so the LEDs light up. Plug the power back in and test the whole system. Congrats—you’ve safely handled how to bypass garage door sensors!
As a real estate tip: If you’re staging a home for sale, ensure sensors work perfectly. It reassures buyers and ties into that polished home decor look.
Tips for Avoiding Sensor Problems in the Future
Prevention beats cure. Let’s keep those sensors happy so you rarely need to bypass them.
Regular Cleaning and Maintenance of Sensors
Wipe sensors monthly with a soft cloth. Remove dust, cobwebs, or grime that blocks the beam. It’s a quick task that saves headaches.
Proper Sensor Alignment and Positioning
Check alignment often—LEDs should glow steadily. Adjust brackets if needed. Position them away from direct sunlight to avoid interference.
Keeping the Area Around Sensors Clear
Store items away from the sensors. Teach kids and pets to steer clear. A clutter-free zone means fewer false alarms.
Scheduling Professional Inspections
Get a pro check-up yearly. They spot issues early, like worn wiring.
For more tips, here’s a bulleted list of quick wins:
- Inspect wiring: Look for frays or rodent damage.
- Use protective covers: Shield sensors from the weather if your garage is exposed.
- Upgrade to innovative systems: Consider apps that alert you to problems.
- Incorporate into home decor: While maintaining, think about painting the garage for a fresh look—check resources like homeimprovementcast.co.uk for ideas.
By following these, you’ll minimize bypass needs and keep your home safe and stylish.
Alternative Solutions to Bypassing Sensors
Bypassing isn’t always the answer. Let’s explore more innovative options that maintain safety.
Troubleshooting Sensor Errors Without Bypassing
First, clean and realign. Check for loose wires or low batteries in wireless models. Reset the opener by unplugging it for a minute.
Test the beam with a non-reflective object—if it reverses, it’s working. Simple fixes often solve 80% of issues without bypassing.
Installing Advanced or Backup Sensor Systems
Upgrade to laser-guided or wireless sensors for reliability. Some systems add cameras for visual checks. This enhances security, too—perfect for home decor enthusiasts who want a modern touch.
Using Manual Garage Door Release Safely Without Sensor Bypass
In a pinch, use the red release cord to go manual. Prop the door open securely. This avoids electrical tinkering altogether.
These alternatives promote long-term safety. What do you think—ready to upgrade your setup?