Transforming your home with custom pieces is a dream for many, but the price tags in showrooms can often turn that dream into a financial nightmare. Have you ever looked at a simple coffee table or a kitchen setup and wondered why it costs a fortune? Here is a thought: why buy when you can learn to make wooden furniture and a kitchen cabinets in-house?
Taking the DIY route isn’t just about saving money—though saving upwards of PKR 20,000 per cabinet set is a massive motivation. It is about the immense satisfaction of running your hand along a smooth, polished surface and knowing that you built it. It is about personalisation. When you build it yourself, you aren’t stuck with standard sizes; you build to fit your specific corners and needs.
Essential Tools and Materials
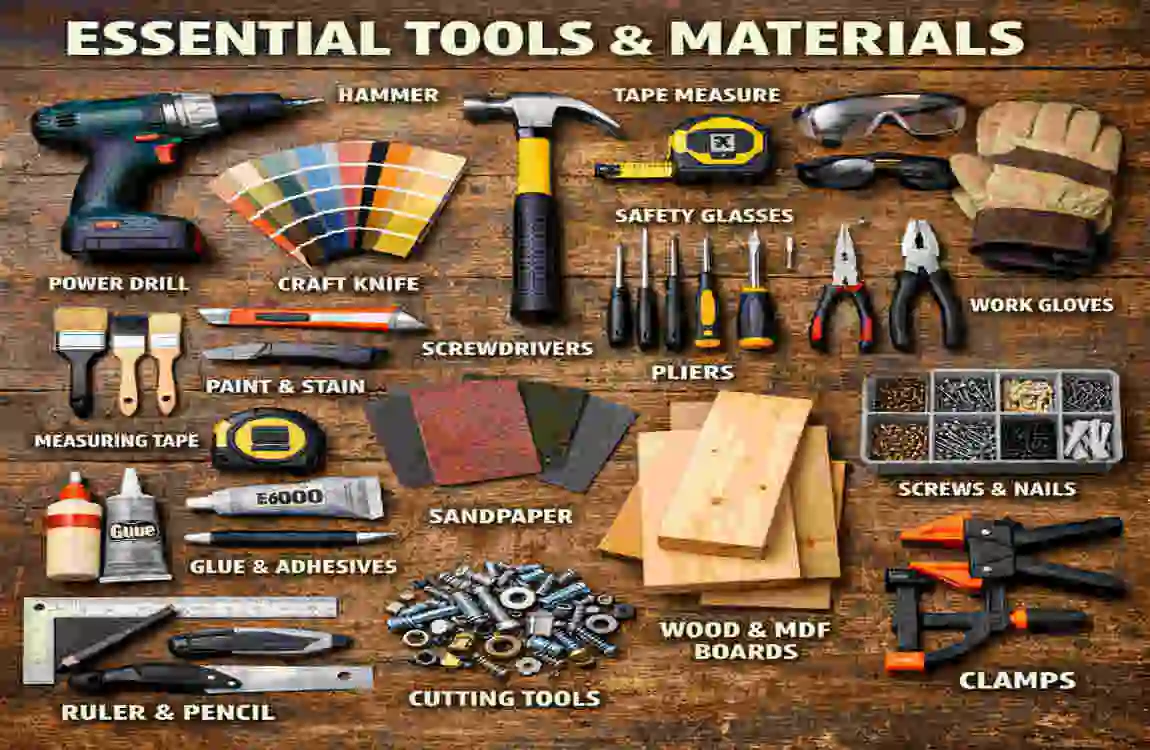
You do not need a factory full of industrial robots to build beautiful furniture. In fact, our grandfathers built heirlooms with nothing but hand tools. For the modern DIYer in Pakistan, a mix of hand tools and a couple of power tools is the sweet spot. You can find almost everything you need at markets like Anarkali or your local hardware store.
Must-Have Tools
To get started, your toolkit should cover measuring, cutting, assembling, and finishing.
- Measuring and Marking: A sturdy measuring tape (at least 5 meters) is non-negotiable. You also need a combination square to ensure your corners are perfectly 90 degrees.
- Cutting: A sharp hand saw is great for beginners. If you want to speed things up, a circular saw is a versatile power tool. For intricate designs or rounded edges, a jigsaw is handy.
- Assembly: A cordless drill is the MVP (Most Valuable Player) of DIY. It drills holes and drives screws. You will also need a hammer, a rubber mallet (for tapping wood without denting it), and a set of chisels for cleaning up joints. Clamps are like having an extra set of hands—never underestimate them.
- Finishing: A sander (orbital sander) saves hours of elbow grease compared to hand sanding.
Wood Choices
Selecting the right wood is critical for the longevity of your project.
- Softwoods: If you are practising, start with Pine (Kail). It is softer, easier to cut, and cheaper, costing around PKR 800 per square foot. It’s great for painted furniture.
- Hardwoods: For furniture that lasts a lifetime, you want Sheesham (Indian Rosewood) or Teak (Sagwan). These are dense, resist termites better, and look stunning with a clear finish. Expect to pay PKR 1500+ per square foot, but the durability is unmatched.
Cost Breakdown
Here is a quick look at what you might invest in to get your home workshop running:
CategoryItemPurposeEstimated Cost (PKR)
Tools Cordless Drill Drilling holes, driving screws 5,000 – 10,000
Tools Hand Saw Cutting lumber manually 1,500 – 2,500
Materials : Sheesham Board (4×8) , Strong, durable cabinets/tables 2,000 / sheet (approx)
Materials Plywood (Lamination) Cabinet boxes/interior structure 1,200 – 1,800 / sheet
Finishes Polyurethane Varnish Protection against water/scratches 500 / litre
Safety Gear Bundle Mask, Goggles, Gloves 1,000
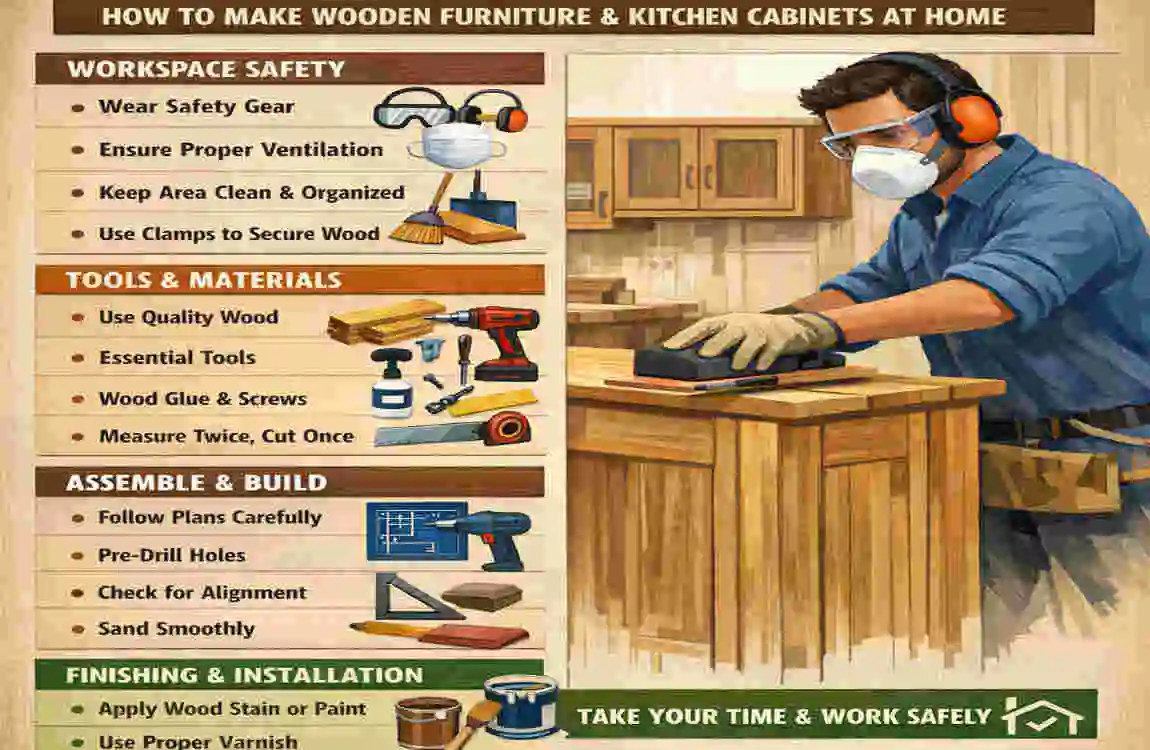
Safety First: Woodworking generates dust and involves sharp blades. Always wear a dust mask to protect your lungs, safety goggles to shield your eyes from flying splinters, and gloves when handling rough timber.
Planning Your Project
The difference between a wobbly table and a sturdy masterpiece happens before you even make the first cut. It happens on paper. “Measure twice, cut once” is the golden rule of carpentry.
Free Plans and Measurements
You don’t need to be an architect. Start with simple sketches.
- Dining Table: A standard 4-seater is roughly 4 feet by 3 feet.
- Stool: A height of 18 inches is standard for seating.
- Basic Kitchen Cabinet: Standard base cabinets are 60 cm deep and 80 cm tall.
Grab a notebook and sketch your idea. Label every single part with its length, width, and thickness. This “cutting list” will be your shopping list when you go to the timber market.
Wood Cutting Guide
When you mark your wood for cutting, remember the “kerf.” The kerf is the thickness of the saw blade itself (usually about 1/8th of an inch). If you don’t account for this, your final piece will be slightly shorter than you planned.
Always mark your line with a sharp pencil or a marking knife. When cutting, cut on the waste side of the line, not right down the middle, to preserve your exact measurement.
Building Simple Wooden Furniture
Let’s dive into the actual building process. We will start with three manageable projects that build the skills you will need for the kitchen cabinets later.
DIY Wooden Table
A table is the perfect first project. It teaches you about structure, legs, and flat surfaces.
The Legs and Apron. Cut four legs from 4×4-inch posts. Standard dining height is 28 to 30 inches. Next, cut the “aprons”—the boards that connect the legs right under the tabletop. For a 4-foot table, you might want two aprons at 40 inches and two at 28 inches.
The Frame Assembly. Connect the aprons to the legs. Traditional woodworkers use mortise and tenon joints (a square peg in a square hole), but as a beginner, you can use pocket screws or heavy-duty corner braces. Drill pilot holes first to stop the wood from splitting. Apply wood glue to the ends of the aprons before screwing them into the legs—glue creates a bond stronger than the wood itself!
The Table Top. You can glue multiple planks together or use a single large sheet of veneered plywood. If using planks, ensure the edges are perfectly straight so they sit flush. Attach the top to the frame using “Z-clips” or screws driven from underneath the apron up into the top. This hides the screws from view.
Smoothing Sand everything. Start with 80-grit paper to remove rough patches, then 120-grit, and finish with 220-grit for a glass-smooth feel.
Wooden Stool or Chair
A chair requires greater precision because it must support weight without wobbling.
Preparation Cut your seat (approx. 18×18 inches). You will need four legs and “stretchers” (the horizontal bars connecting the legs near the bottom for stability).
Joinery. For a stool, you should notch the legs slightly so the stretchers fit securely. If you are feeling adventurous and want a curved backrest (like for a dining chair), Mango wood is a great local option in Lahore, as it is easier to shape than Sheesham.
Assembly Assemble the two side frames first (two legs and a stretcher), let them dry, and then connect the two sides with the front and back stretchers. This ensures the chair sits square on the floor.
Bookshelf Unit
This project introduces you to vertical structures and shelving, which is exactly what a kitchen cabinet is.
The Carcass Cut two long vertical sides (e.g., 6 feet tall). Cut your top and bottom pieces to determine the width (e.g., 3 feet wide).
Adjustable vs Fixed Shelves. For a sturdy unit, permanently secure the middle shelf using screws or dowels to pull the sides together. For the other shelves, you can drill a series of holes on the inside of the side panels and use “shelf pins.” This allows you to move shelves up and down.
The Back Panel Do not skip the back panel! Nailing a thin sheet of plywood to the back of your bookshelf prevents it from leaning (racking) side to side.
Project Comparison Table
Project Difficulty Level, Estimated Time, Wood Quantity Needed
Dining Table Beginner 4 – 6 Hours 1 Sheet + 4 Posts
Simple Stool Easy 2 Hours 0.5 Sheet
Bookshelf Intermediate 6 – 8 Hours 2 Sheets + Backing Board
Making Kitchen Cabinets at Home
Now that you have mastered the basics, you are ready for the main event. Learning how to make wooden furniture and a kitchen cabinet in-house reaches its peak utility here. Kitchen cabinets are essentially just sturdy boxes with doors.
Design and Layout
Kitchens are divided into two zones: Base Units (on the floor) and Wall Units (hanging up high).
- Base Units: Standard depth is 24 inches (60 cm).
- Wall Units: Standard depth is 12 inches (30 cm).
Measure your kitchen floor plan—Mark where the sink and stove go. Decide how many drawers you want versus standard cupboard doors.
Step-by-Step Base Cabinet Build
Cut the Box Components. You are building a box without a top (the countertop goes there) and without a front (the doors go there). Cut two side panels (30 inches high, 24 inches deep). Cut a bottom panel (width varies, 24 inches deep). Cut two narrow strips for the top (to keep the box square).
Assembly Drill “pocket holes” or countersunk holes through the side panels into the bottom panel. Use wood glue and screws. Critical: Use a square tool to ensure the box is perfectly 90 degrees. If it is crooked, your doors will never hang straight.
The Back and Toe Kick Nail a backing board to the rear. At the bottom front, cut out a notch (about 3 inches high and 3 inches deep) for the “toe kick”—this allows you to stand close to the counter without stubbing your toes.
Installing Shelves and Drawers. If you want drawers, install the metal drawer slides before you put the box in the kitchen. It is much easier to screw them in when the box is lying on a workbench.
Doors and Hinges. For a modern look, use Euro-style concealed hinges. These cost about PKR 200 per pair. You will need a special drill bit (Forstner bit) to bore a cup hole in the door for the hinge to sit in. These hinges are adjustable, allowing you to align the doors perfectly later.
Wall Cabinets and Custom Touches
Wall cabinets are built similarly but are shallower.
- Safety Critical: Because these hang on the wall, they need a strong “nailing strip” at the back. This is a thick piece of wood inside the cabinet, near the top, that you drive the mounting screws through into the wall studs.
- Custom Touches: Consider adding soft-close dampers to your drawers or pull-out wire organisers for spices. These small additions make a DIY project feel like high-end Italian design.
Common Mistakes to Avoid
- Over-tightening Screws: This can strip the wood fibres, weakening the joint. Set your drill clutch to a medium setting.
- Ignoring Levels: Floors are rarely perfectly flat. When installing cabinets, use shims (thin wedges of wood) and a spirit level to ensure the cabinets are perfectly horizontal; otherwise, eggs will roll off your counter!
Finishing and Maintenance
The raw wood needs protection from kitchen grease, water, and heat.
- Sanding: Do a final pass with 220-grit sandpaper. Wipe away all the dust with a “tack cloth” or a damp rag.
- Priming (for Paint): If painting, use a high-quality primer first. This seals the wood so it doesn’t soak up all your expensive Paint.
- Varnishing (for Stain): If you are using Sheesham or Teak, you want to see the grain. Apply 3 coats of polyurethane varnish. Lightly sand between coats 1 and 2 for a super smooth finish.
- Oiling: For a natural matte look on Teak, you can use Teak Oil or Linseed Oil. It requires reapplication every year, but it looks rich and organic.
Maintenance: Dust your wooden furniture weekly. For kitchen cabinets, wipe spills immediately. Re-oil your teak surfaces annually to prevent them from drying out and cracking.
Safety and Tips for Lahore Homes
Working in the Pakistani climate presents specific challenges.
- Monsoon Humidity: Wood swells when it’s humid. If you build tight-fitting drawers in the dry winter, they might get stuck in the summer monsoon. Leave a little extra gap (allowance) for movement.
- Ventilation: Workshop dust can harm your lungs. Ensure your workspace is well-ventilated.
- Wood Storage: Store your plywood and boards flat, off the ground, in a dry place. Leaning them against a wall for weeks can cause them to warp or bow.
- Eco-Friendly: Try to source FSC-certified wood or reclaimed timber to minimise environmental impact.
FAQs
Here are the most common questions we get from aspiring woodworkers in Lahore.
Q: How to make wooden furniture and a kitchen cabinet in the house without prior experience? A: Start with the “box” method. Almost all furniture is just a variation of a box. Start with a simple open bookshelf. Once you understand how to square up corners and drive screws straight, a kitchen cabinet is just a bookshelf with a door.
Q: What is the best wood for kitchen cabinets in Pakistan? A: Laminated Plywood (Lasani) is the most popular for the internal structure because it is stable and easy to clean. For visible doors and frames, Sheesham is excellent for a traditional look, while Ash Wood is great for a lighter, modern grain pattern.
Q: What is the cost to build DIY cabinets in Lahore? A: A typical 10×10-foot kitchen might cost PKR 150,000 – 200,000 if you hire a contractor. DIY materials might cost you only PKR 60,000-80,000, saving you significantly on labour and profit margins.
Q: Do I need expensive tools to start? A: No. You can build almost anything with a circular saw, a drill, and a straight edge. You don’t need huge table saws or planers to begin.
Q: How long does a home-built table last? A: If built with solid joinery (screws + glue) and sealed properly against moisture, a DIY table made of hardwood like Sheesham can last for generations—literally 50+ years.