Tiling your house can be a rewarding project, but managing your time effectively is key to achieving a successful outcome without unnecessary stress. Proper planning, prioritizing tasks, and using efficient techniques can help you stay on schedule and ensure quality results from start to finish. With the right time management approach, you can make your house tiling project smooth and satisfying.
Understanding the Tiling Process
Tiling a house involves more than slapping tiles onto a surface. It’s a step-by-step journey that requires patience and precision. If you’re asking how long it takes to tile a house, start by grasping these key stages. Each one builds on the last, and skipping ahead can cause big headaches.
Let’s break it down. Imagine you’re tiling your kitchen floor—every phase matters to get that polished finish.
Surface Preparation: The Foundation of Success
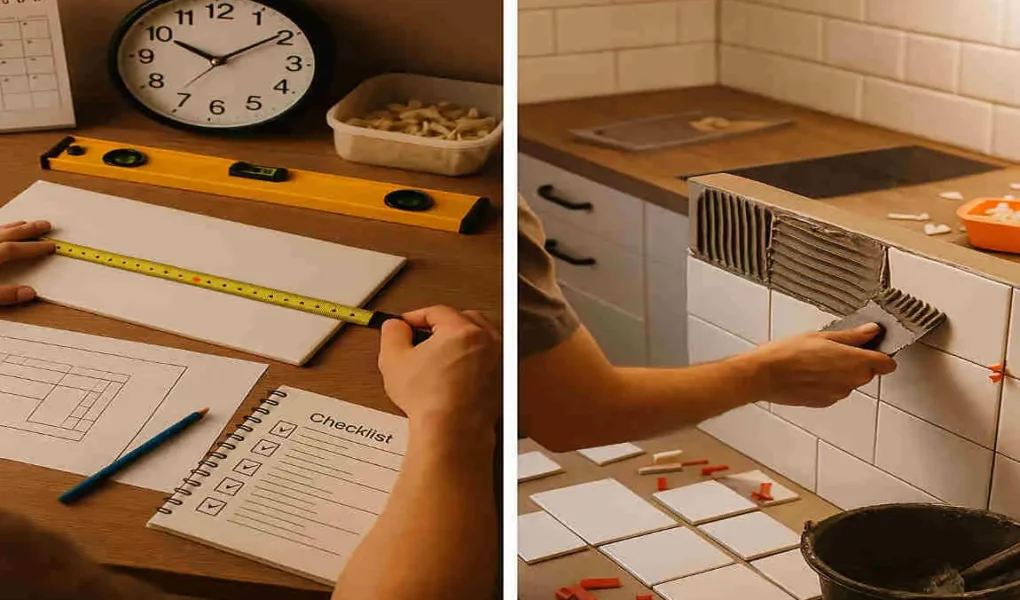
First up, you prepare the surface. This means cleaning away dirt, old grout, or leftover adhesive. You also level the area to ensure it’s flat. A bumpy base leads to crooked tiles, so take your time here.
Typically, this stage takes 4-8 hours for a medium-sized room, depending on the mess. For a whole house, factor in days if multiple areas need work. Why does this matter to you? Skipping it could double your overall tiling project duration and require additional fixes later.
Measuring and Planning Tile Layout
Next, measure everything twice. Sketch out where tiles will go, considering patterns like herringbone or straight lines. This planning prevents waste and awkward cuts.
Expect 2-4 hours per room. Pros use apps or laser tools to speed this up, but as a beginner, give yourself extra time. Remember, good house tiling preparation here sets the pace for the rest of the project.
Cutting and Fitting Tiles
Now, cut tiles to fit edges, corners, or obstacles like pipes. Tools like a wet saw make clean cuts, but it takes practice.
This can eat up 5-10 hours for a standard floor, more if you’re dealing with intricate designs. Factors like tile type—ceramic is easier than stone—affect speed. Ever tried cutting tiles without the proper gear? It’s frustrating, right? Plan to keep things moving.
Applying Adhesive or Mortar
Spread the tile glue (that’s adhesive or mortar) evenly. Use a notched trowel for grip. This bonds tiles to the surface securely.
Allow 1-3 hours per section, plus drying time. Rushing this leads to loose tiles down the line. For outdoor areas, weather plays a role—more on that later.
Laying Tiles and Spacing
Lay the tiles down, pressing them into the glue. Use spacers for even gaps—those little plastic bits keep everything uniform.
This stage typically takes hours for a room, scaling up for a whole house. It’s satisfying to see progress, but fatigue sets in, so pace yourself.
Grouting and Sealing
Finally, fill gaps with grout and seal for protection. Grout needs to be mixed and applied carefully, then wiped off excess.
Grouting adds 4-6 hours, with sealing another 1-2. Drying times vary—24 hours minimum. These steps significantly impact your total tiling timeline, so don’t underestimate their importance.
Overall, factors such as house size, tile type (porcelain vs. mosaic), and project complexity can affect these estimates. A small bathroom might wrap in a weekend, but a whole house? We’re talking weeks. Stay tuned as we explore how long it takes to tile a home in more detail.
How Long Does It Take to Tile a House?
So, you’ve got the basics—now let’s get to the heart of it. How long does it take to tile a house? The answer isn’t one-size-fits-all. It depends on the areas you’re tiling, who’s doing the work, and the project’s scale. We’ll look at averages, pro vs. DIY differences, and real examples to give you a clear picture.
Picture this: You’re excited to revamp your space, but unrealistic expectations can kill the vibe. Let’s set you up for success with honest insights into tiling project duration.
Tiling Different Areas: Time Estimates
Floors in living rooms or hallways often take 1-3 days per room, assuming 100-200 square feet. Walls, like those in showers, may require 2-4 days due to vertical challenges.
Bathrooms and kitchens are trickier—expect 3-7 days each because of fixtures and moisture concerns. Outdoor spaces, such as patios, add 4-10 days, weather permitting.
For a whole house (say, 2,000 square feet), pros might finish in 2-4 weeks. DIY? Double that to 4-8 weeks. These are ballparks—your mileage varies.
Pros vs. DIY: Timing Showdown
Professional installers bring speed and skill. They tile a house in half the time a newbie would, thanks to experience and tools. A pro team could handle a medium home in 10-20 days.
DIY saves money but stretches the tiling timeline. If you’re learning as you go, add 50-100% more time for mistakes. Ask yourself: Do you have weekends free, or is hiring worth the quicker finish?
Real-Life Case Examples
You may also read (8 qualities to look for in a home builder).
Consider a 1,500-square-foot home with basic ceramic floor tiles. Pros completed it in 15 days, working 8-hour shifts. DIY for the same? One homeowner reported 35 days over evenings and weekends.
For a complex kitchen with a mosaic backsplash, it took professionals 5 days versus a DIYer’s 12. Outdoor tiling on a rainy week? That pushed a project from 7 to 14 days. These stories highlight why planning your tiling project duration matters.
Busting Common Misconceptions
Many think tiling is a quick weekend job—wrong! Underestimating prep time leads to frustration—another myth: All tiles install at the same speed. Small mosaics take longer than large slabs.
Don’t fall for these traps. Realistic expectations make your project enjoyable. Up next, we’ll dig into what really affects how long it takes to tile a house.
Key Factors Affecting Tiling Duration
Tiling isn’t a race, but certain elements can slow you down or speed things up. Understanding these helps you manage your tiling timeline better. Let’s explore them one by one—think of this as your roadmap to avoid surprises.
What factors are at play in your project? Reflect on your home as we go.
House Size and Layout Complexity
Bigger houses mean more square footage, so naturally, they take longer. A cozy bungalow takes 1-2 weeks, while a sprawling mansion needs a month.
Complex layouts—with curves, angles, or multiple levels—add hours. Straight rooms are faster. Measure your space early to gauge this.
Tile Type and Size
Large porcelain tiles lay quickly, covering more ground per piece. Tiny mosaics? They demand precision and time—think days extra.
Material matters too: Natural stone cuts slower than vinyl. Choose wisely based on your patience level.
Surface Condition and Prep Needs
Rough or damaged surfaces require more extensive leveling or repairs, which can extend the preparation time by several days. New builds are easier than old homes with hidden issues.
Inspect early—catch problems to keep your tiling project duration on track.
Installer Skill and Experience
Beginners face a learning curve, adding 20-50% time. Seasoned pros zip through efficiently.
If you’re DIY, build skills with small tests. Or hire experts for speed.
Tools and Materials Readiness
Having everything on hand saves trips to the store. Delivery delays can halt work for days.
Stock up ahead—it’s a simple time management tip.
Weather or Environmental Conditions
Outdoor tiling dislikes rain or extreme temperatures, which slows down the drying process. Indoor? Humidity can affect adhesives.
Plan around forecasts to avoid forced pauses.
Here’s a quick table to summarize how these factors impact time:
Factor Low Impact (Shorter Time)High Impact (Longer Time)Estimated Time Addition
House Size Small (under 1,000 sq ft) Large (over 2,000 sq ft) +1-2 weeks
Tile Type Large slabs Small mosaics +3-7 days
Surface Condition: Smooth and ready, Rough/needs repairs +2-5 days
Installer Skill Professional Beginner DIY +50-100% overall
Weather (Outdoor) Dry and mild Rainy/cold +1-10 days
This table illustrates why tailoring your approach is crucial.
Time Management Tips for Successful Tiling Projects
Excellent tiling comes from thoughtful planning, not just hard work. These time management tips for house tiling will help you stay on schedule without burning out. Let’s make your project efficient and fun.
You can do this—apply these to your own setup.
Start with Solid Planning and Preparation
Measure twice, buy once. Order extra tiles (10-15% more) to cover breaks. Clear the work area of furniture days ahead.
This house tiling preparation saves time. Set a timeline: Week 1 for prep, Week 2 for laying.
Schedule Realistic Phases and Breaks
Break the job into chunks—tile one room at a time. Work 4-6 hours daily to avoid fatigue.
Include breaks; tiredness leads to errors. Use a calendar app to track progress.
Assemble a Team or Assess DIY Feasibility
Going solo? Ensure you have the time. For bigger jobs, recruit friends or hire help.
Weigh if DIY fits your schedule—sometimes pros save weeks.
Choose High-Quality, Easy Materials
Opt for pre-cut tiles or quick-dry glues. They reduce handling time.
Quality pays off in fewer fixes later.
Leverage Tools and Tech for Speed
Invest in efficient equipment, such as automatic mixers. Tile leveling systems ensure flatness without constant checks.
These cut hours from your tiling timeline.
Allow Drying and Curing Time
Don’t rush grout—let it set 24-48 hours. Seal properly to avoid redo’s.
Patience here prevents delays.
Buffer for the Unexpected
Add 20% extra time for surprises like delayed shipments or tweaks.
This keeps stress low.
- Pro Tip List: Quick ways to manage time:
- Start early in the day when energy is high.
- Maintain a cleanup routine to keep the workflow running smoothly.
- Track daily progress in a journal.
- Reward milestones with breaks or treats.
Follow these, and your project flows smoothly.
Tools and Resources to Speed Up Your Tiling

The right tools turn a slog into a breeze. Let’s talk about what accelerates your tiling project duration without sacrificing quality.
Ever felt overwhelmed by options? I’ll simplify it for you.
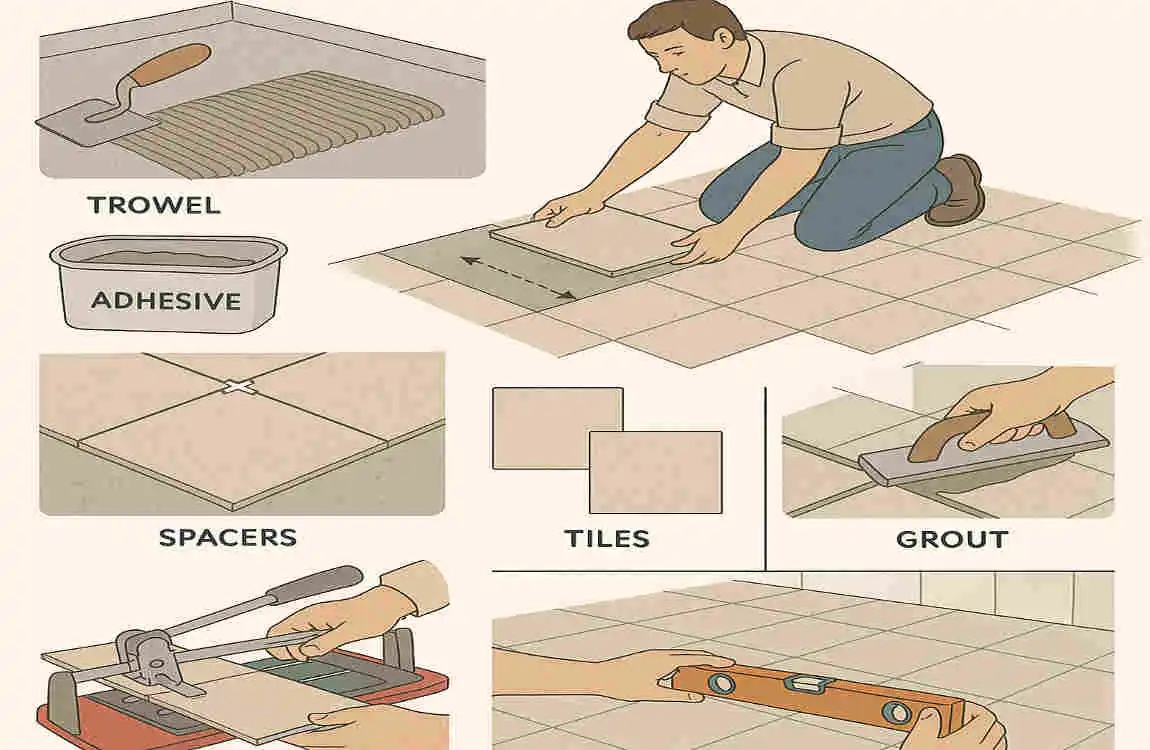
Essential Tools for Efficiency
Grab a tile cutter for precise edges—manual ones work for basic tasks, while electric ones are ideal for professionals.
Spacers and adhesive spreaders ensure even application. A rubber mallet taps tiles into place gently.
These basics can halve cutting time.
Time-Saving Technologies and Methods
Pre-mixed adhesives skip mixing hassles, ready in minutes. Tile leveling clips automatically keep everything flat.
Laser levels project perfect lines, eliminating the need for string and chalk.
Hiring Pros vs. DIY: Time Pros and Cons
Pros bring speed but cost more—ideal for tight schedules.
DIY saves cash but demands your time. Pros: Finish in days. Cons: Less control.
Choose based on your priorities.
Numbered list of steps to decide:
- Assess your skill level honestly.
- Calculate available time vs. project size.
- Get quotes from locals.
- Test a small area yourself.
- Commit to the path that fits your life.
Making wise choices here optimizes your tiling timeline.
Common Challenges and How to Overcome Them
No project is perfect—challenges pop up. However, with these tips, you’ll be able to handle them without derailing your tiling project’s duration.
What hurdles might you face? Let’s tackle them head-on.
Dealing with Surface Issues or Tile Damage
Uneven floors? Level with self-leveling compound early.
Damaged tiles during shipping? Order extras and inspect on arrival.
Fix these quickly to avoid rework.
Measurement and Layout Mistakes
Double-check measurements—use graph paper for layouts.
If off, remove and redo promptly. Practice on cardboard first.
Weather Delays for Outdoor Work
Check forecasts; tent areas if needed.
Switch to indoor tasks during rain. Flexible scheduling helps.
Identify issues early by daily inspections. Address them fast—it’s key to staying on track.
Post-Tiling Care and Final Steps
You’re almost done! But post-tiling care ensures longevity. Don’t skimp here—it saves future time and money.
How can you wrap up strong? Let’s see.
Letting Grout and Sealant Set Properly
Wait the full curing time—usually 72 hours before heavy use.
This prevents cracks. Patience pays.
Cleanup and Inspection Tips
Wipe away haze with a damp sponge. Inspect for loose spots.
Fix any now to avoid later headaches.
Preventing Future Repairs
Seal annually for moisture protection. Clean gently to maintain.
Reasonable care means your tiles last for decades, freeing up your time.
You may also read (mastering lumber calculations for your new home project).