Painting the interior of your new home is an exciting project that can transform your space into a beautiful and inviting living area. A professional-quality paint job not only enhances the aesthetics of your interior but also provides essential protection for your walls.
Understanding the Basics of Interior House Painting
What Makes Painting a New Interior Different from Repainting
When you’re painting a new house interior, you’re starting with a clean slate. Unlike repainting, which requires dealing with existing paint, stains, or imperfections, painting a new interior allows you to create a flawless finish from scratch. This means you have more control over the final result and can achieve a truly professional look.
Types of Interior Paint Finishes and When to Use Them
Choosing the right paint finish is crucial for achieving the desired look and durability. Here are some standard interior paint finishes and when to use them:
- Flat/Matte: Ideal for low-traffic areas, such as bedrooms or formal dining rooms, as it effectively hides imperfections but is less durable.
- Eggshell: A popular choice for living rooms, hallways, and bedrooms, offering a subtle sheen and good durability.
- Satin: Suitable for high-traffic areas like kitchens and bathrooms, as it’s easy to clean and resistant to moisture.
- Semi-Gloss/Gloss: Best for trim, doors, and cabinets, providing a high sheen and excellent durability.
Essential Tools and Materials Needed for Painting a New House Interior
To ensure a successful painting project, you’ll need the following tools and materials:
- Paint brushes and rollers
- Paint trays and liners
- Painter’s tape
- Sandpaper and sanding blocks
- Putty knives and spackling compound
- Primer and paint
- Drop cloths and plastic sheeting
- Ladder or step stool
- Caulk and caulk gun
- Cleaning supplies (e.g., soap, water, rags)
Preparing to Paint a New House Interior
Importance of Proper Preparation for a Flawless Finish
Proper preparation is the key to achieving a flawless paint job. By taking the time to prepare your walls and surfaces correctly, you’ll ensure that your paint adheres well, covers evenly, and lasts longer. Skipping or rushing through the preparation process can lead to disappointing results and necessitate costly repairs down the line.
How to Assess Walls and Surfaces in a New House (Drywall, Plaster, Primers)
Before you start painting, it’s essential to assess the condition of your walls and surfaces. In a new house, you may encounter drywall or plaster, each of which requires slightly different preparation techniques. Here’s what to look for:
- Drywall: Check for any imperfections, such as dents, nail pops, or uneven seams. These will need to be sanded and patched before painting.
- Plaster: Look for cracks or loose areas that may need to be repaired. Plaster can be more challenging to work with than drywall, so take your time to ensure a smooth finish.
- Primers: Depending on the type of surface and paint you’re using, you may need to apply a primer. Primers help the paint adhere better and can cover up any stains or discolorations on the surface.
Step-by-Step Prep Process: Cleaning, Sanding, Patching Holes and Cracks
Follow these steps to prepare your walls and surfaces for painting:
- Clean the walls: Use a mild detergent and water to remove any dust, dirt, or grease from the walls. Rinse thoroughly and allow the walls to dry completely.
- Sand the walls: Use a fine-grit sandpaper to smooth out any imperfections, such as rough patches or seams. Wipe away any dust with a damp cloth.
- Patch holes and cracks: Use a putty knife and spackling compound to fill in any holes or cracks. Allow the compound to dry, then sand it to a smooth finish.
- Caulk gaps and seams: Use a caulk gun to fill in any gaps or seams between walls, trim, and baseboards. Smooth out the caulk with a damp finger or tool.
Choosing the Right Primer for New Interiors and Why Primer is Essential
Selecting the right primer is crucial for achieving a professional-quality paint job. Primers help the paint adhere better, cover up any stains or discolorations, and create a smooth, even surface for painting. When choosing a primer for your new interior, consider the following factors:
- Surface type: Different primers are formulated for specific surfaces, such as drywall, plaster, or wood.
- Paint type: Some primers are designed to work best with certain kinds of paint, such as latex or oil-based.
- Color: If you’re painting over a dark color or stained surface, consider using a tinted primer to help cover the existing color more effectively.
How to Choose the Perfect Paint Colors for Your New Home Interior
Tips for Selecting Colors that Complement Your Interior Style and Mood
Choosing the right paint colors for your new home interior can be both exciting and challenging. Here are some tips to help you select colors that complement your interior style and create the desired mood:
- Consider your style: Think about the overall style of your home, whether it’s modern, traditional, or eclectic. Select colors that complement your style and create a cohesive appearance.
- Think about the mood: Different colors can evoke different emotions and moods. For example, cool blues and greens can create a calming atmosphere, while warm reds and yellows can energize a space.
- Take lighting into account: The lighting in your home can significantly affect how colors appear. Test your paint colors in both natural and artificial lighting to ensure they appear as you intended.
Understanding Color Psychology in Interior Painting
Color psychology is the study of how colors can influence our emotions, behaviors, and perceptions. When choosing paint colors for your new home interior, consider the following color associations:
- Red: Stimulating, energizing, and attention-grabbing
- Orange: Warm, friendly, and inviting
- Yellow: Cheerful, optimistic, and uplifting
- Green: Calming, soothing, and refreshing
- Blue: Relaxing, tranquil, and peaceful
- Purple: Luxurious, creative, and sophisticated
- Pink: Soft, romantic, and nurturing
- Brown: Earthy, warm, and comforting
- Gray: Neutral, calming, and sophisticated
- White: Clean, fresh, and minimalist
- Black: Dramatic, bold, and sophisticated
Using Paint Samples and Testing Colors on Your Walls
Before committing to a paint color, it’s essential to test it out in your space. Here’s how to use paint samples and test colors on your walls:
- Purchase paint samples: Most paint stores offer small sample sizes of their colors. Buy a few samples of the colors you’re considering.
- Paint large swatches: Use the paint samples to paint large swatches on your walls, about 2 feet by 2 feet. Paint the swatches at different times of day to see how the color looks in various lighting conditions.
- Live with the color: Leave the swatches on your walls for a few days to see how you feel about the color over time. Consider how the color makes you think and whether it complements your furniture and decor.
Trending Paint Colors for 2025
As we look ahead to 2025, several paint colors are emerging as popular choices for new home interiors. Here are some of the trending colors to consider:
- Soft pastels: Gentle shades of pink, blue, and green are becoming increasingly popular for creating a calming and soothing atmosphere.
- Warm neutrals: Warm beige, taupe, and gray tones are versatile and timeless, making them perfect for creating a cozy and inviting space.
- Rich jewel tones: Deep shades of emerald, sapphire, and amethyst add a touch of luxury and sophistication to any room.
- Earthy tones: Natural colors like terracotta, olive green, and warm brown create a connection to nature and a sense of calm.
- Bold and bright: Vibrant shades of yellow, orange, and red are perfect for adding a pop of color and energy to your space.
Step-by-Step Guide: How to Paint a New House Interior Like a Pro
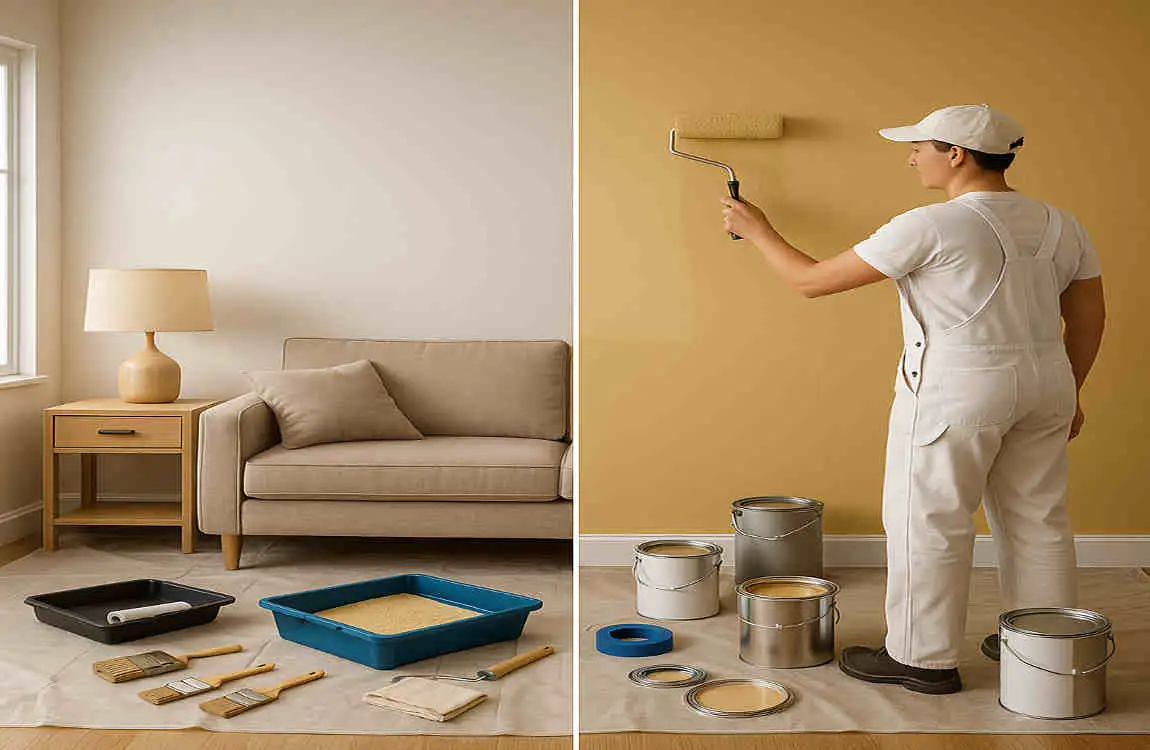
Setting Up Your Workspace: Protecting Floors, Furniture, and Fixtures
Before you start painting, it’s essential to set up your workspace properly to protect your floors, furniture, and fixtures from paint splatters and spills. Follow these steps:
- Move furniture: If possible, move furniture out of the room or to the center and cover it with drop cloths.
- Cover floors: Use drop cloths or plastic sheeting to cover your floors, securing them with painter’s tape.
- Protect fixtures: Use painter’s tape to cover light switches, outlets, and any other fixtures you don’t want to paint.
- Remove hardware: Take off any hardware, such as door knobs or cabinet pulls, to make painting easier and prevent paint from getting on them.
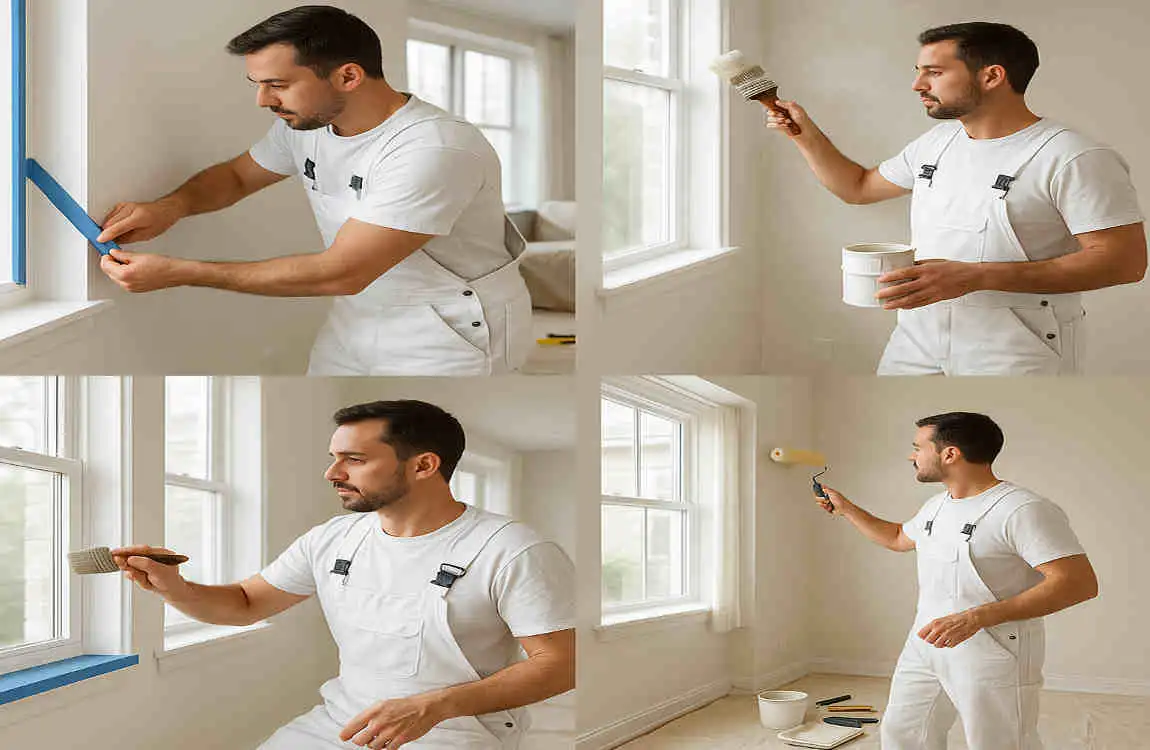
Cutting in Around Edges, Corners, and Trim for a Clean Look
Cutting in is the process of painting along the edges, corners, and trim of your walls to create a clean and professional-looking finish. Here’s how to do it:
- Load your brush: Dip your brush into the paint, tapping off any excess on the side of the can.
- Start at the top: Begin cutting in at the top of the wall, working your way down. Use smooth, even strokes to apply the paint.
- Use the proper technique: Hold the brush at a 45-degree angle and use the tip to paint along the edges and corners. For trim, use a steady hand to paint along the edge, feathering the paint out towards the wall.
- Work in sections: Cut in one section at a time, about 2-3 feet wide, before moving on to the next section.
Roller Techniques for Even Coverage on Walls and Ceilings
Using a roller is the most efficient way to paint large areas of your walls and ceilings. Follow these tips for even coverage:
- Load your roller: Dip your roller into the paint tray, rolling it back and forth to distribute the paint evenly.
- Start at the top: Begin rolling at the top of the wall or ceiling, working your way down. Use a “W” or “M” pattern to apply the paint, then fill in the gaps with long, even strokes.
- Maintain even pressure: Apply even pressure to the roller, using your body weight to help you maintain a consistent pressure.
- Overlap your strokes: Overlap your roller strokes by about half to ensure even coverage and prevent lap marks.
Applying Multiple Coats: When and How
Applying multiple coats of paint is often necessary to achieve a professional-quality finish. Here’s when and how to do it:
- When to apply numerous coats: Most paints require at least two coats for full coverage and a smooth finish. If you’re painting over a dark color or a stained surface, you may need to apply additional coats.
- How to apply multiple coats: Allow the first coat to dry completely, following the manufacturer’s recommended drying time. Once dry, lightly sand the surface to smooth out any imperfections. Apply the second coat using the same techniques as the first, ensuring even coverage and a smooth finish.
Dealing with Common Challenges: Drips, Streaks, and Uneven Coverage
Even with careful preparation and painting techniques, you may encounter some common challenges. Here’s how to deal with them:
- Drips: If you notice drips while painting, use a brush to smooth them out immediately. If the paint has already dried, wait until it’s scorched, then sand the drip smooth and touch up the area with a small brush.
- Streaks: Streaks can occur if you don’t maintain even pressure or if you don’t overlap your roller strokes enough. To fix streaks, wait until the paint is dry, then lightly sand the area and apply another coat, ensuring even coverage.
- Uneven coverage: If you notice uneven coverage, it may be due to not applying enough paint or not overlapping your strokes enough. To fix this, apply another coat, ensuring you use enough paint and overlap your strokes correctly.
Tips for Efficient and Safe Painting
Best Practices to Save Time While Maintaining Quality
Painting your new house interior can be a time-consuming process, but with these best practices, you can save time while still achieving a high-quality finish:
- Work in sections: Divide your room into smaller sections and focus on completing one section at a time. This helps you stay organized and prevents you from feeling overwhelmed.
- Use the right tools: Invest in high-quality brushes, rollers, and other painting tools to make your job easier and more efficient.
- Keep a clean workspace: Take the time to keep your workspace clean and organized. This will help you work more efficiently and prevent accidents.
- Take breaks: Don’t try to paint for hours on end without taking breaks. Step back and assess your work periodically to ensure you’re maintaining a high level of quality.
Importance of Ventilation and Personal Protective Equipment
When painting, it’s essential to prioritize ventilation and personal protective equipment to ensure your safety and the quality of your work:
- Ventilation: Open windows and doors to provide adequate ventilation while painting. This helps to reduce the concentration of paint fumes in the air and promotes faster drying.
- Personal protective equipment: Wear a mask or respirator to protect yourself from inhaling paint fumes. Use gloves to protect your hands from paint and chemicals, and wear old clothes or a painting smock to protect your skin and clothing.
Keeping a Consistent Paint Schedule to Avoid Problems
Maintaining a consistent paint schedule is crucial for achieving a professional-quality finish and avoiding common problems. Here are some tips:
- Paint in the right conditions: Choose a day with moderate temperature and humidity to paint. Avoid painting in direct sunlight or in very cold or hot conditions.
- Work at a steady pace: Take your time and work at a steady pace to ensure even coverage and a smooth finish. Rushing through the painting process can lead to drips, streaks, and uneven coverage.
- Allow adequate drying time: Follow the manufacturer’s recommended drying time between coats and before using the painted surface. Rushing the drying process can lead to smudging, sticking, or other problems.
Finishing Touches and Cleanup
Inspecting for Missed Spots and Touch-Ups
Once you’ve finished painting, take the time to inspect your work for any missed spots or areas that need touch-ups. Use a small brush and the same paint to carefully touch up any imperfections, ensuring a flawless finish.
Techniques for Painting Trims, Baseboards, and Doors
Painting trims, baseboards, and doors requires more precision than painting walls and ceilings. Here are some techniques to help you achieve a professional-quality finish:
- Use a small brush: Use a small, angled brush to paint trims and baseboards, allowing you to get into tight spaces and achieve crisp lines.
- Tape off edges: Use painter’s tape to protect the walls and floors from paint. Apply the tape carefully, pressing it down firmly to prevent paint from bleeding underneath.
- Work in small sections: Paint trims and baseboards in small sections, about 2-3 feet at a time. This allows you to maintain a wet edge and prevents lap marks.
- Use a steady hand: Take your time and use a steady hand when painting doors. Use a small brush to paint the edges and corners, then use a roller or larger brush to paint the flat surfaces.
How to Clean Brushes, Rollers, and Equipment Correctly
Properly cleaning your brushes, rollers, and other equipment is essential for maintaining their quality and extending their lifespan. Here’s how to do it:
- Brushes: Rinse your brushes thoroughly with water (for latex paint) or mineral spirits (for oil-based paint). Use your fingers to work the cleaning solution into the bristles, then rinse until the water runs clear. Shake out excess water and reshape the bristles before hanging the brush to dry.
- Rollers: Remove the roller cover from the frame and rinse it thoroughly with water (for latex paint) or mineral spirits (for oil-based paint). Use a brush or your fingers to work the cleaning solution into the roller, then rinse until the water runs clear. Squeeze out excess water and hang the roller to dry.
- Trays and other equipment: Rinse your paint trays, buckets, and other equipment with water (for latex paint) or mineral spirits (for oil-based paint). Use a brush or rag to remove any remaining paint, then rinse until the water runs clear. Allow the equipment to dry completely before storing it.
Proper Disposal of Paint and Materials
Properly disposing of paint and materials is crucial for protecting the environment and ensuring compliance with local regulations. Here’s how to do it:
- Paint: If you have leftover paint, consider donating it to a local charity or recycling center. If you need to dispose of it, check with your local waste management facility for guidelines on how to do so safely.
- Paint cans: Empty paint cans can be recycled with other metal or plastic containers. Ensure that you rinse out any remaining paint and allow the cans to dry entirely before recycling.
- Rags and drop cloths: If your rags and drop cloths are still in good condition, wash them and reuse them for future projects. If they’re no longer usable, dispose of them in accordance with local regulations.
- Brushes and rollers: If your brushes and rollers are no longer usable, dispose of them according to local regulations. Some areas permit you to dispose of them with regular trash, while others require special disposal methods.
Maintenance Tips to Keep Your New Paint Job Looking Fresh
How to Maintain and Clean Painted Surfaces Over Time
To keep your new paint job looking fresh and beautiful, follow these maintenance and cleaning tips:
- Dust regularly: Use a soft, dry cloth or a duster to gently remove dust and dirt from your painted surfaces regularly. This helps to prevent the buildup of grime and keeps your paint looking clean.
- Clean with mild soap and water: For more stubborn dirt or stains, use a mild soap and water solution to clean your painted surfaces. Avoid using harsh chemicals or abrasive cleaners, as these can damage the paint.
- Avoid excessive moisture: Excessive moisture can cause paint to peel or blister. Use a dehumidifier or fans to control moisture levels in your home, and fix any leaks or water damage promptly.
When to Consider Repainting or Touch-Ups for Longevity
Over time, your paint job may start to show signs of wear and tear. Here’s when to consider repainting or touch-ups to maintain the longevity of your paint:
- Fading or discoloration: If your paint starts to fade or discolor due to sun exposure or other factors, it may be time to repaint. Select a high-quality paint with UV protection to help prevent future fading.
- Chipping or peeling: If you notice chipping or peeling paint, it’s essential to address it promptly. Scrape away the damaged paint, sand the area smooth, and apply a new coat of paint to prevent further damage.