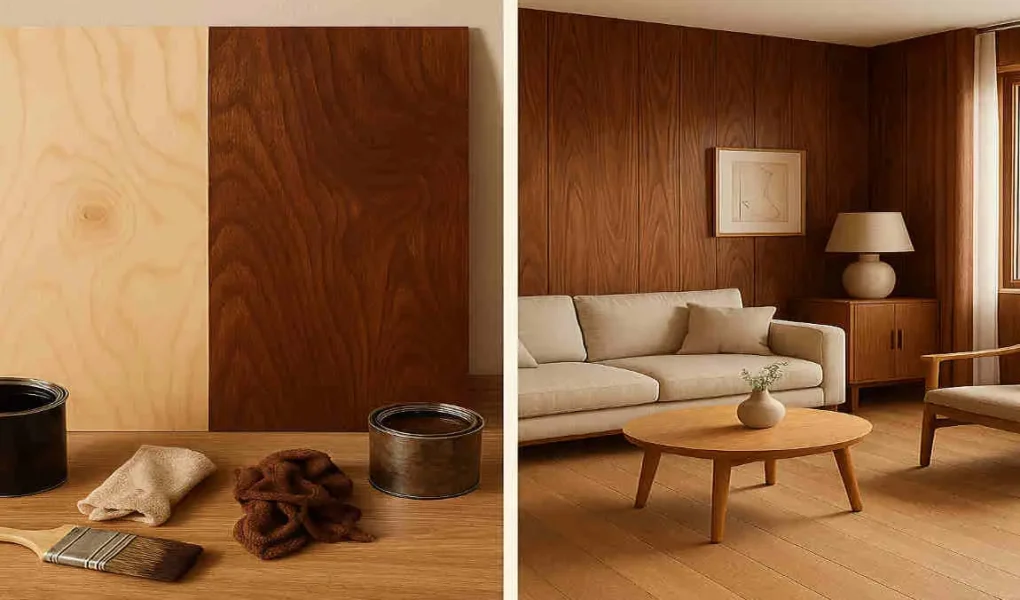
Staining plywood is a fantastic way to enhance the beauty and durability of your house finishes. By using the best house-staining plywood techniques, you can transform ordinary plywood into stunning, long-lasting surfaces that elevate your home’s aesthetics. In this comprehensive guide, we’ll walk you through the process of staining plywood, from understanding the material to achieving professional-looking results.
Understanding Plywood and Its Characteristics
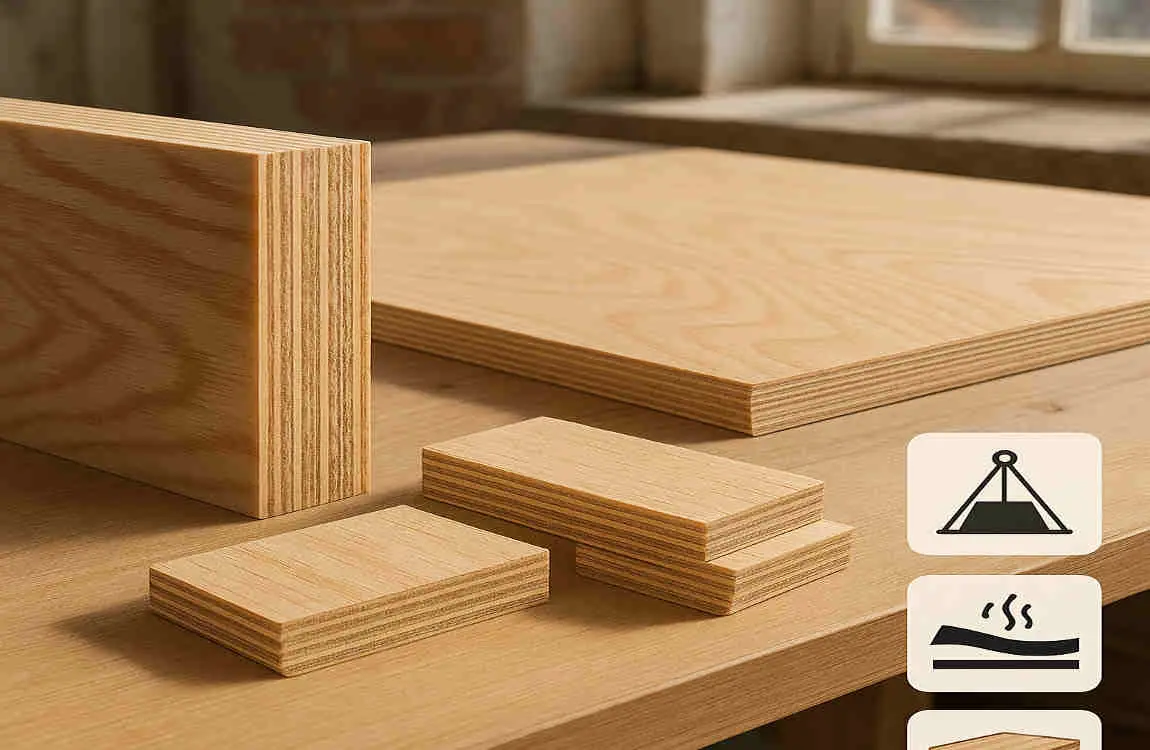
Plywood is a popular choice for house finishes due to its versatility, affordability, and stability. It’s made by layering thin sheets of wood veneer and bonding them together with adhesive, creating a strong and resistant panel.
When it comes to staining, it’s essential to understand the differences between plywood types:
- Softwood plywood: Made from coniferous trees like pine or fir, softwood plywood is more prone to uneven stain absorption and blotchiness.
- Hardwood plywood: Produced from deciduous trees such as oak or maple, hardwood plywood tends to absorb stain more evenly, resulting in a more consistent finish.
Choosing the right plywood grade is crucial for visible house finishes. Look for grades like A or B, which have fewer defects and smoother surfaces, making them ideal for staining.
Preparing Plywood for Staining: The Essential First Step
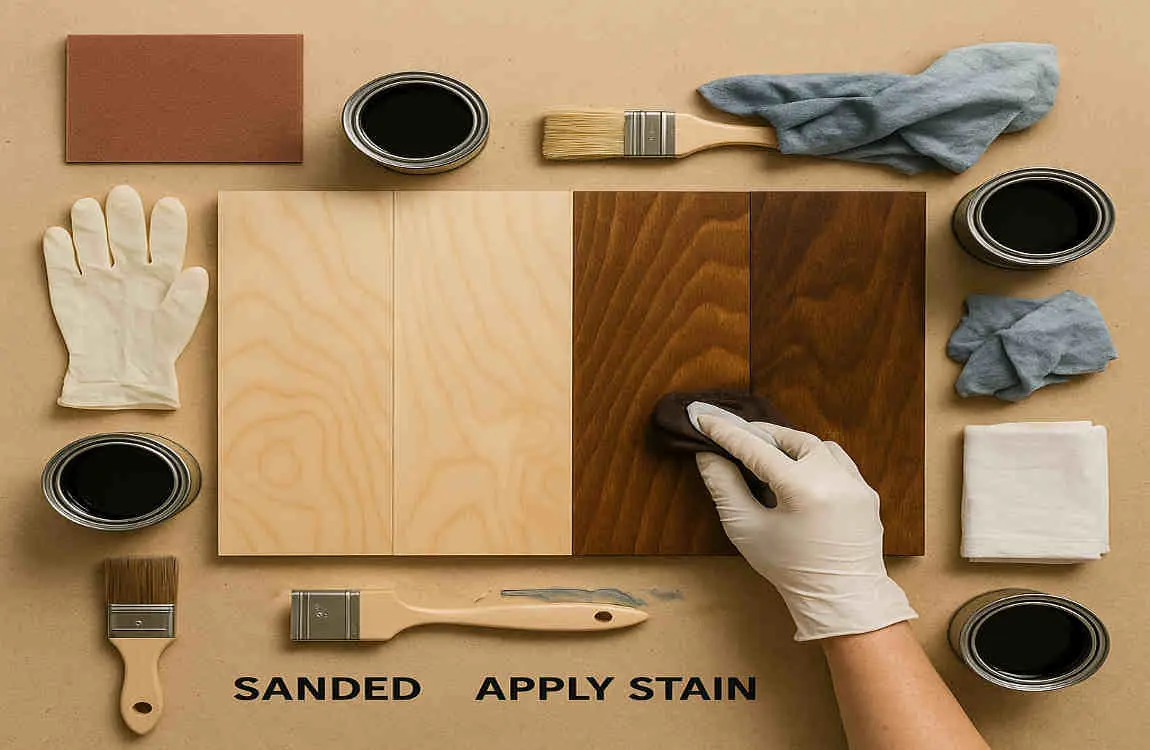
Proper surface preparation is key to achieving stunning stained plywood finishes. Follow these steps to ensure your plywood is ready for staining:
You may also read (emergency residential locksmith for home what to expect).
- Sanding: Use a fine-grit sandpaper (120-150 grit) to smooth the surface, always sanding along the wood grain to avoid scratches.
- Cleaning: Remove dust, oils, and residues using a tack cloth or vacuum cleaner. A clean surface ensures even stain absorption.
- Conditioning: Apply a wood conditioner or pre-stain treatment, especially on softwoods, to prevent blotchiness and promote uniform stain absorption.
- Filling: Use wood filler to repair any cracks or holes, then sand the filled areas smooth.
- Workspace setup: Cover surrounding surfaces with drop cloths or plastic sheeting to protect them from stain drips and splatters.
Choosing the Best Stain for House Plywood Projects
Selecting the right stain is crucial for achieving the desired look and durability of your plywood house finishes. Here’s an overview of the main types of wood stains:
- Oil-based stains: These stains penetrate deep into the wood, providing rich colour and a durable finish. They take longer to dry and require mineral spirits for cleanup.
- Water-based stains: With faster drying times and easier cleanup using soap and water, water-based stains are more eco-friendly. However, they may raise the wood grain slightly.
- Gel stains: The thick consistency of gel stains makes them ideal for controlling the application, especially on blotchy softwoods. They sit on top of the wood rather than penetrating deeply.
Consider these factors when choosing the best house staining plywood options:
- Desired colour and opacity
- Drying time and ease of cleanup
- Durability and protection needs
- Compatibility with the plywood type
Always test your chosen stain on a scrap piece of plywood to preview the final results before applying it to your project.
Step-by-Step Guide to Staining Plywood
Now that you’ve prepared your plywood and selected the best stain, it’s time to apply it. Follow these steps for professional-looking results:
- Prepare: Sand, clean, and condition the plywood as described earlier.
- Apply the stain:
- Use a brush, rag, or foam applicator to apply the stain in the direction of the wood grain.
- Work in small sections to maintain a wet edge and avoid streaks.
- Wipe off excess stain with a clean cloth, controlling the darkness of the finish.
- Dry and cure: Allow the stain to dry and cure according to the manufacturer’s instructions. Drying times vary depending on the type of stain used.
- Apply additional coats: If a deeper colour is desired, apply additional coats of stain, following the drying times between each coat.
- Final sanding: Once the final coat of stain is completely dry, lightly sand the surface with a fine-grit sandpaper (220-320 grit) to smooth any raised wood fibres.
- Seal and finish: Protect your stained plywood by applying a clear sealer like polyurethane or polycrylic. This will enhance the durability and resilience of the finish.
You may also read (old condominium new vibe stylish home upgrades to modernize your unit).
Remember to work in a well-ventilated area and wear protective gear, such as gloves and a dust mask, when staining and finishing your plywood.
Common Mistakes to Avoid When Staining Plywood
To ensure the best house staining plywood results, avoid these common mistakes:
- Applying stain on unprepared plywood surfaces
- Skipping wood conditioner on softwoods, leading to blotchiness
- Using too much stain or applying it unevenly
- Not wiping off excess stain properly, resulting in a sticky or uneven finish
- Rushing drying times between coats, causing the stain to peel or blister
- Ignoring proper sealing or finishing after staining, leaving the surface vulnerable to damage
Maintenance Tips for Long-Lasting Stained Plywood Finishes in Your Home
To keep your stained plywood house finishes looking stunning for years to come, follow these maintenance tips:
- Clean stained plywood surfaces regularly using a soft, damp cloth and mild detergent. Avoid harsh chemicals that can damage the finish.
- Reapply the clear sealer or touch up the stain as needed, typically every 1-2 years, depending on wear and tear.
- Protect stained plywood from moisture damage by addressing leaks promptly and using coasters on horizontal surfaces.
- Minimise UV fading by using window treatments or applying UV-resistant finishes, especially for surfaces exposed to direct sunlight.
You may also read (maximizing space self storage solutions for home renovations).