Imagine the freedom of the open road, exploring new destinations, and the comfort of your own home on wheels. That’s the allure of the RV lifestyle. But what happens when you need to take care of the less glamorous aspects of RV living, like managing waste? That’s where connecting your RV to your house sewer system comes in handy.
Properly connecting your RV to your house sewer not only ensures sanitation and convenience but also allows you to enjoy the best of both worlds – the freedom of the road and the comfort of modern home.
Understanding RV Sewer Systems and House Sewers
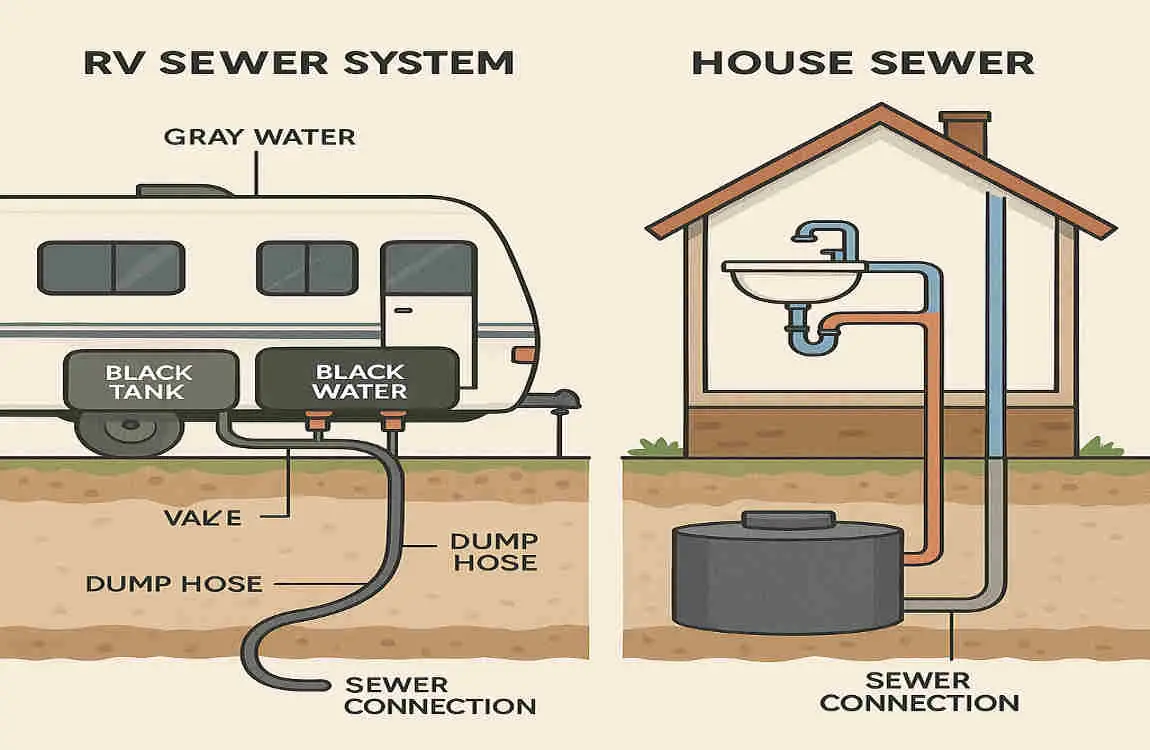
Before we dive into the connection process, let’s take a moment to understand the key components involved. Your RV’s sewer system consists of two main tanks: the gray water tank, which collects water from your sink and shower, and the black water tank, which holds waste from your toilet.
On the other hand, your house sewer system is typically connected to the municipal sewer line or a septic system. The sewer line runs from your house to the street or septic tank, and it’s usually accessible through a cleanout point near your home’s foundation.
While RV sewer outlets and house sewer connections may seem similar, there are some key differences to keep in mind. RV sewer outlets are designed to be portable and easy to connect and disconnect, while house sewer connections are typically more permanent and may require specific adapters or fittings.
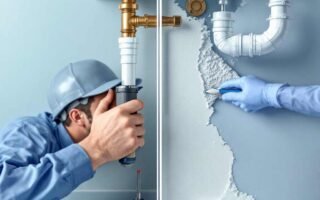
Properly connecting your RV to your house sewer is crucial to prevent leaks, odors, and potential health risks. A secure connection ensures that waste flows smoothly from your RV to the house sewer system without any issues.
Tools and Materials Needed for Connection
To successfully connect your RV to your house sewer, you’ll need a few essential tools and materials. Here’s a list of what you’ll need:
- Sewer hose: A durable, flexible hose designed specifically for RV sewer connections.
- Adapters and fittings: Depending on your RV and house sewer setup, you may need various adapters and fittings to ensure a secure connection.
- Gloves: Protect your hands from potential contamination when handling sewer components.
- Backflow prevention valve: This device helps prevent sewage from flowing back into your RV.
- Hose supports: These keep your sewer hose elevated and prevent sagging, which can cause leaks.
- Safety equipment: Eye protection and disinfectants are essential for maintaining hygiene during the connection process.
You can find these supplies at most RV dealerships, home improvement stores, or online retailers specializing in RV accessories. Investing in high-quality materials will ensure a reliable and long-lasting connection.
Step-by-Step Guide on How to Connect an RV to a House Sewer
Now that you have a good understanding of the basics and the necessary tools, let’s walk through the step-by-step process of how to connect your RV to your house sewer.
Preparatory Steps
Before you start the connection process, take the time to prepare appropriately. Here’s what you need to do:
- Locate the house sewer cleanout or access point: Find the cleanout point near your home’s foundation. This is where you’ll connect your RV sewer hose to the house sewer system. Make sure to handle the cleanout cap carefully to avoid damaging the threads.
- Check local regulations and permits: Depending on your location, you may need to obtain a license or follow specific rules for connecting your RV to your house sewer. Check with your local authorities to ensure compliance.
- Inspect the RV sewer outlet: Before connecting, take a moment to inspect your RV’s sewer outlet for any damage or clogs. Clear any debris or obstructions to ensure a smooth connection.
Connection Process
Now that you’ve completed the preparatory steps, it’s time to start the connection process. Follow these steps carefully:
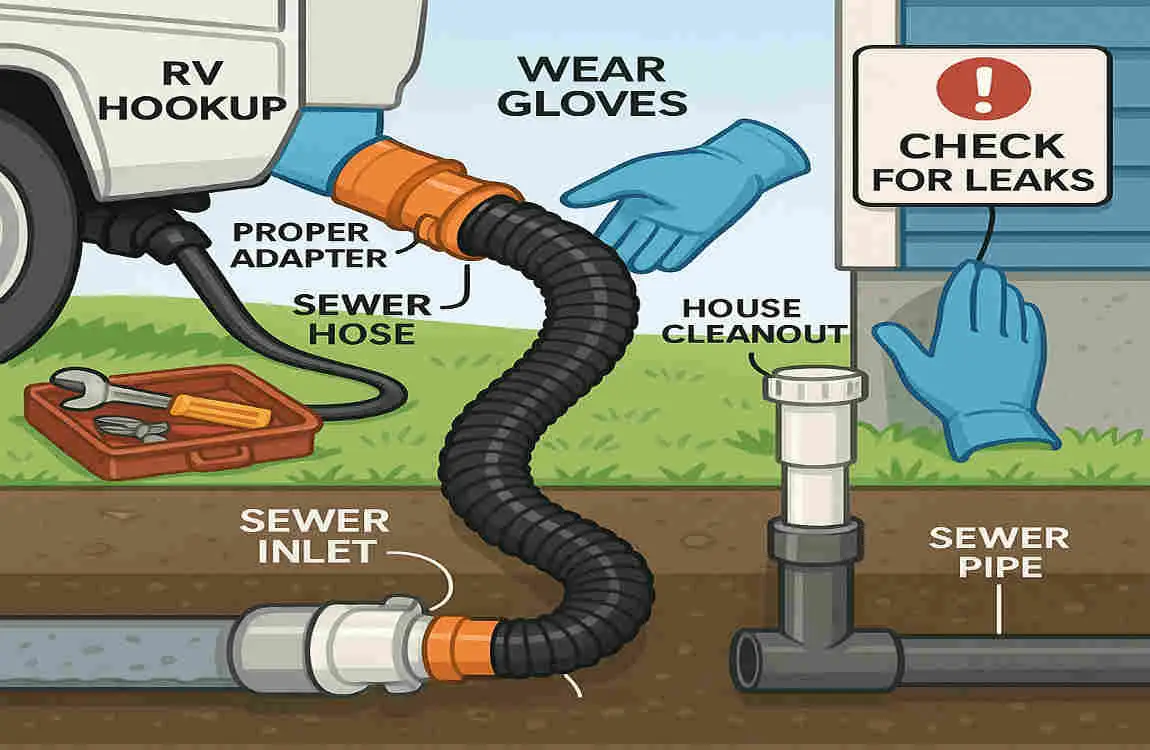
- Fit the RV sewer hose to the RV outlet: Attach one end of the sewer hose to your RV’s sewer outlet. Make sure the connection is secure and tight to prevent leaks.
- Connect the other end to the house sewer cleanout or pipe: Carefully insert the other end of the sewer hose into the house sewer cleanout or pipe. Use the appropriate adapters or fittings to ensure a snug fit.
- Secure the connection with adapters and fittings: Depending on your setup, you may need to use additional adapters or fittings to create a secure connection between the RV sewer hose and the house sewer system. Follow the manufacturer’s instructions for proper installation.
- Support the hose to prevent sagging: Use hose supports to keep the sewer hose elevated and to avoid sagging. This will help maintain a proper flow and reduce the risk of leaks.
- Install a backflow prevention device: To prevent sewage backups, install a backflow prevention valve between the RV sewer hose and the house sewer connection. This device will help protect your RV from potential contamination.
Testing and Inspection
Once you’ve completed the connection process, it’s crucial to test and inspect the system to ensure everything is working correctly. Follow these steps:
- Check for leaks or loose connections: Carefully inspect the entire connection, from the RV sewer outlet to the house sewer cleanout, for any signs of leaks or loose fittings. Tighten any connections as needed.
- Flush the system and monitor for issues: Flush your RV’s toilet and run water through the sinks to test the connection. Monitor the system for any signs of leaks, odors, or other issues.
- Practice proper sanitation: After completing the connection process, take the time to properly clean and disinfect any tools or surfaces that came into contact with the sewer system. This will help maintain hygiene and prevent the spread of bacteria.
Common Issues and Troubleshooting Tips
Even with proper installation, you may encounter some common issues when connecting your RV to your house sewer. Here are some troubleshooting tips to help you overcome these challenges:
- Sewer hose leaks or cracks: If you notice leaks or cracks in your sewer hose, replace it immediately. Using a damaged hose can lead to messy and unsanitary situations.
- Odors and sewer gas escape: If you detect unpleasant odors or sewer gas escaping, check all connections for tightness and consider using odor-eliminating products designed for RV sewer systems.
- Weak or clogged house sewer access points: If you’re having trouble connecting to the house sewer cleanout or experiencing slow drainage, the access point may be weak or clogged. In this case, you may need to call a professional plumber to address the issue.
- Backflow and sanitary hazards: If you notice sewage backing up into your RV, immediately disconnect the sewer hose and check the backflow prevention valve. If the issue persists, seek professional assistance to avoid health risks.
- When to call a professional plumber: If you’re unsure about any aspect of the connection process or encounter persistent issues, don’t hesitate to call a professional house plumber. They can provide expert guidance and ensure a safe and secure connection.
Maintenance and Safety Tips for RV and House Sewer Connections
To keep your RV’s house sewer connection in top condition, follow these maintenance and safety tips:
- Regular inspection and cleaning: Inspect your sewer hose and connections regularly for signs of wear, damage, or clogs. Clean the hose and fittings as needed to prevent buildup and maintain proper flow.
- Proper disposal and storage: When disconnecting your RV from the house sewer, properly dispose of any waste and store the sewer hose in a clean, dry place. This will help prevent contamination and extend the life of your equipment.
- Hygiene and safety protocols: Always wear gloves and eye protection when handling sewer components. Wash your hands thoroughly after completing any sewer-related tasks to maintain personal hygiene.
- Seasonal maintenance: If you live in an area with cold winters, take steps to winterize your RV sewer system. This may include draining the tanks, disconnecting the sewer hose, and protecting any exposed pipes from freezing temperatures.
Benefits of Proper RV to House Sewer Connections
Connecting your RV to your house sewer system offers several benefits, including:
- Convenience and cost savings: A direct sewer connection eliminates the need for frequent trips to dump stations, saving you time and money on waste disposal.
- Environmental benefits: Properly connecting your RV to your house sewer helps prevent leaks and spills, reducing the risk of environmental contamination.
- Improved RV waste management: A secure connection ensures efficient waste management, helping to prolong the life of your RV’s sewer system and prevent costly repairs.
Legal and Regulatory Considerations
Before connecting your RV to your house sewer, be sure to check local codes and regulations. Some areas may have specific requirements or restrictions on RV sewer hookups. Failing to comply with these regulations can result in fines or damage to your property.
To ensure you’re following the proper guidelines, consult with your local authorities or a professional plumber. They can provide valuable insights and help you navigate any legal or regulatory hurdles.