Why Choose Wall Panelling for Your House?
Lately, wall panelling has made a striking comeback in house decor, winning hearts with its stylish versatility. If you’re considering adding wood wall panelling to your house interiors, you’re in for a delightful mix of aesthetics and functionality. This choice not only boosts your house’s charm—whether you prefer a classic or a modern twist—but also offers practical benefits. It hides wall flaws, improves insulation, and adds sturdiness to your house walls. Whether you’re drawn to the timeless appeal of wood or the modern vibe of slatted designs, you have a whole array of styles to transform anything from cosy nooks to bold accent walls in your house.
What’s even better? It’s a DIY-friendly house improvement project. With some basic tools, a bit of patience, and a good plan, you can transform a wall in your house in just a weekend. Ready to get started?
Selecting Your House Wall Panelling Style
Before anything else, pinpoint the style that best suits your house room. Each type of panelling sets a different tone:
Shaker-style panelling offers clean, simple lines, perfect for both traditional and modern house spaces. It’s great for living rooms and bedrooms in your house.
Beadboard panelling brings a touch of quaint charm with its vertical stripes, ideal for creating a cosy, cottage vibe in house kitchens or bathrooms.
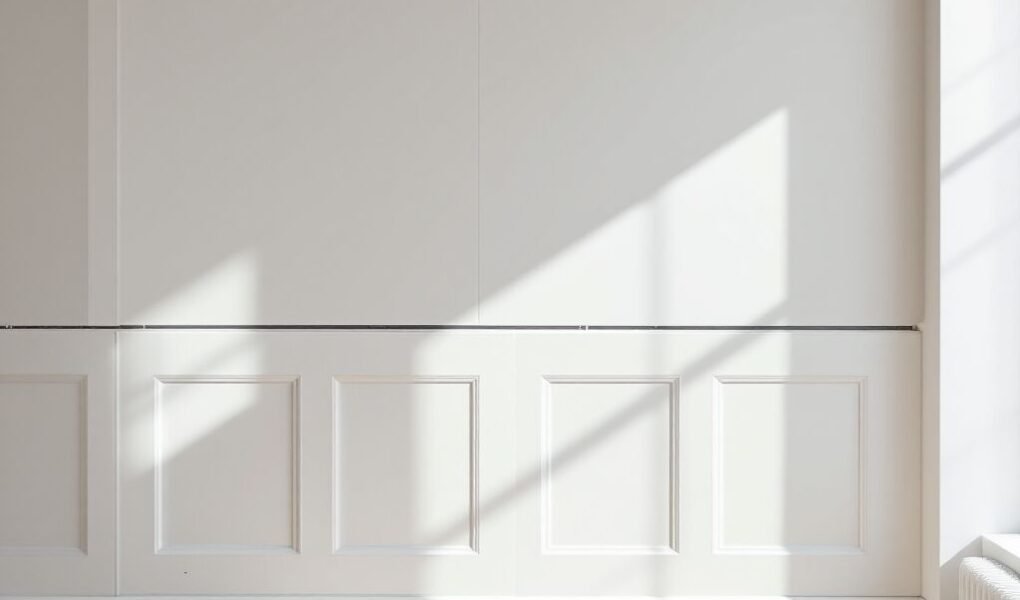
Board and batten panelling creates striking, structured looks, making it excellent for dramatic hallways or feature walls around your house.
Slatted panelling offers a sleek, modern aesthetic and can improve a house room’s acoustics, a boon for contemporary house interiors.
Once you’ve settled on a style, it’s time to line up your house wall panelling materials.
Gathering House Wall Panelling Essentials
Measure and Plan — Start by measuring your house wall meticulously and sketch out your design, either on paper or using masking tape to mark it directly on your house wall. For any grid patterns, precision in spacing is crucial.
Supplies — Medium-density fibreboard (MDF) is a popular choice for house wall panelling because of its affordability and workability. Here’s what you’ll need:
MDF panels, pre-cut or sized to fit your house walls
Strong adhesive (like No More Nails)
Decorator’s caulk
Primer and paint
A saw (mitre saw recommended, but a hand saw will do)
Sandpaper
A spirit level
A caulking gun
Paintbrush and roller
Prepare the House Wall — Clear the house wall of any nails or hooks and sand down rough spots to ensure the adhesive bonds well.
Installation Steps for Your House Wall Panelling
Cut Your Panels — Measure and cut your MDF panels to fit the house wall sizes needed. While a mitre saw is faster, a hand saw works fine with careful handling. Sand down rough edges for a smooth finish suitable for your house.
Attach the Panels — Spread adhesive on the back of each panel and press firmly against the house wall, starting with vertical pieces. Use a spirit level to keep everything aligned. Horizontal strips come next, spaced evenly.
Fill Gaps — Once the adhesive is dry, fill seams with decorator’s caulk and smooth for a seamless house wall appearance.
Prime and Paint — Since MDF absorbs paint, start with a primer to ensure an even coat. Apply your chosen paint colour next, using a brush for edges and a roller for broad house wall surfaces. Two coats usually give a polished house wall look.
Maintaining Your House Wall Panelling
Admire your handiwork! Keep your new house wall panels looking fresh with regular dusting and the occasional wipe with a damp cloth. For scuffs, a quick touch-up with paint will restore the panelled house wall.
Final Thoughts on House Wall Panelling
DIY house wall panelling is an economical yet transformative way to upgrade your house interiors. Whether you’re after classic elegance or a contemporary edge, panelling is a flexible and striking choice for any house room. If you’re new to DIY, consider watching tutorial videos first. But a word of caution: once you’ve finished one house wall, you might be tempted to panel more walls in your house!