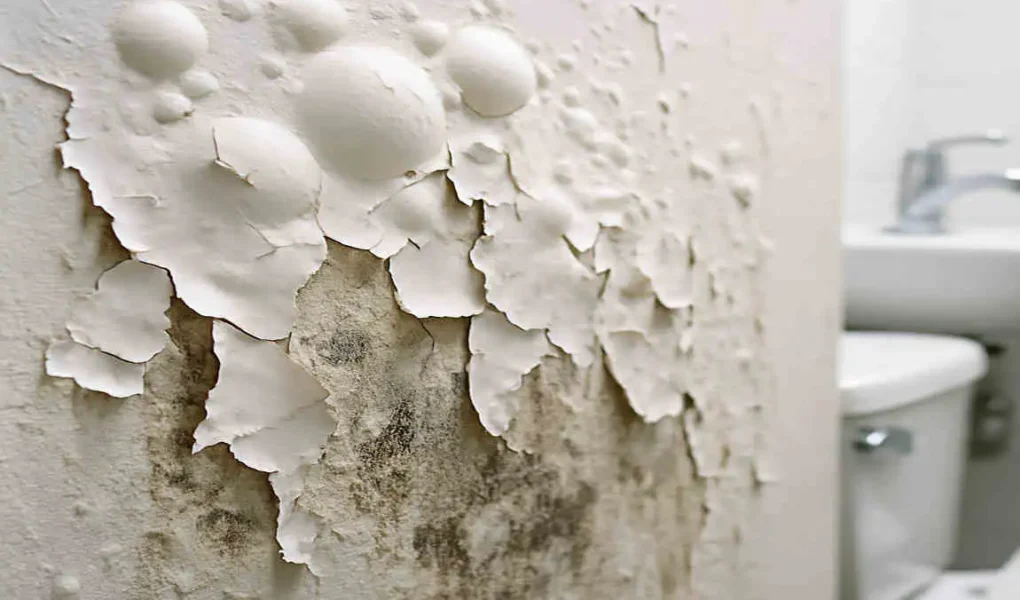
Paint peeling on bathroom walls is a common problem that many homeowners face. It’s essential to understand why paint peels specifically in bathrooms, as this knowledge can help you prevent and address the issue effectively. In this article, we’ll dive into the causes, signs, and solutions for paint peeling in bathroom surfaces. By the end, you’ll be equipped with the information needed to keep your modern bathroom walls looking pristine and protect them from moisture damage.
What Causes Paint to Peel in Bathrooms?
Before we explore the specific reasons behind paint peeling in bathrooms, let’s briefly explain what paint peeling is. When paint loses its adhesion to the surface beneath it, it begins to lift, crack, and eventually fall off in flakes or strips. This process is accelerated by several factors commonly found in bathrooms:
- High humidity and moisture exposure: Bathrooms are notorious for their humid environment due to steam from showers and baths. This constant exposure to moisture can weaken the bond between the paint and the wall surface.
- Poor surface preparation: If the wall wasn’t properly cleaned, sanded, and primed before painting, the paint may not adhere well, leading to peeling.
- Incorrect paint type: Using a paint that isn’t formulated for high-moisture areas like bathrooms can result in premature peeling.
- Ventilation issues: Inadequate ventilation traps humidity and encourages condensation, which can seep into paint layers and cause them to separate from the wall.
- Water leaks: Hidden leaks behind walls or ceilings introduce moisture that can infiltrate paint coatings from behind, causing bubbling and peeling.
- Incompatible primers or paints: Applying a new paint layer that’s incompatible with the existing primer or paint can lead to poor adhesion and peeling.
Each of these factors can individually contribute to paint peeling, but they often work in combination to accelerate the damage in bathroom environments.
Signs and Symptoms of Paint Peeling
Identifying paint peeling early allows you to address the problem before it escalates. Here are some visual indicators to watch for:
- Cracks or small bubbles in the paint surface
- Edges of paint curling away from the wall
- Flakes or chips of paint falling off when touched
- Discolouration or uneven texture on painted surfaces
As paint peeling progresses, you may notice larger areas of missing paint or exposed wall surfaces. It’s essential to distinguish paint peeling from other types of wall damage, such as mildew or mould growth, which may require different treatment approaches.
To inspect your bathroom walls effectively, start by looking closely at areas prone to moisture exposure, such as:
- Walls near the shower or bathtub
- Surfaces around the sink or vanity
- Ceilings above high-humidity zones
Use a bright light and a magnifying glass, if needed, to identify early signs of paint damage.
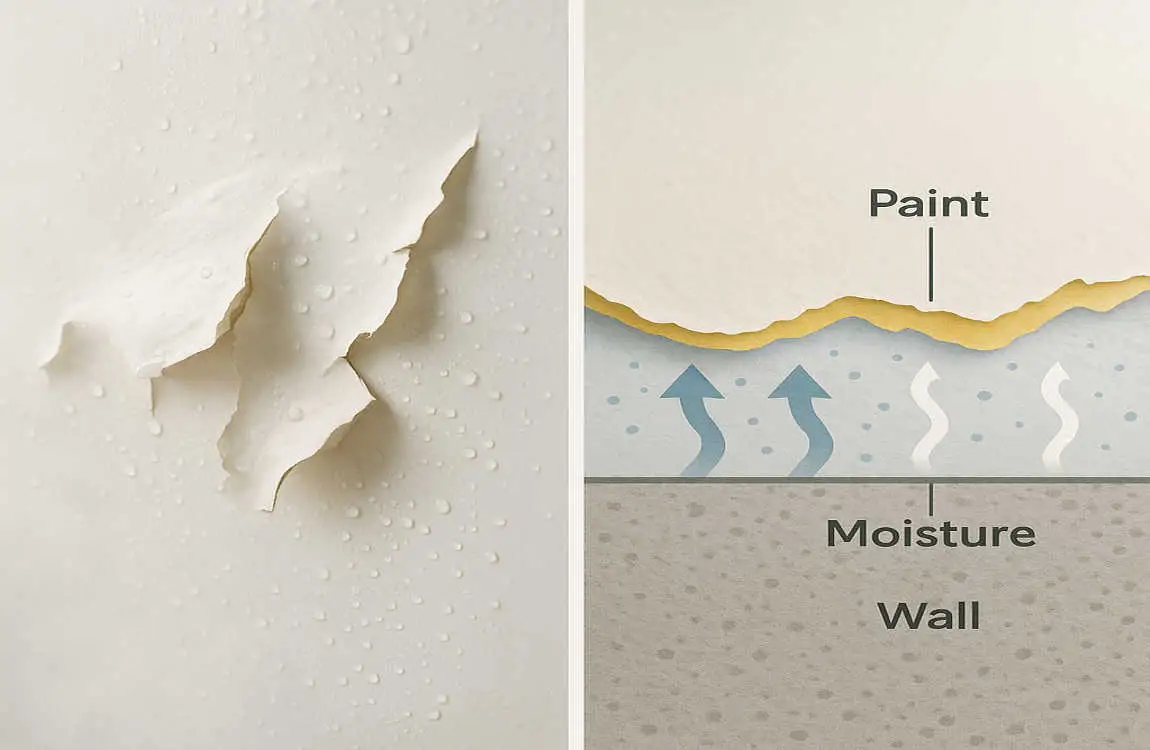
The Role of Moisture and Humidity in Paint Peeling
Bathrooms are inherently prone to high moisture buildup due to their function. Every time you take a hot shower or bath, steam fills the room, increasing the humidity level. This moisture-rich air can penetrate paint layers, causing them to soften, swell, and eventually lose adhesion to the underlying surface.
In addition to steam, condensation is another way moisture affects paint in bathrooms. When humid air comes into contact with cooler surfaces, like mirrors or walls, water droplets form and can seep into small cracks or pores in the paint. Over time, this moisture infiltration weakens the paint’s bond and leads to peeling.
To minimise moisture-related paint damage in bathrooms, it’s crucial to manage indoor humidity levels. Proper ventilation, which we’ll discuss later, plays a significant role in reducing humidity and protecting your paint.
Common Bathroom Paint Types and Their Vulnerability
When choosing paint for your bathroom, it’s essential to select a type that can withstand the unique challenges of this high-moisture environment. Here are some standard bathroom paint options and their pros and cons:
- Latex paint: Latex is a popular choice for bathrooms due to its affordability, easy cleanup, and moisture resistance. However, lower-quality latex paints may not hold up as well in high-humidity conditions.
- Enamel paint: Enamel paints are known for their durability and resistance to moisture, making them a good choice for bathrooms. They have a smooth, hard finish that’s easy to clean. The downside is that they can be more expensive and difficult to apply evenly.
- Acrylic paint: Acrylic paints offer good moisture resistance and flexibility, which helps them adapt to temperature changes without cracking. They’re also less likely to yellow over time compared to oil-based paints.
- Oil-based paint: While oil-based paints provide excellent durability and resistance to moisture, they’re less commonly used in bathrooms today due to their strong odour, longer drying time, and potential for yellowing.
When selecting paint for your bathroom, prioritise high-quality, moisture-resistant formulas specifically designed for use in high-humidity areas. These paints may cost more upfront, but can save you money and headaches in the long run by preventing premature peeling.
Importance of Proper Surface Preparation
One of the most critical steps in preventing paint peeling in bathrooms is proper surface preparation before painting. This process involves several key steps:
- Cleaning: Thoroughly clean the walls to remove any dirt, grime, or soap scum that could interfere with paint adhesion. Use a mild detergent solution and a scrub brush or sponge, then rinse with clean water and allow the surface to dry completely.
- Scraping: If there’s any existing loose or peeling paint, use a paint scraper or putty knife to remove it gently. Be careful not to damage the underlying wall surface.
- Sanding: Use fine-grit sandpaper to lightly sand the walls, creating a slightly rough surface that helps the new paint adhere better. Wipe away any sanding dust with a damp cloth and let the surface dry.
- Priming: Apply a high-quality, moisture-resistant primer designed for bathrooms. The primer creates a sealed layer between the wall and the paint, improving adhesion and preventing moisture from penetrating.
Skipping or rushing through any of these crucial preparation steps can lead to paint failure down the road. Investing time in proper surface prep lays the foundation for a long-lasting, peel-resistant paint job.
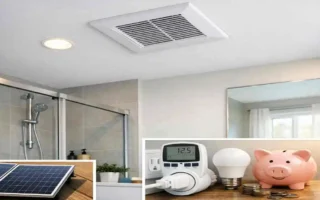
Ventilation and Its Impact on Paint Durability
Ventilation plays a vital role in managing moisture levels in bathrooms and, consequently, protecting your paint from peeling. Poor ventilation allows humidity to linger, leading to condensation and moisture buildup that can degrade paint over time.
The two most effective ways to improve bathroom ventilation are:
- Exhaust fans: Installing a high-quality exhaust fan that’s appropriately sized for your bathroom’s square footage can make a significant difference in reducing humidity. Run the fan during showers or baths and for at least 20-30 minutes afterwards to remove excess moisture from the air.
- Windows: If your bathroom has a window, opening it for a short period after showering can help release humid air and promote air circulation. However, be mindful of privacy concerns and the potential for moisture damage to window frames.
To maintain your ventilation system’s effectiveness, regularly clean the exhaust fan grille and ductwork to prevent buildup that can impede airflow. Replace old or malfunctioning fans promptly to ensure optimal humidity control.
Water Leaks and Hidden Damage Behind Walls
Sometimes, the cause of paint peeling in bathrooms lies hidden behind the walls. Water leaks from pipes, fixtures, or roofing can introduce moisture that seeps through the wall material and infiltrates paint layers from the backside. This moisture can cause paint to bubble, crack, and eventually peel away.
To identify potential water leaks causing paint damage, look for:
- Soft or spongy areas on the walls
- Discolouration or water stains
- Musty odours or visible mould growth
- Unexplained increases in water bills
If you suspect a hidden leak, it’s crucial to address it promptly to prevent further paint damage and potential structural issues. Depending on the leak’s location and severity, you may need to hire a professional plumber or contractor to repair the problem.
In addition to fixing leaks, consider installing water-resistant barriers or sealants behind bathroom walls during renovations or repairs. These products help prevent moisture from penetrating the wall material and reaching the paint layer, providing an extra level of protection against peeling.
How to Fix Paint Peeling in Your Bathroom
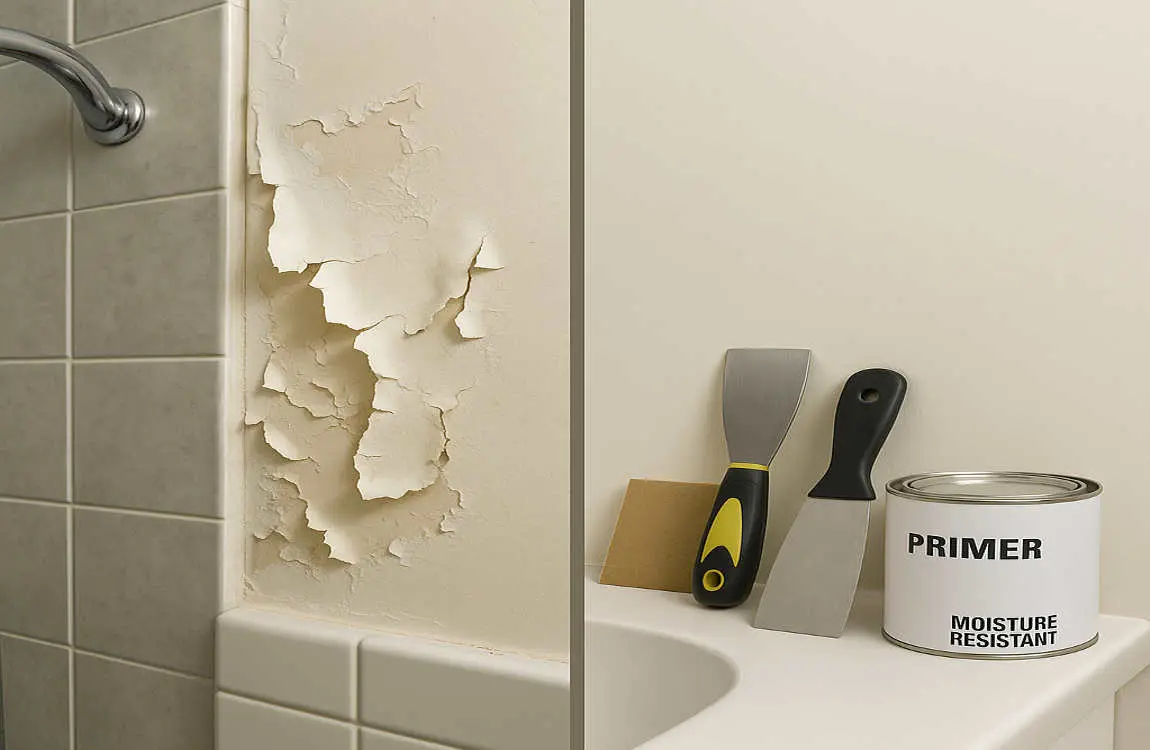
If you’re already dealing with peeling paint in your bathroom, don’t despair. With the right tools and techniques, you can repair the damage and restore your walls to their former glory. Here’s a step-by-step guide:
- Prepare the area: Cover the floor and any nearby fixtures with drop cloths or plastic sheeting to protect them from debris and paint.
- Remove loose paint: Using a paint scraper or putty knife, gently scrape away any loose, flaking, or bubbling paint. Be careful not to gouge or damage the wall surface beneath.
- Clean and sand: Clean the exposed wall area with a damp cloth to remove any dust or debris. Once dry, lightly sand the edges of the remaining paint to create a smooth transition.
- Apply spackling compound (optional): If there are any cracks, holes, or uneven areas in the wall surface, fill them with spackling compound using a putty knife. Allow the compound to dry completely, then sand it smooth.
- Prime the wall: Apply a high-quality, moisture-resistant primer to the repaired area, extending slightly beyond the damaged section. Let the primer dry according to the manufacturer’s instructions.
- Paint the wall: Using a bathroom-specific paint in your desired colour and sheen, apply two thin, even coats to the primed area, allowing each coat to dry completely before adding the next. Feather the edges of the new paint to blend seamlessly with the existing paint.
- Clean up and ventilate: Remove any drop cloths or protective sheeting and clean your tools with soap and water. Open a window or run the exhaust fan to promote air circulation and speed up the drying process.
By following these steps carefully and using the right products, you can achieve a long-lasting, professional-looking repair that blends in with the surrounding paint.
Prevention Tips to Avoid Future Paint Peeling
While repairing peeling paint is essential, preventing the problem from recurring is even better. Here are some tips to keep your bathroom walls looking fresh and peel-free:
- Maintain proper humidity levels: Use a hygrometer to monitor your bathroom’s humidity and keep it between 30-50% to prevent moisture-related paint damage. Run exhaust fans or open windows to remove excess moisture.
- Upgrade ventilation: If your current ventilation system isn’t effectively managing humidity, consider upgrading to a more powerful exhaust fan or adding a window for improved air circulation.
- Inspect for leaks regularly: Periodically check for signs of water leaks behind walls, around fixtures, and on ceilings. Address any leaks promptly to prevent moisture from damaging your paint.
- Choose high-quality, bathroom-specific paint: When repainting your bathroom, invest in premium, moisture-resistant paint formulated for high-humidity environments. Look for paints with antimicrobial additives to prevent mould and mildew growth.
- Clean painted surfaces gently: To maintain your bathroom’s paint, clean the walls regularly with a soft sponge or cloth and a mild, non-abrasive cleaner. Avoid harsh scrubbing or using abrasive tools that could damage the paint surface.
By implementing these preventive measures, you can extend the life of your bathroom paint and minimise the risk of peeling in the future.
When to Call a Professional
While many instances of paint peeling in bathrooms can be addressed through DIY repairs and prevention strategies, some situations may require professional intervention. Consider hiring an expert if:
- The peeling paint covers a large area or multiple walls
- You suspect extensive water damage or mould growth behind the walls
- The bathroom has structural leaks or plumbing issues beyond your repair skills
- You’re unsure about the proper repair techniques or products to use
Professional painters and contractors possess the experience, tools, and expertise to accurately assess the severity of the problem, identify underlying causes, and provide long-lasting solutions. They can also help you choose the best paint products and colours for your bathroom’s specific needs.
When hiring a professional, be sure to:
- Get recommendations from trusted sources or read online reviews
- Request multiple bids and compare prices and services
- Verify the contractor’s licensing, insurance, and references
- Obtain a detailed, written contract outlining the scope of work and payment terms
While professional services may cost more upfront than DIY repairs, they can often save you money in the long run by preventing recurring issues and ensuring a high-quality, durable result.