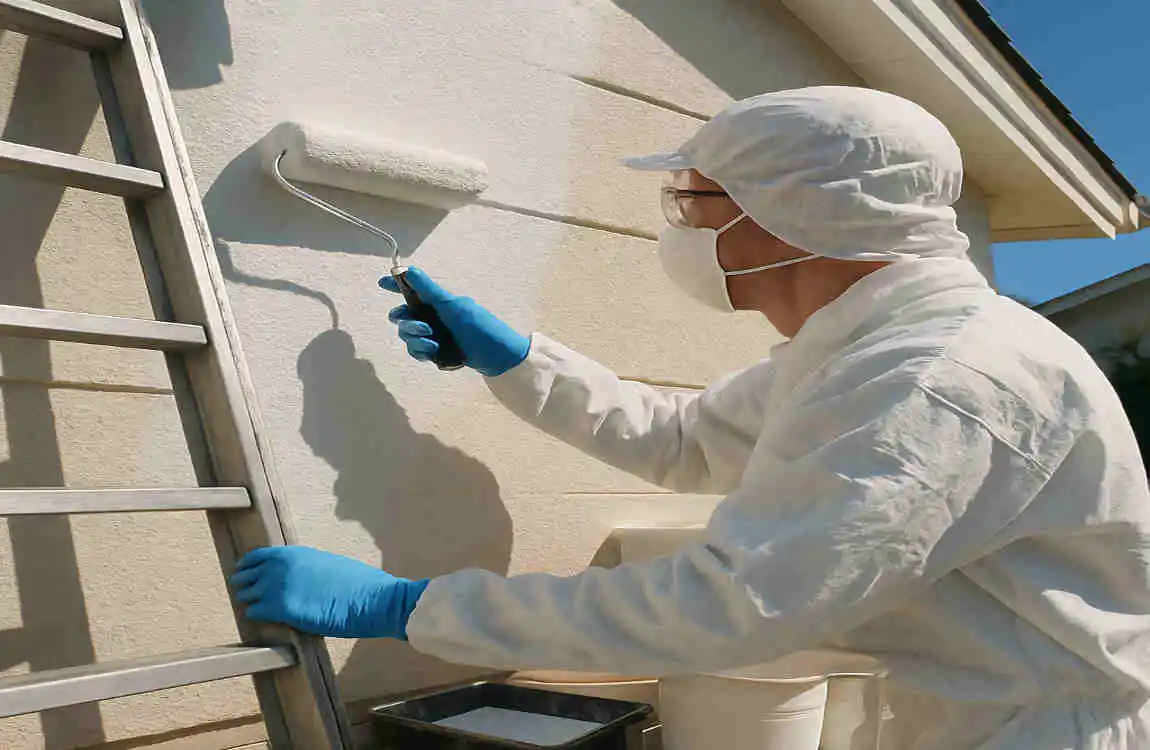
Painting the exterior of your house is more than just boosting its curb appeal. It’s a crucial step in protecting your home from the elements and maintaining its structural integrity. But let’s be honest, hiring professionals can be a hefty investment. That’s where learning how to paint your exterior house with a roller comes in handy. Not only is it a cost-effective solution, but it also gives you the satisfaction of a DIY project done right.
Preparing Your Exterior Surface
Inspecting and Cleaning the Surface
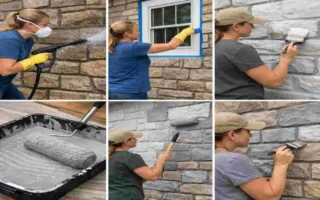
Before you even think about picking up a paint roller, ensure your exterior surface is ready for a fresh coat. Start by thoroughly inspecting the surface for any dirt, debris, mold, or loose paint. These can all affect the adhesion and longevity of your new paint job.
Power Washing Techniques and Best Practices
One of the most effective ways to clean your exterior surface is by using a power washer. This tool can blast away years of grime and prepare your surface for painting. When using a power washer, remember to:
- Start with a low-pressure setting and gradually increase as needed.
- Keep the nozzle at least 12 inches away from the surface to avoid damaging it.
- Use a wide fan tip for even coverage.
- Work in small sections, moving the nozzle in a consistent pattern
Removing Dirt, debris, Mold, and Loose Paint
After power washing, use a stiff-bristle brush to scrub away any remaining dirt or debris. For mold or mildew, mix a solution of 1 part bleach to 3 parts water, then apply it to the affected areas. Let it sit for 15 minutes before rinsing thoroughly.
Loose paint should be scraped off using a putty knife or paint scraper. Be sure to feather the edges of the remaining paint to create a smooth transition for your new coat.
Repairing Damages
Filling Cracks, Holes, and Peeling Paint
Now that your surface is clean, it’s time to address any damage. Use a patching compound to fill cracks, holes, and areas where paint has peeled. Apply the compound with a putty knife, feathering the edges to blend with the surrounding surface. Allow the compound to dry completely before moving on to the next step.
Sanding Rough Surfaces
Once the patching compound is dry, use sandpaper to smooth out the repaired areas. Start with a coarse grit (80-100) and gradually work up to a finer grit (220-240) for a smooth finish. Be sure to sand in the direction of the wood grain if you’re working on a wood surface.
Protecting Surrounding Areas
Covering Plants, Windows, and Ground with Drop Cloths
Before you start painting, take the time to protect the surrounding areas from drips and splatters. Use drop cloths to cover plants, windows, and the ground around your work area. Secure the drop cloths with painter’s tape to keep them in place.
Taping Edges and Trim
To achieve clean, crisp lines, use painter’s tape to mask off any edges or trim you don’t want painted. Press the tape firmly into place, ensuring there are no gaps where paint could seep through. When you’re ready to paint, use a putty knife to press the tape down even further, creating a tight seal.
Choosing the Right Painting Supplies
Selecting the Appropriate Paint for Exterior Surfaces
Types of Exterior Paints (Latex, Acrylic, Oil-Based)
When choosing the right paint for your exterior, you have a few options: latex, acrylic, or oil-based. Latex and acrylic paints are water-based and known for their ease of use, quick drying time, and low VOC (volatile organic compound) levels. Oil-based paints, on the other hand, offer superior durability and adhesion but take longer to dry and have higher VOCs.
For most exterior painting projects, latex or acrylic paint is the way to go. They’re easier to work with and clean up, and they provide excellent coverage and durability.
Durability and Weather Resistance Considerations
When selecting your paint, consider your area’s climate. If you live in a region with extreme temperatures or high humidity, look for paints that offer enhanced durability and weather resistance. These paints will better withstand the elements and maintain their color and finish over time.
Picking the Right Roller
Nap Length Recommendations Based on Surface Texture
The key to achieving a smooth, even finish with a roller is choosing the right nap length. The nap length refers to the length of the fibers on the roller cover. Here’s a quick guide to help you choose the right nap length based on your surface texture:
- Smooth surfaces (e.g., new drywall, primed wood): 3/16″ to 1/4″ nap
- Semi-rough surfaces (e.g., stucco, textured drywall): 3/8″ to 1/2″ nap
- Rough surfaces (e.g., brick, concrete): 3/4″ to 1-1/4″ nap
Quality vs. Budget Options
When it comes to roller covers, you generally get what you pay for. Higher-quality roller covers are made with better materials and construction, resulting in a smoother, more even finish. While budget options may be tempting, they can lead to lint in your paint and an uneven application.
Invest in a few high-quality roller covers, and you’ll be rewarded with a professional-looking finish that’s worth the extra cost.
Additional Tools and Supplies
- Extension poles: These allow you to reach high areas without a ladder, making your painting job safer and more efficient.
- Brushes for edges and detailed areas: While rollers are excellent for large surfaces, you’ll need brushes to paint edges, trim, and other detailed areas.
- Primer and sealers (if applicable): Depending on the condition of your surface, you may need to apply a primer before painting. Primers help create a smooth, uniform base for your paint and improve adhesion. Sealers can protect your paint job from the elements and extend its lifespan.
Preparing Your Painting Area
Weather Considerations and Ideal Painting Conditions
Painting your exterior is a big job, and you want to make sure you’re doing it under the best possible conditions. The ideal temperature for painting is between 50°F and 85°F, with low humidity and no rain in the forecast. Avoid painting in direct sunlight, as it can cause the paint to dry too quickly, resulting in an uneven finish.
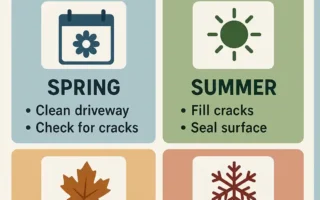
Determining the Best Time to Paint
The best time to paint your exterior is typically spring or fall, when temperatures are mild and the chance of rain is lower. These seasons also allow for better ventilation, which is essential when working with paint fumes.
If you live in an area with a short painting season, consider breaking your project into smaller sections to complete over several weekends. This will help you avoid rushing the job and ensure you’re working in optimal conditions.
Mapping Out Sections of the House for Systematic Painting
Before you start painting, take the time to map out the different sections of your house. This will help you work systematically and ensure you don’t miss any spots. Start with the least visible areas and work your way towards the front of the house, where the paint job will be most noticeable.
Here’s an example of how you might break down your house into sections:
- Back wall and any attached structures (e.g., garage, shed)
- Side walls
- Front wall and entryway
- Trim and detailing
By working in this order, you’ll be able to fine-tune your technique as you go and ensure that the most visible areas look their best.
Step-by-Step Guide: How to Paint an Exterior House with a Roller
Applying Primer (If Needed)
If your surface requires a primer, start by applying it to the entire area you’ll be painting. Use a brush to cut in around edges and trim, then use your roller to apply the primer to the larger surfaces.
Apply the primer in thin, even coats, allowing each coat to dry according to the manufacturer’s instructions before applying the next. Once the primer is dry, lightly sand the surface to smooth out any imperfections and create a better base for your paint.
Loading the Roller Properly
How to Load Paint Evenly
Loading your roller properly is key to achieving an even finish. Start by pouring your paint into a paint tray, leaving about half an inch from the top.
Dip your roller into the paint, then roll it back and forth on the ramp of the paint tray to distribute the paint evenly. Aim for a roller that’s about 75% saturated with paint—not too wet, but not too dry either.
Avoiding Overloading or Dripping
It’s essential to avoid overloading your roller with paint, as this can lead to drips and an uneven finish. If you notice paint dripping off your roller, use the paint tray to remove the excess before applying it to your surface.
Starting with Edges and Trim
Using Brushes for Detailed Areas
Before you start rolling, use a brush to paint any edges, trim, or other detailed areas. This is known as “cutting in,” and it helps create clean, crisp lines where the roller can’t reach.
Dip your brush into the paint, then tap off any excess on the side of the paint can. Apply the paint to the edge or trim in smooth, even strokes, working from the top down. Use the tip of the brush to feather the paint into the surrounding area, creating a seamless transition.
Creating Clean Lines
To create clean lines where the paint meets another surface (e.g., a window frame or door), use painter’s tape to mask off the area. Apply the paint, then remove the tape while it’s still wet for the best results.
If you notice any paint bleeding under the tape, use a small brush to carefully touch up the area before it dries.
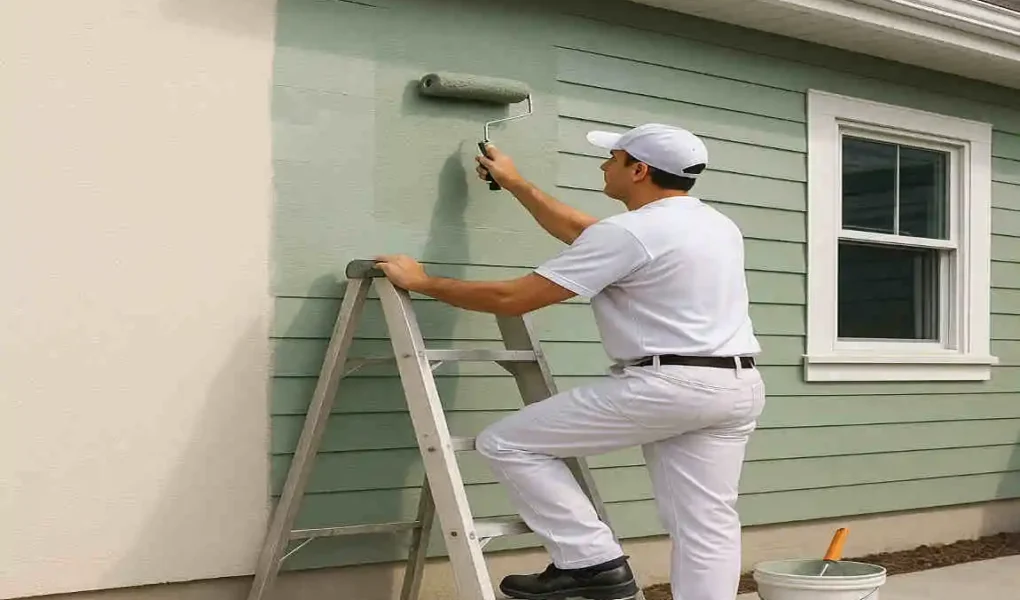
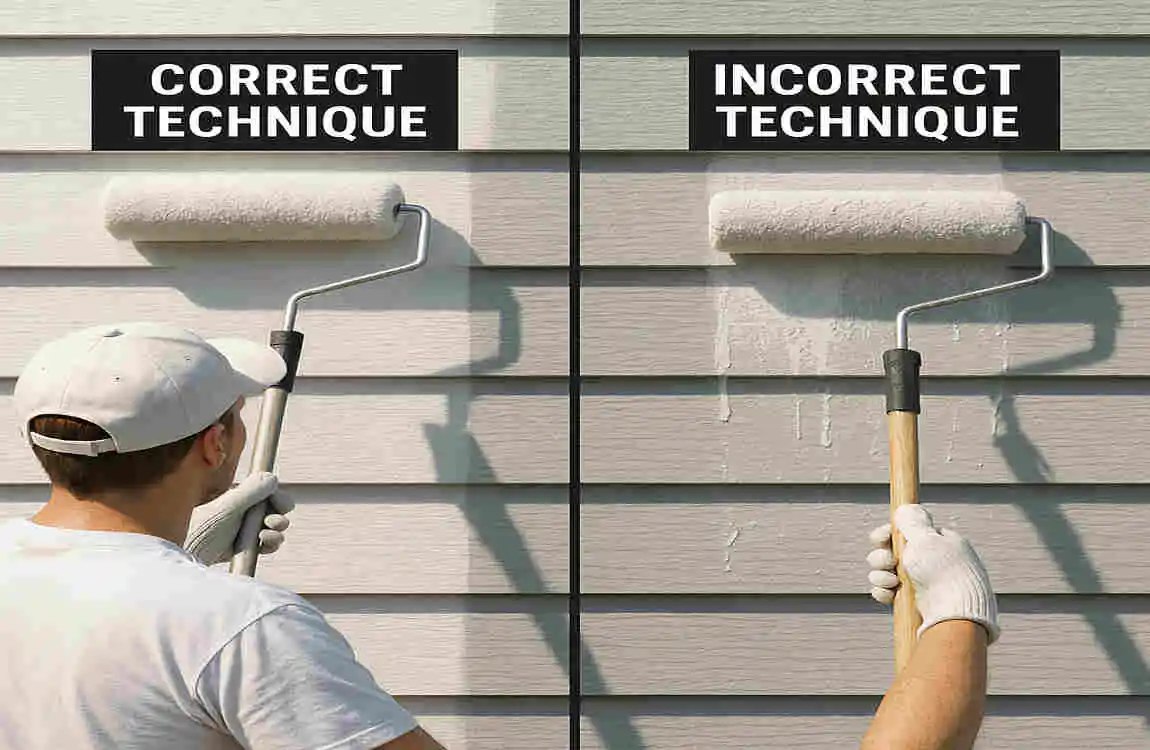
Using the Roller for Large Surfaces
Techniques for Even Coverage
Now that you’ve cut in the edges and trimmed, it’s time to start rolling the larger surfaces. Start at the top of the wall and work your way down, using a “W” or “M” pattern to spread the paint evenly.
Apply the paint in thin, even coats, reloading your roller as needed. Avoid applying too much pressure, as this can cause the roller to skip or leave streaks.
Ensuring Consistent Thickness
To ensure a consistent thickness, maintain a wet edge as you work. This means always keeping a small amount of damp paint along the edge of the area you’re painting, so you can blend the new paint into it seamlessly.
If you notice the paint starting to dry before you can blend it, use a brush to feather the edge and create a smooth transition.
Rolling Method
“W” or “M” Pattern for Spreading Paint
The “W” or “M” pattern is a popular technique for spreading paint evenly with a roller. Start by rolling a “W” or “M” shape on the surface, then fill in the gaps with horizontal or vertical strokes.
This pattern helps distribute the paint evenly and reduces the risk of roller marks or streaks.
Overlapping Strokes
As you work, be sure to overlap your strokes by about 50%. This helps ensure even coverage and prevents lap marks where the paint has dried between strokes.
If you notice any areas that are lighter or darker than the surrounding paint, use your roller to blend them in while the paint is still wet.
Finishing Each Section
Ensuring Seamless Blending
As you finish each section, take a step back and assess the overall appearance. If you notice any areas that need blending, use your roller to feather the paint and create a seamless transition.
Pay special attention to the edges where one section meets another, as these can be prone to lap marks or uneven coverage.
Checking for Missed Spots
Before moving on to the next section, take a close look at the area you’ve just painted. Check for any missed spots or areas that need a second coat.
If you find any missed spots, use your brush or roller to touch them up while the paint is still wet. If the paint has already started to dry, wait until it’s scorched before applying a second coat.
Tips for Achieving a Flawless Finish
- Maintaining a wet edge: As mentioned earlier, it is crucial for achieving a seamless finish. Always keep a small amount of damp paint along the edge of the area you’re painting, and blend the new paint into it as you work.
- Avoiding roller marks and streaks: Use the right roller nap length for your surface texture, and apply the paint in thin, even coats. Reload your roller frequently to ensure consistent coverage.
- Working in manageable sections: Break your painting project into smaller, manageable sections. This will help you maintain a wet edge and ensure even coverage throughout the project.
- Tips for painting hard-to-reach areas: For hard-to-reach areas like eaves or gables, use an extension pole to extend your roller’s reach. If necessary, use a ladder to access the area safely, but always have someone spot you.
- Using a roller extension pole for higher surfaces: A must-have tool for painting them. It allows you to reach areas that would be difficult or unsafe to access with a ladder alone. Just be sure to use the pole carefully and follow all safety guidelines.
Drying and Additional Coats
- How long to wait between coats: Drying time between coats depends on the type of paint you’re using and the weather conditions. In general, you should wait at least 4 hours between coats, but check the manufacturer’s instructions for specific guidance.
- When to apply a second coat for durability and finish quality: Most exterior paint jobs require at least two coats for optimal durability and finish quality. Apply the second coat once the first coat is completely dry, using the same techniques and patterns as for the first coat.
- Tips for avoiding common painting mistakes: Always read and follow the manufacturer’s instructions for your paint and tools. Take your time and work methodically, maintaining a wet edge and applying thin, even coats. If you make a mistake, don’t panic—use a damp cloth to wipe away the wet paint and start again.
Clean Up and Maintenance
- Properly clean rollers and brushes: After you’ve finished painting, take the time to clean them thoroughly. Rinse them thoroughly with water (for latex or acrylic paint) or mineral spirits (for oil-based paint), then use a brush comb to remove any remaining paint. Allow the tools to dry completely before storing them.
- Removing painter’s tape without damaging paint: To remove painter’s tape without damaging your paint job, wait until the paint is completely dry, then pull the tape off at a 45-degree angle. If the paint starts to lift with the tape, use a utility knife to score along the edge of the tape before removing it.
- Caring for your exterior paint job: To keep it looking its best, perform regular maintenance. This includes cleaning the surface annually with a mild detergent and water, inspecting for any damage or peeling paint, and touching up as needed.
- Routine inspections and touch-ups: Make it a habit to inspect your exterior paint job at least once a year, looking for any signs of wear or damage. Touch up any areas that need it, using the same paint and techniques you used for the original job.