Have you ever looked up at your roof and wondered if there’s a better way to keep your home dry and protected? Enter EPDM rubber roofing, a rigid, flexible material that’s gaining popularity among homeowners. EPDM stands for Ethylene Propylene Diene Monomer—don’t worry, we’ll break that down later. It’s basically a synthetic rubber sheet that acts like a superhero shield for your house roof.
What is EPDM Rubber Roofing?

Let’s start with the basics. EPDM is a type of rubber roofing made from a mix of ethylene, propylene, and a bit of diene—think of it as a durable plastic-rubber blend. It comes in large sheets, usually black or white, and it’s rolled out like a giant blanket over your roof.
Advantages Compared to Other Roofing Materials
Now, compare EPDM to traditional options, such as asphalt shingles or metal roofing. EPDM shines in durability—it can last 30 to 50 years with proper care, outpacing many alternatives that need replacing every 20 years.
Waterproofing is another big win. Unlike shingles that can let water sneak through gaps, EPDM forms a seamless barrier. No more worrying about ice dams or heavy rain seeping in.
Common Uses in Residential Roofing
In homes, EPDM is ideal for flat or low-slope roofs, such as those on garages, extensions, or modern house design. It’s not just for pros—many homeowners use it for DIY projects on sheds or patios. Picture this: You’re building a home office in your backyard. EPDM keeps it leak-free without the hassle of pitched-roof materials.
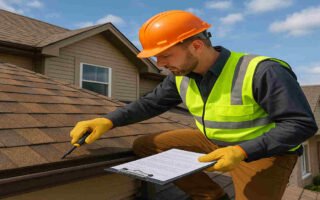
Preparation Before Installing EPDM Rubber Roofing
Assessing Your Roof’s Condition and Structure
Climb up (safely!) and inspect for debris, old roofing, or damage. Measure the slope too; EPDM works best on flat or gently sloped surfaces. If it’s steeper than 3:12, you might need extra fasteners.
Ask yourself: Does my roof need repairs first? Fixing issues now prevents headaches later. It’s like prepping a canvas before painting—get it right for a masterpiece.
Tools and Materials Needed for Installation
Gather your gear to make the job smooth. You’ll need basics like a tape measure, utility knife, and roller for smoothing. Don’t forget extras like a heat gun for tricky spots. Stock up, and you’ll avoid mid-project trips to the store.
Safety Precautions and Protective Gear
Safety first—roofs can be a slippery business. Wear non-slip shoes, a harness if necessary for high work, and gloves to handle chemicals. Protect your eyes with goggles, especially when cutting or gluing. Work on calm days to avoid wind whipping materials around. Remember, you’re dealing with heights and heavy rolls. Take breaks, stay hydrated, and have a buddy spot you. Think of it this way: A safe install means you enjoy your new roof worry-free.
Step-by-Step Guide: How to Install EPDM Rubber Roofing
Measuring and Ordering the Right Size of EPDM Membrane
Accuracy is everything here. Measure your roof’s length and width, adding extra for overlaps—aim for 6-12 inches on all sides.
Order from a reliable supplier; EPDM comes in rolls up to 50 feet wide. Double-check dimensions to avoid waste. Too small? Gaps lead to leaks. Too big? You’re wasting cash.
Cleaning and Preparing the Roof Surface for Adhesion
A clean surface is non-negotiable for installing EPDM rubber roofing. Sweep away dirt, leaves, and old debris. Use a pressure washer if needed, but let it dry completely. Remove any nails or protrusions that could poke through. Sand rough spots for a smooth base. This prep ensures the adhesive sticks like glue—pun intended.
Applying Primer and Adhesive Properly
Primer comes next. Brush it on where the membrane will adhere, allowing it to become tacky. This boosts adhesion, like priming walls before painting.
Then, apply adhesive evenly—use a roller for uniform coverage. Work in sections to keep it fresh. Too much? It gets messy. Too little? Weak spots form.
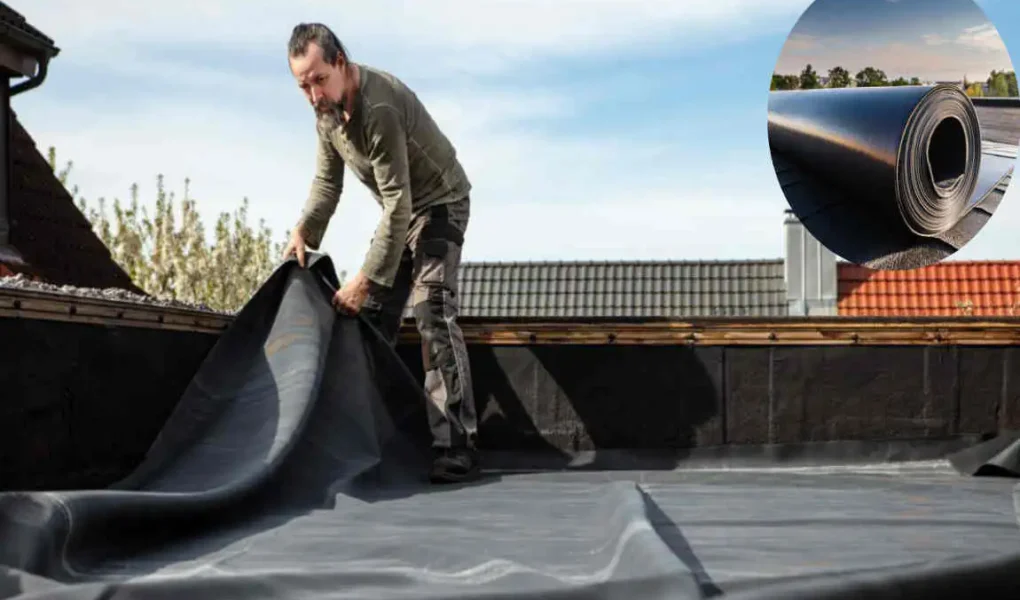
Positioning and Securing the Membrane with Seams and Flashing
Position the membrane over the adhesive, pressing it firmly into place. For seams, overlap edges and use seam tape for a seal. This step prevents water intrusion. Get it right, and your roof laughs at rain.
Rolling Out and Smoothing the Membrane to Avoid Air Bubbles and Wrinkles
Grab your roller and smooth everything out. Start from the center, pushing air toward the edges. Wrinkles? Lift and reposition gently.
Work methodically to banish bubbles—they trap moisture otherwise. A smooth finish means better performance.
Pat yourself on the back; this is where pros shine.
Installing Termination Bars and Edge Trims for Water-Tightness
Finish with termination bars along edges, screwing them in every 6-8 inches. These lock the membrane down.
Add edge trims for a clean look and extra seal. Caulk any gaps for ultimate water-tightness.
You’ve just sealed the deal—literally. Your roof is now ready for anything.
Common Challenges and How to Avoid Them

Troubleshooting Wrinkles, Bubbles, and Lifting Edges
Wrinkles happen if the membrane isn’t relaxed before adhering. Fix by lifting gently and re-rolling. Bubbles? Poke with a needle and smooth. Lifting edges often means poor adhesion—reapply glue and secure. Prevention is key: Work in mild weather and double-check smoothing. You’ll avoid these pitfalls with patience.
Weather Considerations During Installation
Rain or high winds? Postpone. Ideal temperatures range from 40°F to 90°F for adhesives to set correctly. Too hot, and the glue dries too fast; too cold, it won’t bond. Check forecasts and plan accordingly. Mother Nature can be tricky, but timing it right keeps your install on track.
How to Handle Roof Penetrations Like Vents and Skylights
Penetrations are spots where vents or skylights poke through. Cut EPDM precisely around them, then flash with tape or boots.
Seal generously to block water. It’s like plugging holes in a boat—do it well, and you stay dry.
If you’re unsure, practice on scrap material first. These details make or break the job.
Maintenance Tips for EPDM Rubber Roofs
Regular Inspections and Cleaning Routines
Once installed, check your EPDM roofing features twice a year. Inspect for debris, punctures, or signs of wear.
Clean with mild soap and a soft brush—avoid harsh chemicals that damage the rubber. Rinse gently.
Regular care spots issues early. How often do you inspect yours? Make it a habit for longevity.
Repairing Minor Damages and Leaks
Spot a tear? Clean the area, apply patch tape, and seal. For leaks, trace the source and reapply adhesive to lifted spots.
Keep repair kits handy. Quick fixes prevent big problems—act fast, and your roof thanks you. Don’t ignore minor issues; they grow. You’re the guardian of your home’s top layer.
Extending Lifespan Through Preventive Care
Apply protective coatings every few years for UV resistance. This care can add years to your EPDM’s life. Think long-term: A little effort now means fewer replacements later. What’s your plan?
Cost Considerations of Installing EPDM Roofing
Average Cost Breakdown
Costs vary, but let’s break it down. Materials like the membrane run $1-2 per square foot. Adhesives and tools add $0.50 to $ 1.00 more.
Labor, if hiring, is $3-5 per square foot. For a 1,000 sq ft roof design, expect a total cost of $4,000-$ 8,000. Factor in your location—urban areas cost more. Budget wisely for a solid investment.