Choosing the right kitchen cabinets is one of the most important decisions when designing or renovating your kitchen. Cabinets are not only used for storing dishes, cookware, and food items, but they also create the overall look and feel of your kitchen.
The right cabinets can make a small kitchen feel more spacious, improve organization, and increase the value of your home. Whether you prefer a modern, traditional, farmhouse, or minimalist design, there are many cabinet styles available to match your home.
Every home has a different personality, and your kitchen cabinets should reflect your lifestyle and design preferences.
Why Choosing the Right Kitchen Cabinets Matters
Kitchen Cabinets Improve Storage and Organization
A well-designed kitchen depends on smart storage solutions. The right kitchen cabinets help you keep your cooking space clean, organized, and easy to use.
Modern cabinets offer features that maximize every inch of space, including:
- Pull-out drawers for easy access to pots and pans
- Corner cabinets that use difficult spaces efficiently
- Built-in organizers for spices, utensils, and kitchen tools
- Deep drawers for larger cookware
Good storage design reduces clutter and makes daily kitchen activities more convenient. Instead of searching through crowded cabinets, everything has its own place.
Cabinets Define Your Kitchen Style
Kitchen cabinets are one of the first things people notice when they enter a kitchen. They create the foundation of your kitchen design and influence the atmosphere of the entire space.
For example:
- Modern cabinets create a clean and stylish appearance.
- Wood cabinets add warmth and traditional beauty.
- Simple cabinets create a minimalist and peaceful environment.
- Rustic cabinets bring natural charm and character.
Choosing cabinets that match your home’s style creates a balanced and attractive kitchen design.
Quality Cabinets Increase Home Value
A beautiful kitchen is a major selling point for many homeowners. Updated and high-quality kitchen cabinets can make your home more attractive to potential buyers.
Durable cabinets provide long-term benefits because they:
- Improve kitchen appearance
- Offer better storage
- Require fewer repairs
- Create a premium look
Investing in quality materials and professional installation can increase your home’s overall value.
Best Kitchen Cabinets for Every Home Style
Modern Kitchen Cabinets
Modern kitchen cabinets are perfect for homeowners who prefer a clean, simple, and stylish design. These cabinets focus on straight lines, smooth surfaces, and minimal decoration.
Features of Modern Cabinets:
- Flat-panel doors
- Simple designs
- Minimal hardware
- Neutral colors
- Smooth finishes
Popular choices include:
- Glossy white cabinets
- Matte black cabinets
- Handleless cabinet designs
- High-quality laminate finishes
Modern cabinets work especially well in:
- Contemporary homes
- Apartments
- Open kitchen layouts
- Modern renovations
They create a fresh appearance while keeping the kitchen functional and uncluttered.
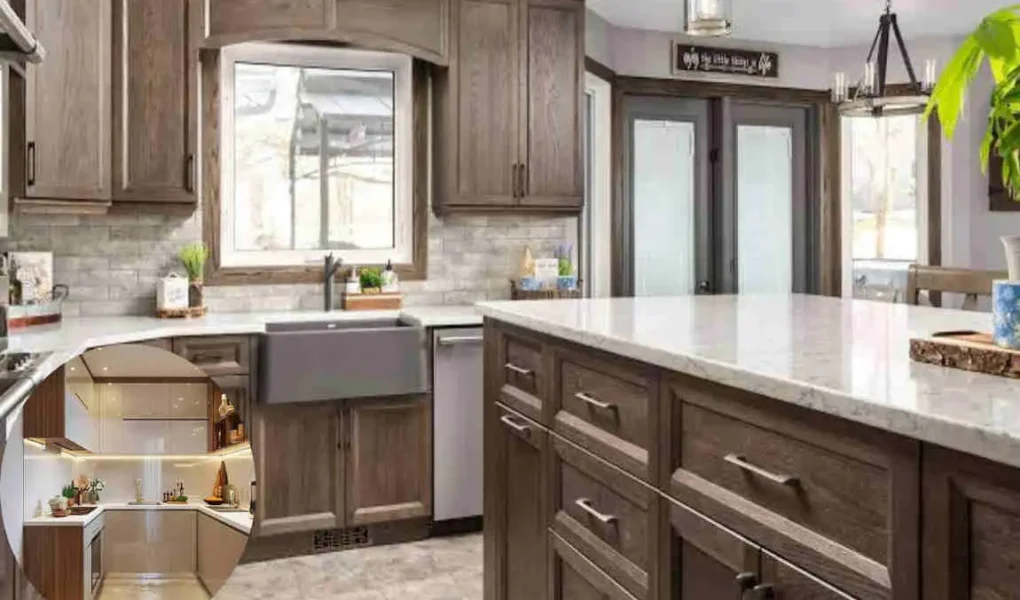
Traditional Kitchen Cabinets
Traditional kitchen cabinets offer a classic and timeless look. They often include detailed designs, warm colors, and natural materials.
Common Features:
- Raised panel doors
- Decorative molding
- Detailed hardware
- Rich wood finishes
Popular materials include:
- Oak cabinets
- Cherry wood cabinets
- Painted wooden cabinets
Best color choices:
- Cream
- Beige
- Warm brown
- Soft white
Traditional cabinets are ideal for homeowners who want a comfortable and elegant kitchen that will remain attractive for many years.
Farmhouse Kitchen Cabinets
Farmhouse kitchens are known for their cozy and welcoming appearance. This style combines simple designs with natural materials and rustic details.
Recommended Farmhouse Cabinet Ideas:
- White shaker cabinets
- Distressed wood finishes
- Open shelving combinations
- Vintage-style hardware
Farmhouse cabinets look beautiful when paired with:
- Butcher block countertops
- Farmhouse sinks
- Wooden floors
- Antique decorations
This style creates a warm kitchen atmosphere that feels comfortable and inviting.
Contemporary Kitchen Cabinets
Contemporary kitchen cabinets combine modern designs with comfortable and practical features.
These cabinets often include:
- Simple shapes
- Mixed materials
- Unique finishes
- Minimal decorations
Popular ideas include:
- Two-tone cabinets
- Wood and metal combinations
- Minimalist handles
- Textured surfaces
Contemporary cabinets are great for homeowners who want a stylish kitchen without making the space feel too cold.
Rustic Kitchen Cabinets
Rustic kitchen cabinets bring natural beauty into the home. They highlight the texture and character of wood materials.
Main Features:
- Natural wood grains
- Handmade appearance
- Earthy colors
- Traditional craftsmanship
Best materials include:
- Reclaimed wood
- Pine
- Hickory
Rustic cabinets work well in countryside homes, cabins, and for homeowners who enjoy a natural design style.
Scandinavian Kitchen Cabinets
Scandinavian design focuses on simplicity, brightness, and functionality. These cabinets create a clean and peaceful kitchen environment.
Scandinavian Cabinet Features:
- Light colors
- Simple shapes
- Minimal hardware
- Functional storage
Recommended options:
- Light wood cabinets
- White finishes
- Smooth surfaces
This style works especially well in small kitchens because bright colors can make the space appear larger.
Popular Kitchen Cabinet Materials
The material you choose affects cabinet durability, appearance, and maintenance needs.
Cabinet Material Benefits Best For
Solid Wood Durable and timeless Traditional kitchens
MDF Smooth finish and affordable Painted cabinets
Plywood Strong and moisture-resistant High-quality kitchens
Laminate Budget-friendly and easy maintenance Modern kitchens
Thermofoil Easy cleaning and affordable Small kitchens
Best Kitchen Cabinet Colors and Finishes
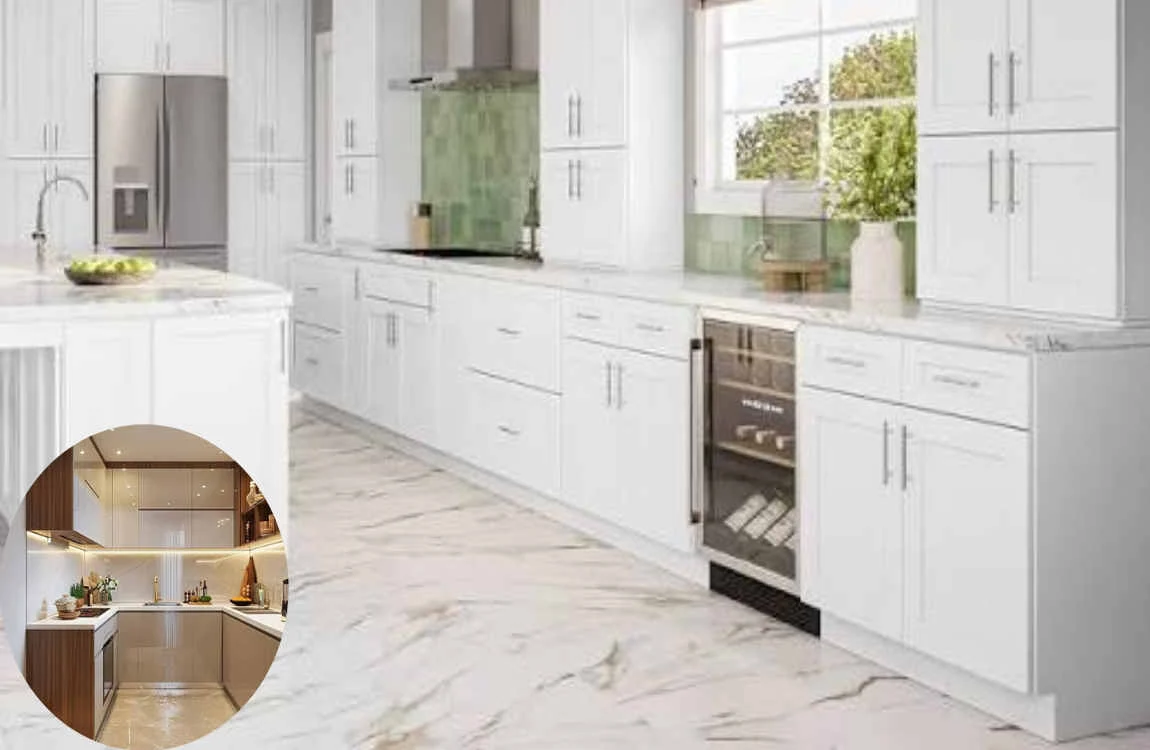
White Kitchen Cabinets
White cabinets remain one of the most popular choices because they create a clean and spacious feeling.
Benefits include:
- Makes kitchens look larger
- Matches many design styles
- Creates a bright appearance
- Works with different countertops
White cabinets are suitable for modern, farmhouse, and traditional kitchens.
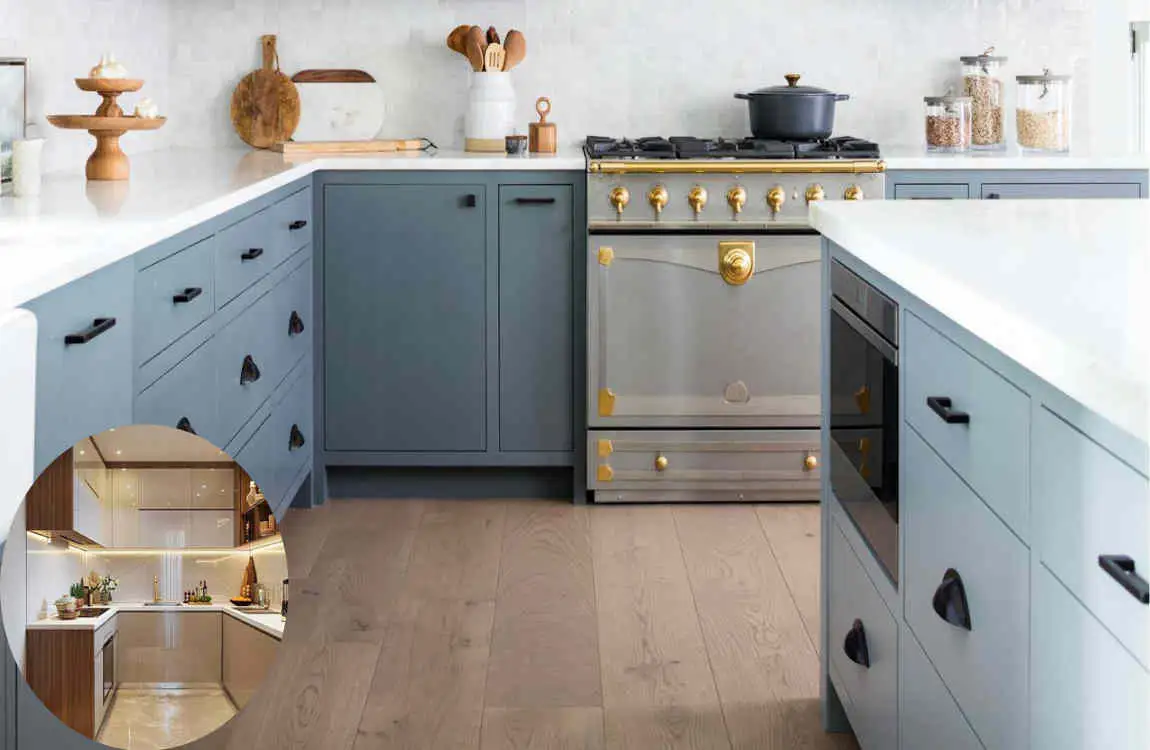
Gray Kitchen Cabinets
Gray is a popular neutral color that provides a modern and elegant look.
Gray cabinets pair well with:
- Marble countertops
- Wooden floors
- Stainless steel appliances
- Metal fixtures
They offer a balanced design that feels stylish without being too bold.
Black Kitchen Cabinets
Black cabinets create a dramatic and luxurious kitchen appearance.
They work best in:
- Large kitchens
- Modern homes
- High-contrast designs
Black cabinets can be combined with lighter countertops and flooring to create an attractive balance.
Natural Wood Finishes
Natural wood cabinets add warmth and timeless beauty to any kitchen.
Popular wood choices include:
- Walnut
- Oak
- Maple
Wood finishes work well in traditional, rustic, and contemporary homes.
Types of Kitchen Cabinets to Consider
Stock Kitchen Cabinets
Stock cabinets are ready-made options available in standard sizes.
Advantages:
- Affordable pricing
- Quick installation
- Easy availability
They are a good choice for homeowners working with a limited budget.
Semi-Custom Kitchen Cabinets
Semi-custom cabinets provide more flexibility than stock options.
Benefits include:
- More size choices
- Better design options
- Improved storage solutions
They offer a balance between affordability and customization.
Custom Kitchen Cabinets
Custom kitchen cabinets are designed specifically for your kitchen space.
They are ideal for:
- Unique layouts
- Luxury homes
- Maximum storage needs
Although they cost more, custom cabinets provide complete control over design, materials, and features.
How to Choose the Best Kitchen Cabinets for Your Home
Consider Your Kitchen Layout
Your kitchen size and layout should guide your cabinet choices.
For small kitchens:
- Choose light colors
- Use space-saving storage
- Consider vertical cabinets
For large kitchens:
- Add larger cabinets
- Include kitchen islands
- Use decorative storage features
Choose Durable Materials
Kitchen cabinets experience daily use, moisture, and temperature changes. Selecting strong materials helps your cabinets last longer.
Consider:
- Moisture resistance
- Cleaning requirements
- Material strength
- Long-term maintenance
Match Cabinets With Your Home Style
Your cabinets should complement other kitchen elements, including:
- Flooring
- Walls
- Countertops
- Lighting
- Appliances
A balanced design creates a more attractive and comfortable kitchen.
Set a Realistic Budget
Before buying cabinets, plan your budget carefully.
Consider costs for:
- Cabinet materials
- Installation
- Hardware upgrades
- Additional storage features
A clear budget helps you choose cabinets that provide the best value.
Kitchen Cabinet Design Trends
Two-Tone Kitchen Cabinets
Two-tone cabinets are becoming increasingly popular. This design combines different colors to create visual interest.
Common combinations include:
- White upper cabinets with dark lower cabinets
- Wood cabinets with painted cabinets
This style creates a modern and personalized appearance.
Smart Storage Features
Modern homeowners want kitchens that are beautiful and practical.
Popular storage features include:
- Pull-out shelves
- Hidden drawers
- Built-in organizers
- Corner storage solutions
These features improve convenience and maximize space.
Sustainable Cabinet Choices
Many homeowners are choosing eco-friendly cabinet options.
Sustainable choices include:
- Recycled wood
- Responsible materials
- Low-VOC finishes
These options help create healthier indoor spaces.
Common Mistakes to Avoid When Buying Kitchen Cabinets
Avoid these common mistakes:
- Choosing style over functionality
- Ignoring cabinet quality
- Not measuring kitchen space correctly
- Selecting poor-quality hardware
- Forgetting future storage needs
Always focus on both appearance and practical use.
Kitchen Cabinets Maintenance Tips
Regular Cleaning
Clean your cabinets regularly to maintain their appearance.
Tips:
- Use gentle cleaners
- Avoid harsh chemicals
- Wipe dust frequently
Protect Cabinet Surfaces
Protect your cabinets by:
- Cleaning spills quickly
- Avoiding excessive moisture
- Using proper cleaning products
Check Hardware Regularly
Small repairs can prevent bigger problems.
Remember to:
- Tighten loose handles
- Check hinges
- Repair damaged parts
Frequently Asked Questions About Kitchen Cabinets
What are the best kitchen cabinets for a modern home?
Modern homes usually look best with flat-panel kitchen cabinets, neutral colors, handleless designs, and smooth finishes.
What is the most durable material for kitchen cabinets?
Solid wood and plywood are considered some of the most durable kitchen cabinet materials because they provide strength and long-lasting performance.
Are custom kitchen cabinets worth the cost?
Yes, custom kitchen cabinets can be worth the investment if you need unique designs, better storage solutions, or a perfect fit for your kitchen layout.
What color kitchen cabinets are most popular?
White, gray, natural wood, and two-tone cabinet designs are among the most popular choices because they match many home styles.
How long do kitchen cabinets usually last?
High-quality kitchen cabinets can last 15–30 years or longer with proper care and maintenance.
| Home Style | Best Kitchen Cabinet Choice | Key Features |
|---|---|---|
| Modern Home | Flat-panel cabinets | Clean lines, smooth finishes, minimalist look, often paired with neutral colors |
| Traditional Home | Raised-panel cabinets | Classic designs, detailed molding, warm wood finishes, timeless appeal |
| Farmhouse Style | Shaker cabinets | Simple design, durable construction, white or natural wood finishes |
| Contemporary Home | Handleless cabinets | Sleek appearance, glossy finishes, smart storage solutions |
| Industrial Style | Metal or dark wood cabinets | Bold look, strong materials, pairs well with exposed brick and steel |
| Scandinavian Style | Light wood cabinets | Bright, simple, functional design with a natural feel |
| Cottage Kitchen | Beadboard or painted cabinets | Cozy appearance, soft colors, charming details |
| Luxury Kitchen | Custom wood cabinets | High-quality materials, personalized designs, premium finishes |
| Small Kitchen | Space-saving cabinets | Tall cabinets, pull-out storage, and smart organizers maximize space |
| Transitional Home | Shaker or simple panel cabinets | Mixes modern and traditional styles for a balanced look |